


How To Add Music To Google Slides Easily [2025]
Using Microsoft’s PowerPoint application is surely the most common thing. But if you are into Google Slides, have you ever wondered how to level up your presentation? Ever thought of how to add music to Google Slides ?
Integrating your favorite songs, specifically those from your Spotify application, into your Google Slide presentation would keep all your audience’s eyes on you. But the difficulty is that you cannot easily add music to Google slides, unlike PowerPoint presentations. So how to add music to a Google Slide?
If you are looking into the idea of using Google Slides, then you should know the steps on how you can successfully add songs to it. Songs will add up some spice, you will probably agree, right? Here, we will teach you two easy ways to add music to Google Slides. But before heading on to it, we will first give you some basic idea about what Google Slides is and what features you can enjoy from using it.
Contents Guide Part 1: What Is Google Slides And Its Features?Part 2: Benefits of Putting Music on Google SlidesPart 3: How to Put Music on Google Slides?Part 4: FAQs About Putting Music on Google SlidesPart 5: To Wrap It All
Part 1: What Is Google Slides And Its Features?
What Is Google Slides?
Google Slides was formerly known as Google Presentations. It was introduced in March of the year 2006. This is a free web application that is being utilized by a lot of people worldwide. This also does not differ that much from the Microsoft PowerPoint application. Google Slides also supports several file formats such as .ppt, .pptx, .pot, .ppsx, and more.
What Are the Features Of Google Slides?
- In using Google Slides, one can be assured that presentations are automatically backed up and saved in one’s cloud storage. This only means that even if the hard drive or the device you are using suddenly fails or faces an issue, you will not be worrying that much because all data can still be retrieved from your cloud storage.
- You can have images, media, other texts, and even animations inserted into your Google Slides presentation.
- Customization is also possible since you have the chance to edit and input transitions and animations depending on your preference.
- Some templates are readily available which you can also make use of.
- There is a feature of collaborative editing that enables one to easily share files with other devices and users.
Now that we learned much about Google Slides, we will begin with our discussion to find out the benefits of adding music to Google Slides presentations.
Part 2: Benefits of Putting Music on Google Slides
Adding music to your Google Slides presentation can enhance your overall presentation and engage your audience in a more immersive and emotional way. Here are some of the benefits of putting music on Google Slides:
- Emotional impact: Music has the power to evoke emotions and set the tone for your presentation. Whether you want to create a calm and soothing atmosphere or energize your audience, music can help you achieve that.
- Enhance storytelling: Music can complement your narrative and help you tell a more compelling story. It can emphasize key points, transitions, or the overall message of your presentation.
- Maintain audience engagement: Music can help maintain your audience's attention throughout the presentation. It can be particularly useful in longer presentations to break up the monotony and re-engage your audience.
- Create a professional atmosphere: Well-chosen music can make your presentation feel more professional and polished. It can give the impression that you've put thought and effort into your delivery.
- Set a theme or mood: Music can help establish a theme or mood for your presentation. For example, if you're presenting about a specific culture, you can use music from that culture to create a more immersive experience.
- Improve retention: Music can aid in information retention. When paired with specific content, it can help the audience remember key points or ideas more effectively.
- Smooth transitions: Music can be used to bridge the gap between different sections or topics within your presentation. It can provide a seamless transition and maintain the flow of your talk.
- Creativity and personalization: Adding music allows you to express your creativity and personalize your presentation. You can choose music that resonates with your topic and your audience.
- Entertainment value: Music can make your presentation more entertaining and enjoyable for your audience, increasing their overall satisfaction with the experience.
- Accessibility: Keep in mind that some people may not be able to hear the music due to hearing impairments or may find it distracting. Make sure to provide subtitles or alternative ways to convey the same information to ensure inclusivity.
When adding music to your Google Slides, be mindful of copyright and licensing issues. Ensure that you have the appropriate rights to use the music in your presentation, and give credit to the artists or sources as necessary. Additionally, consider the volume and timing of the music to avoid overwhelming or distracting your audience. It should enhance, not overshadow, your message.
Part 3: How to Put Music on Google Slides?
In this portion, we are to highlight two easy ways on how you can finally add your most loved Spotify songs to your Google Slides presentation.
1. Add Music to Google Slides by Pasting the Song’s Link
The first way to add music to Google Slides presentations is to use the link to the Spotify songs. Here are the steps that need to be accomplished.
- Make sure to open your Google Slides presentation.
- Head to your desktop Spotify application.
- Paste the link to the chosen Spotify song.
To know more about each step, make sure to keep on reading the proceeding texts.
Step 1: Make Sure to Open Your Google Slides Presentation
Of course, the initial thing you need to do is to make sure that your Google Slides presentation has been opened on your personal computer. You must go to a certain slide or page wherein you want the Spotify song to be played and pasted.
Once you have chosen, what you need to do next is to hover your mouse over the toolbar section and look for the “Text” button. Now, you can just click anywhere on the slide to be able to create a text box that you will be using later on.
Step 2: Head to Your Desktop Spotify Application
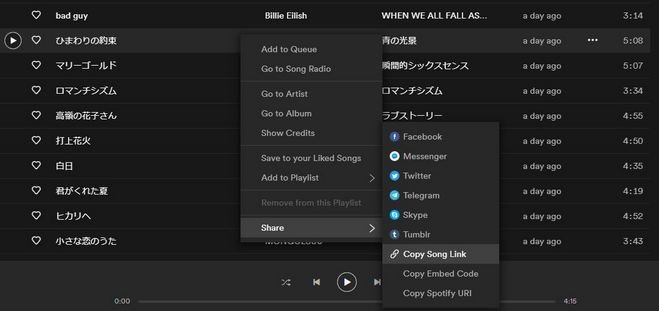
Once you have completed the first step, you must now go to your desktop Spotify application. Open it and head to your music library. Look for the song you want to be used on your Google Slides presentation. Once selected, right-click, and from the options on the screen, choose “Share”. New options will be presented. One of which is “Copy Song Link”. Hit this button to finally copy the link to the Spotify song selected.
Step 3: Paste the Link Of The Chosen Spotify Song
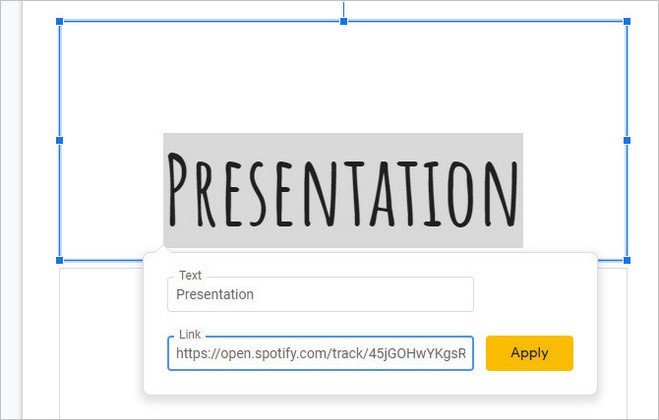
After successfully copying the link of the Spotify song you wanted to use, you can just return to your Google Slides presentation and paste the copied link to the text box you initially created in the first step.
Once done, just make sure to hit the “Apply” button to save the link to the Spotify song. Now, you can just freely tick the “Present” button to check whether the song has been completely and successfully integrated into the presentation.
2. Add Music to Google Slides By Using Google Drive
The next option for you to finally add music to Google Slides presentation is through the use of your Google Drive. But how are you going to do that? The answer is through the use of an amazing third-party software application, the DumpMedia Spotify Music Converter.
What Is This DumpMedia Spotify Music Converter?
DumpMedia Spotify Music Converter is a software application that is trusted by a lot of users in terms of audio conversion. Apart from having your Spotify songs transformed into several other formats such as MP3, WAV, WMA, FLAC, AAC, and more, you can also have your Spotify songs downloaded easily to your device making it shareable and playable to any gadgets or media players.
Well, the reason is that Spotify songs are DRM (Digital Rights Management) protected which makes it hard for users to play it in unauthorized devices like Apple Music. Through DumpMedia Spotify Music Converter, the removal of DRM protection is so much easier. After that, you can move the playlist from Spotify to Apple Music and play it on Apple Music.
How Will You Be Able to Use This DumpMedia Spotify Music Converter?
Here is the detailed step-by-step guide to follow.
- Download and install DumpMedia Spotify Music Converter.
- Choose any you desire as the resulting one.
- Proceed with conversion by ticking the Convert button.
Let us look into these steps further. Click the below button to download and have a try!
Step 1: Download and Install DumpMedia Spotify Music Converter
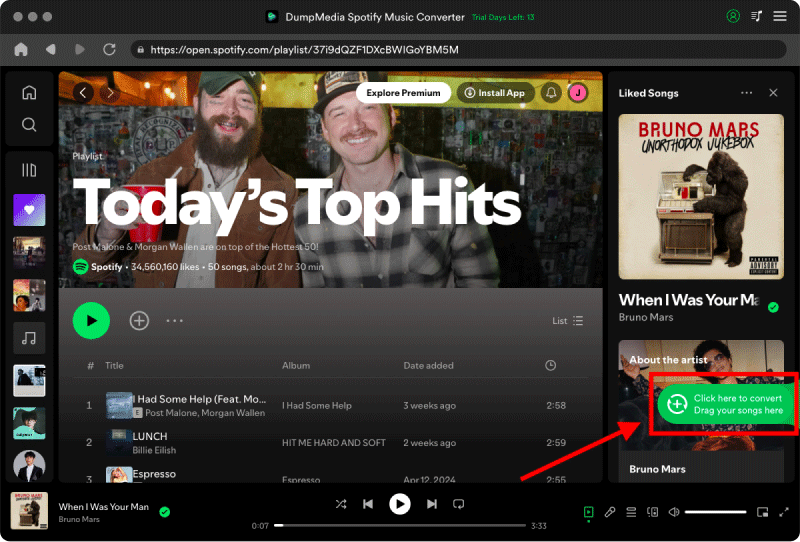
Of course, the first thing you need to do is to have this DumpMedia Spotify Music Converter downloaded and installed on your personal computer. Once done, just open and launch the program to start as well as your Spotify application.
You can begin adding the files by dragging and dropping or even adding just the file’s URL (link). This program supports batch conversion which makes it possible to convert not only a file but a number. Converting a lot at a time is not an issue.
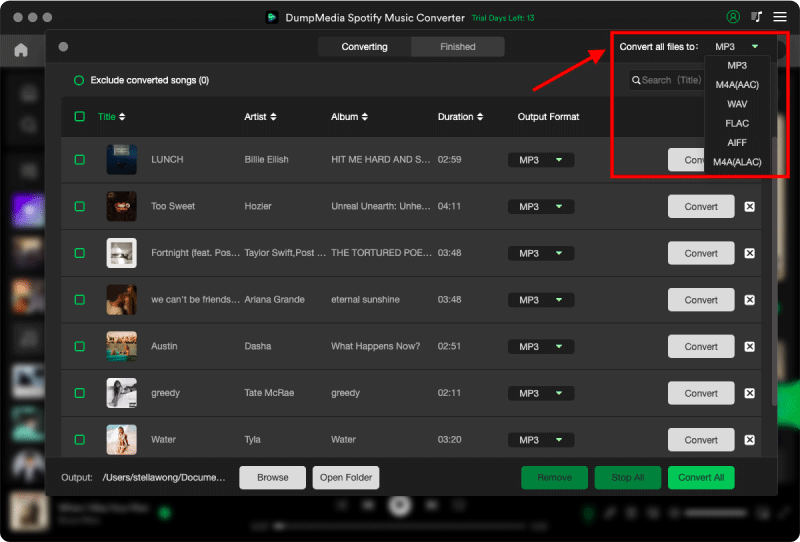
Step 2: Choose Any Format You Desire As The Resulting One
Upon importing and uploading the songs to be converted, the next step would be the selection of the output format. Make sure that you choose any format you desire among those that you will be seeing on the screen. In this case, we ought to convert the songs to a format that has been generally supported by numerous media players.
You can have the songs converted to MP3 format or any other you prefer. You can do this by heading to the “Convert All Tasks To” button located at the top right corner of the screen.
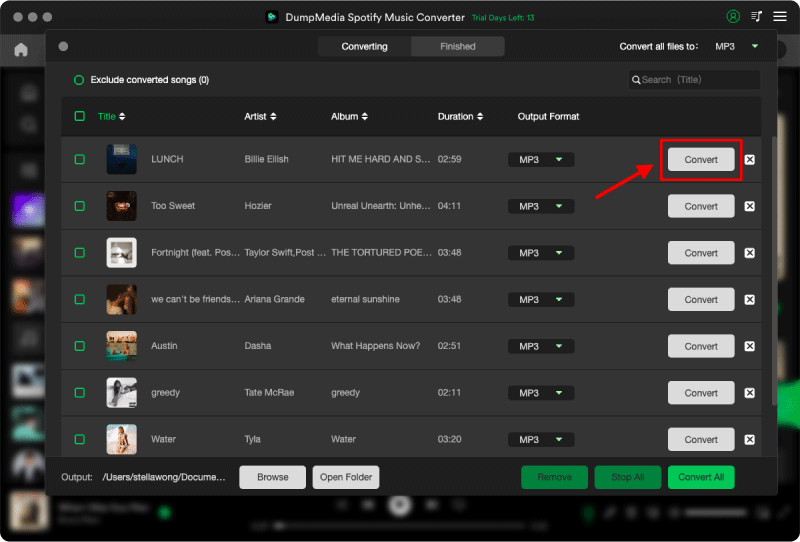
Step 3: Proceed With Conversion By Ticking The Convert Button
The last step would be hitting the “Convert” button to begin the conversion process. This will only take some time since the program is designed to function five times faster than any other converters. While conversion is being done, status bars will be shown on the screen wherein you can monitor the progress of the process for each song.
After performing these three simple steps, all those Spotify songs you want to be converted will be transformed into any format supported by the Google Slides application. Once you are done with the conversion, you just need to upload the songs to your Google Drive.
Once uploaded in Google Drive, then you can just head back to your Google Slides presentation, and hit the “Insert” button followed by “Audio”. From the window, you will be seeing, choose those converted songs you uploaded to your drive. Once chosen, just hit the “Select” button and the song will finally be added to the presentation.
Part 4: FAQs About Putting Music on Google Slides
Q1. What audio file formats are supported in Google Slides?
Google Slides supports both WAV and MP3 file formats. If you encounter difficulties adding audio to your Google Slides presentation, make sure the file is in an appropriate audio format and that you have given sharing permissions to viewers with the link before attempting again.
Q2. How do you play music on all slides?
In the file explorer, browse to the music file you want to use, and then select Insert. With the audio icon selected on the slide, on the Playback tab, select Play in Background. Play in Background makes the audio file start automatically during a slide show and also makes the audio play across multiple slides.
Q3. Can you play videos in slides?
Google Slides now automatically plays videos like other animation or slide transitions. To start a video and advance the slide, choose an option: Press any key. Click the mouse.
Part 5: To Wrap It All
In this article, we have presented two easy ways to add music to Google Slides presentations. You have the option to use the Spotify song’s link or proceed with the conversion. Choosing any of the two will be helpful to you.
With DumpMedia, you can play Spotify Music on multiple devices because of the DRM removal. Now not only you can add music to a Google Slide, but also you can put it on your USB drive when you want to listen to your favorite Spotify music in your car.
Are you also on the lookout for such? Which of the two options will you use?

30% Off >>>