


How to Put Music on USB Drive for Car from Spotify?
Whether you're headed on the next great cross-country road trip or just need some tunes to crank on your way to school, your favorite songs are sure to get you into the mood to cruise down the highway. No matter who your favorite artist is or what music taste you like, there's something on Spotify. So, make sure your gas tank is full and that you have an ultimate playlist filled with loved songs ready because we've got you covered with the best way on how to put music on USB drive for car. Follow our guide to play music offline, you can access your favorite tunes while on the road without worrying network issue.
Contents Guide Part 1: Can I Put Spotify Music on USB Drive for Car?Part 2: How to Put Spotify Music on USB Drive for Car?Part 3: FAQPart 4: To Sum It All
Part 1: Can I Put Spotify Music on USB Drive for Car?
If you have a Spotify Premium subscription, you can download playlists, albums, and podcasts freely and play them in the Offline Mode. So how to put music on USB drive for car? Is it possible to copy downloaded music files to a USB drive?
Sadly, all downloaded songs can only be accessed through the Spotify app. You also need to connect the Spotify app to the internet at least once every 30 days to keep Spotify downloads. If you ever cancel your Spotify Premium subscription, you'll eventually lose access to your downloads due to DRM encryption. For the same reason, even though you know where are Spotify offline files stored on your device, you can't transfer them or copy them to other Spotify non-supported players and devices.
DRM can be seen as a barrier to enjoying music freely because it limits how downloaded files can be used, ensuring they can only be accessed under certain conditions. So if you want to play Spotify songs on more players or put them on a USB drive, you need to convert them to a plain and flexible format like MP3. How to put music on USB drive for car playing? Let's dive into the following part and discover how to do that effortlessly while expanding the possibilities of your digital music experience.
Part 2: How to Put Spotify Music on USB Drive for Car?
How to put music on USB drive for car? As the DRM-protected music that you download from Spotify can not be transferred directly, you must first download it to open-source audio files, such as MP3s, for further doing. In this case, DumpMedia Spotify Music Converter will be the best helper.
DumpMedia Spotify Music Converter is gaining popularity among Spotify listeners for its wonderful music download service. No matter if you’re a user of Spotify Free or Spotify Premium, you can download and convert Spotify songs, playlists, and albums to MP3, AAC, ALAC, FLAC, or other formats using DumpMedia. Meanwhile, DumpMedia can remove DRM protection from Spotify so that you can enjoy unlimited downloads and transfer them to any device. Better yet, the downloads will always be available even if your subscription expires.
After conversion, the converted music files can be preserved in original audio quality as 320 Kbps audio. With numerous advantages, DumpMedia Spotify Music Converter stands out as the best Spotify downloader for Mac and Windows to download music. How to put music on USB drive for car? Don't worry, we'll show you how to operate it clearly step by step.
Step 1: Launch your newly installed DumpMedia Spotify Music Converter. Wait until your Spotify tracks are loaded and then choose the Spotify songs that you like to play while driving.
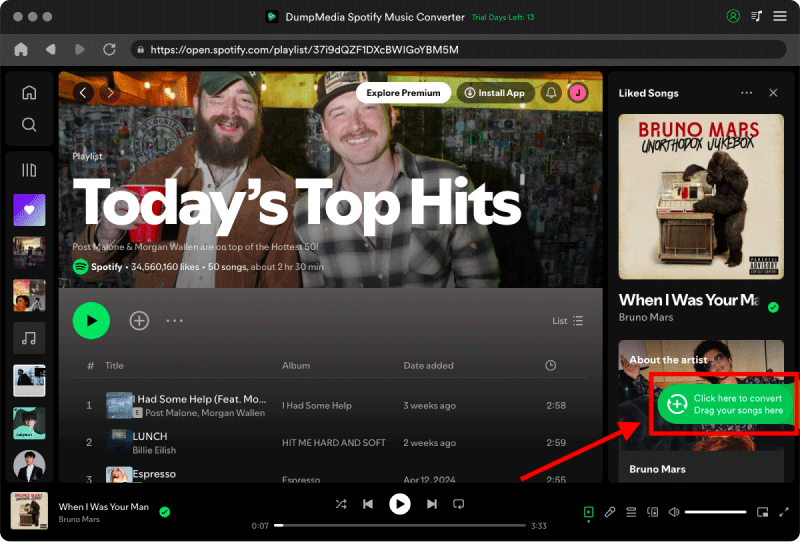
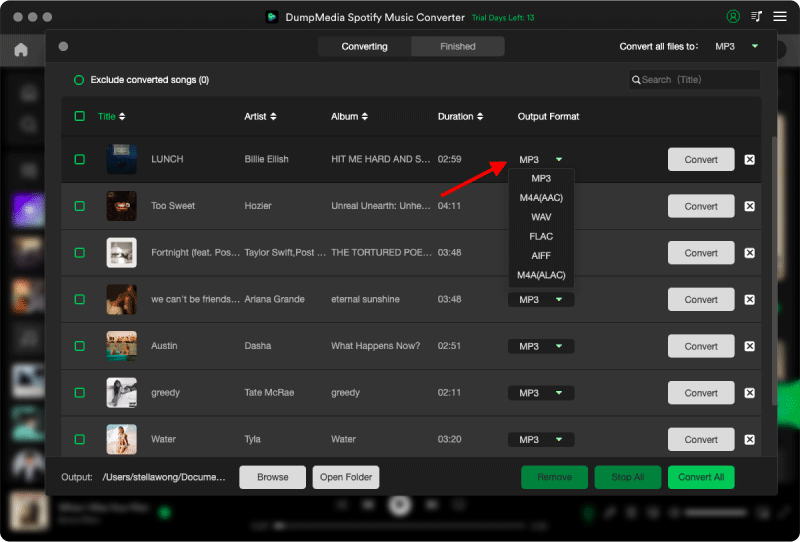
Step 2: Once you are satisfied with the songs that you have selected, you can now set the output to the type which it’s compatible with USB like MP3. You can choose which folder you can view your converted tracks.
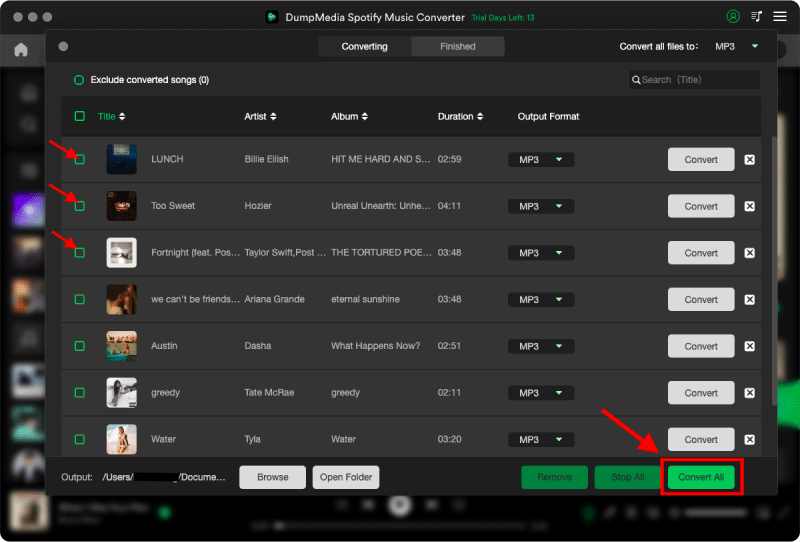
Step 3: After you have finalized everything, you can now begin converting your selected tracks by clicking the "Convert" button. Once the conversion process is complete, you can finally view your chosen track in the folder that you set earlier.
How to put music on USB drive for car? Now that you have the converted songs saved on your personal computer, the next thing you should do is copy them to USB flash driver. Here's how:
Step 1: Connect your USB drive to your Windows or Mac.
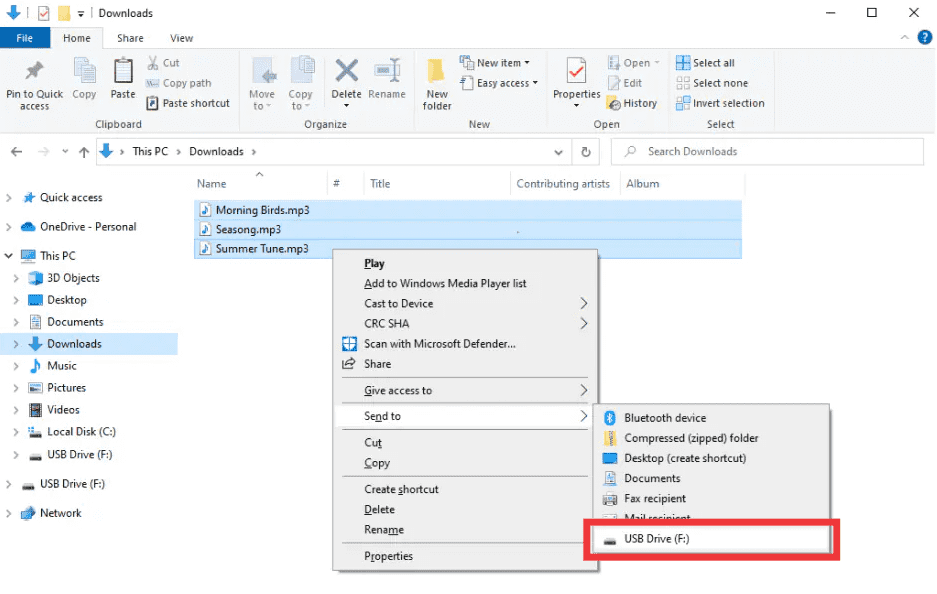
Step 2: Copy downloaded Spotify music files to the USB:
- On Windows: Navigate to the music files you want to copy. Right-click the file and then navigate to Send To and choose your USB drive. Wait for the files to transfer. Once done, eject the USB from your computer.
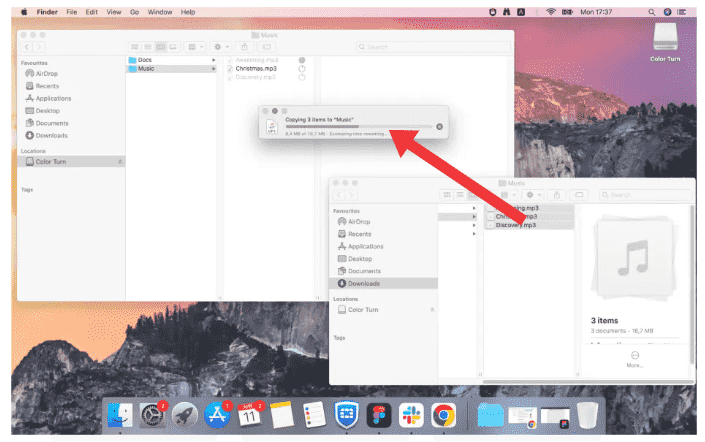
- On Mac: Find the music files you want to transfer onto the flash drive. Transfer the files over to the USB drive, which can be done by either copying and pasting the files or dragging them between finder windows.
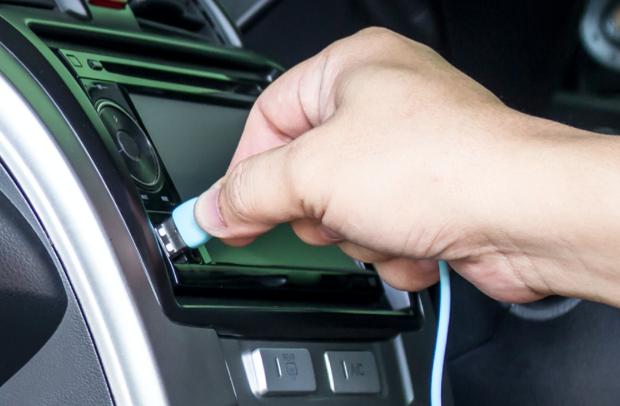
Step 3: Plug the USB drive into the car USB port, then you're ready to play Spotify offline.
Part 3: FAQ
1. Why can’t I put Spotify music on a USB drive for my car?
Because Spotify songs are encrypted OGG files. Even if you have Premium, the downloaded files are not real MP3s and cannot be copied or played on a car stereo. To make Spotify songs compatible with USB car playback, you must convert them to MP3 using a tool like DumpMedia Spotify Music Converter.
2. What is the best format for car USB music?
The most compatible formats for car stereos are:
- MP3 (recommended)
- WMA
- WAV
- AAC (some cars)
- FLAC (newer cars only)
3. What USB format should I use for car audio?
Most car stereos require the USB to be formatted as:
- FAT32 (best compatibility)
- exFAT (for newer cars)
NTFS is usually not supported by vehicles.
4. Can I play Spotify music in my car without a phone?
Yes, but only if you convert Spotify songs into MP3 first and save them onto a USB drive. Cars do not support Spotify's encrypted audio files. Use DumpMedia Spotify Music Converter to download and convert Spotify tracks into car-friendly MP3 files.
5. How many songs can I fit on a 32GB USB for my car?
A typical 4-minute MP3 (320kbps) is around 8–10 MB. A 32GB USB can store 3,000–4,000 songs.
Part 4: To Sum It All
Generally speaking, it is simple to put music on a flash drive, but you need to make sure that the music files you have downloaded from Spotify are DRM-free. Follow your guide to ensure that you know the steps to get DRM-free music via DumpMedia Spotify Music Converter and how to put music on USB drive for car. Simply hit the download button to get the DumpMedia tool and remove DRM from Spotify!

30% Off >>>