


How to Back Up Your iTunes to an External Hard Drive in 2025
Having a backup for all files you have is a must whether we are talking about documents, video files, music files, and more. For music people, getting a hold of their favorite songs on their devices such as mobile phones, tablets, or personal computers surely matters.
When your internet connection suddenly went out or you encountered a power interruption and you wanted to listen to your favorites, you won’t be able to do that. There are many problems with apple music. This is why you need to learn how to back up iTunes music. If you are using the iTunes application and you love listening to all albums curated under this, then surely, you will be benefited from this post.
There are a lot of options relating to how to back up iTunes music. It is important to be informed about these ways and do the regular backup process so that you would not worry about your music files getting lost or inaccessible every time you wanted to listen to iTunes songs you love.
You can also get Apple TV music at the same time. Here, you will be learning easy and effective ways to back up iTunes music fast and properly.
Contents Guide Part 1: How Do I Backup My Music On iTunes?Part 2: How To Backup iTunes Music Using Time MachinePart 3: To Summarize Everything
Part 1: How Do I Backup My Music On iTunes?
The best way of backing up your music on iTunes is to use a professional software application
that is capable of downloading the iTunes songs to your personal computer for keeping in your library, on external storage devices, or even online cloud storage platforms like Google Drive or Dropbox. When you go over the web, you will be seeing a lot of software applications that have the ability to support the process of how to back up iTunes music.
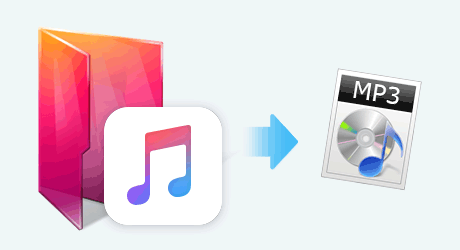
And, among the many available, the best is this DumpMedia Apple Music Converter. Apart from its downloading capability, this also has a lot of features every user can enjoy. Added to that, the interface is too easy to use and the installation requirements are too light to meet. Here, we will be teaching you how to backup iTunes music using this tool by referencing the guide that would be given below:
- Select iTunes music to be downloaded.
- Choose an output format from the available options.
- Hit the “Convert” button to finally get a backup file.
If these three steps mentioned above are too vague, you can refer to the below-detailed description for each.
Tip before using the software :
You need to make sure that your Apple Music/iTunes application is closed before opening this DumpMedia Apple Music Converter. Keep in mind that during the song conversion, please do not do any operation on your Apple Music/iTunes to avoid any interruption along the process.
Step #1. Select iTunes Music To Be Downloaded
Again, before you begin with the process, take note of the tip initially mentioned. Now, the first thing you need to accomplish is to select the iTunes music or songs that you wanted to download.
Since this tool can process a lot of files one-time, there is no need to reprocess or redo the steps from time to time. You can just add the files to convert and download and the conversion will be done once. You can import the songs by dragging and dropping.

Step #2. Choose An Output Format From The Available Options
Once all iTunes songs have been added to the platform, you can select the output format from the available formats in the application. You can use the down arrow under the “Output Format” option to select. Moreover, you can also do some changes in the output settings and change them the way you wanted them to be. Make sure to add an output path wherein the new file/s will be saved after the conversion process.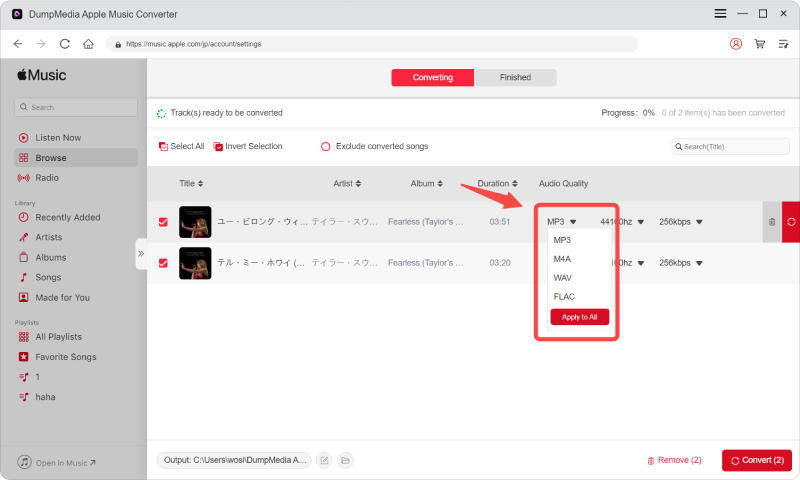
Step #3. Hit The “Convert” Button To Finally Get A Backup File
Finally, the last thing would be clicking the “Convert” button to start the whole conversion process. After a few minutes, the converted files will be downloaded and saved in your computer’s library.
Alas! Your iTunes music is now kept on your computer and you can listen to it anytime you want to even if you do not have an iTunes subscription or a data connection with you. You can also have those transferred to external storage devices such as USB drives and more for sharing with friends and for streaming in other stereos such as that of your car.
This is the first way how to back up iTunes music. You also got the next option which would be discussed below.
Part 2: How To Backup iTunes Music Using Time Machine
Time Machine is one of Apple’s services that support the backing up of files. If you have this enabled, those songs you have in your iTunes library should be covered and backed up as well. In case you need to do the restoring process in the future, you can just look at Time Machine’s history to retrieve those files. You can use the guide below on how to back up iTunes music for saving on your personal computer and other devices.
Manual Backing Up Process For Your iTunes Library
The manual backing-up process will be under two main clauses:
- Consolidate your iTunes Library.
- Perform the copying of your iTunes library to a backup source.
We will be discussing these two divisions below at the beginning of the consolidation of your iTunes library’s files.
Step #1. Consolidate Your iTunes Library
To consolidate your iTunes library, you need to follow the below steps.
- Ensure that you keep a local copy of your iTunes music by downloading it.
- Launch the iTunes application on your personal computer.
- In the main interface, you will be seeing the “File” button at the leftmost portion. Click this button to proceed.
- New options will be seen on the screen. From those, make sure to hover your mouse over the “Library” button and hit it.
- From the secondary menu that the screen will show, select the “Organize Library” button.
- Upon completion, a new window will be seen. Put a checkmark in the “Consolidate Files” option.
- Finally, hit the “OK” button to complete.
By doing the above steps, you can have copies of your favorite iTunes files leaving all those original items.
Step #2. Perform The Copying Of Your iTunes Library To A Backup Source
After doing the manual consolidation of your iTunes files, you now need to perform the copying of your iTunes library to a backup source. To complete this, below must be followed.
- In case you wanted to back up the iTunes files to an external hard drive you need to have this connected to your personal computer using a USB cable.
- If you are using a Mac computer, look for the “Finder” icon and select your hard drive.
- In the options displayed in the left panel, choose the “Music” button.
- Now, there are a lot of folders that would be shown. Make sure to select the “Music folder” or “iTunes” and do the dragging of the folder to the external hard drive that you can see on your desktop. You can also copy the folder to an online backup service that you are using.
- If a message is prompted on the screen asking you to do the authentication process, you need to hit the “Authenticate” button to continue. This will allow you to make a copy of the iTunes folder.
- You will be asked about the “Administrator password”. So, you just need to enter the details needed and finally hit the “OK” button to complete.
Now, the whole process of backing up or copying will then begin. If you are wondering how long the process will last, this will depend on the size of the music or iTunes library. Of course, the bigger the size is, the longer you need to wait to have the whole process completed. You can do other things you need to do while waiting until the backing up is completed.
This is another option that you can use on how to back up iTunes music.
Part 3: To Summarize Everything
We do hope that backing up your iTunes music is no longer an issue or a dilemma for you now. You have the choice to either do the downloading using reliable and trusted software applications like DumpMedia Apple Music Converter or utilize Apple’s Time Machine.
We are suggesting keeping the first option as a better choice as you can also enjoy lots of amazing and added features apart from the main downloading and conversion functions the tool has.
Apart from what you have learned in this blog post, do you know any other methods of backing up your iTunes files in mind? We would love to know your thoughts so please try to leave some ideas in the comment section.

30% Off >>>