


Simplest Ways to Transfer MP3 to iPhone
In the present era, there are actually a lot of brands of mobile devices developed and introduced. There are Samsung, Huawei, Sony, OPPO, and of course Apple. Among all, Apple mobile phones or iPhones seemed to be the most popular and most loved by users. Because of its amazing and unique features, many are actually enjoying iPhones and other Apple gadgets.
However, some of the users who really love music often face issues in how to play and transfer MP3 to iPhone. Fortunately, this article will highlight the easiest and simplest ways to do that!
Listening to music is one of the most enjoyed entertainment and past time of many. And, listening to your favorite songs using your iPhone would always be a great idea. Right?
What if hundreds or thousands of your songs (which usually are in MP3 format) are stored on your personal computer? What if you have the songs on your other android or apple device?
Well, this post will surely make your way out of the mentioned dilemma. Let us begin with the first solution.
Contents GuidePart 1: How do I Transfer MP3 to iPhone With iTunes?Part 2: How do I Transfer MP3 Files to My iPhone Without iTunes?Part 3: Bonus – How to Convert DRM Protected Apple Music to MP3 Format?Part 4: In Conclusion
Part 1: How do I Transfer MP3 to iPhone With iTunes?
iTunes has been one of the best applications developed not only for Apple devices but as well as for Windows personal computers. And, this has promoted a lot of help and assistance to several users due to its awesome and flexible features.
Of course, using this application can solve one of the difficulties to transfer MP3 to iPhone.
Here is the simplest way to use iTunes in transferring your MP3 files to the iPhone.
- Download and install iTunes on your personal computer.
- Ensure that the iPhone is connected to your personal computer.
- Import your MP3 files to iTunes.
- Begin syncing music to your iPhone.
Let us dig in the steps further.
Step 1: Download and Install iTunes on Your Personal Computer
Of course, the first step needed is to ensure that the iTunes application has been downloaded and installed properly on your personal computer.
This application is readily available in the store and can be downloaded for free as long as you got a stable internet connection and enough storage space. The best is to use the latest version.
![]()
Step 2: Ensure that the iPhone Is Connected to Your Personal Computer
Once an application has been installed properly on your personal computer, the next step is to make sure that your iPhone will be connected correctly on your device using a USB cable.
One way to check if the step was correctly done is you will be seeing your iPhone on the iTunes application once opened and launched. Your iPhone’s icon will be seen on the upper left side of the application.

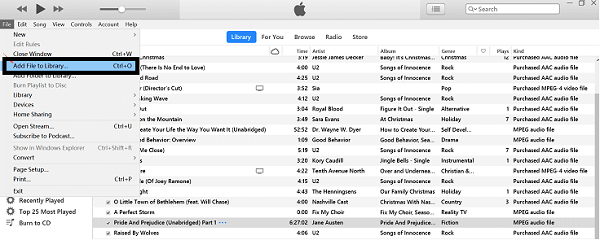
Step 3: Import Your MP3 to iTunes
The third step would be the importing of the MP3 files to iTunes. To be able to do this, you must head to the “File” button then tick the “Add File to Library ” button or simply hit the “Control and O ” buttons at the same time. You also have the option to add even a folder if you prefer to. Once done with this, all songs intended to be added will automatically be added onto the application.
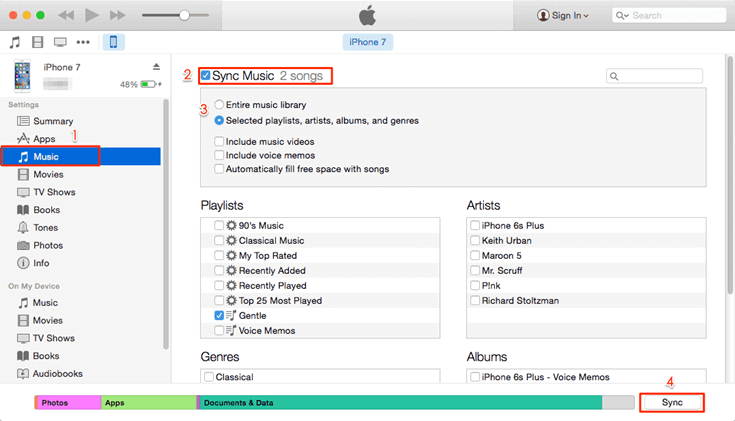
Step 4: Begin Syncing Music to Your iPhone
The next thing to be done is to proceed in syncing your music to your iPhone. To do this, you just need to look for your iPhone’s icon at the left side of the screen and hit the “Music” button which is right under “Settings”.
Make sure that you will be checking the box alongside the “Sync Music ”. Below this, you have the option to choose whether you will be syncing an entire music library or just chosen playlists, artists, albums, and genres. Once done, just click the “Apply” button and the “Sync” menu located at the bottom right corner of the interface.
Upon presenting the first way to solve the issue, here is another which you might also want to check out.
Part 2: How do I Transfer MP3 Files to My iPhone Without iTunes?
If you are having difficulties in using iTunes as a solution to this problem, you can also try to use this application named AirMore. This can, of course, help you out.
This is as well readily available on the web and in both google and apple play store. The use of this application removes the need to connect your device to a personal computer using a USB cable. What is more interesting is that you can manage not only your music, but your videos, images, or even documents.
#1: Transferring MP3 Files from Personal Computer to iPhone Using AirMore
The application can be used in case you wanted the MP3 files from your computer or from your mobile phones to be transferred and imported to your iPhone.
Let us first discussed the ways to transfer MP3 to iPhone.
- Download and install the AirMore application on your iPhone.
- Secure the connection between your iPhone and personal computer.
- Begin in the importing of music from the computer to the iPhone.
Let us look into these steps in detail.
Step 1: Download and Install the AirMore Application on Your iPhone
Make sure that you have the application downloaded and installed on your iPhone. As initially mentioned, this tool is readily available in the apple store and can immediately be downloaded and installed on your iPhone as long as you have a stable and secure internet connection.
Step 2: Secure the Connection between Your iPhone and Personal Computer
Once installed, you may now proceed in securing the connection between your iPhone and personal computer. You might only need to head to the AirMore website and proceed with the connection by scanning the code that you will be seeing in the main screen. To ensure a successful connection, both devices should be connected to the same internet connection.
Once a connection has been properly made, you will be seeing below screen. The next thing needed to be done is to tick the “Music” icon. Once ticked, you will then see all the MP3 files or songs contained on your iPhone gadget.
Step 3: Begin in the Importing of Music from Computer to iPhone
The last and final step would be the importing of the MP3 files to your iPhone. You just need to hit the “Import ” button located at the top portion of the screen.
A new window will then open which will ask you to choose the files to be imported. By hitting the “Open” button (which is located in the bottom right corner of the screen) after the selection of files, your music will now be transferred to your iPhone.
By just doing these three simple steps, you already got your songs imported from your personal computer to your iPhone.
How about the transfer of MP3 files from another mobile phone to your iPhone? Here is how you can proceed.
#2: Transferring MP3 Files from Another Mobile Device to iPhone Using AirMore
Aside from having the ability to transfer MP3 files from personal computer to iPhone. AirMore is also capable of having your MP3 files stored on your mobile device imported to your iPhone. Same with the above, you just need to ensure that both are connected in the same internet connection for successful transfer and sharing.
Check out these steps needed to proceed with the transfer of MP3 files from one mobile device to your iPhone:
- Ensure that the AirMore application is downloaded and installed on both mobile phones.
- Launch the application and secure the connection between two mobile phones.
- Select the MP3 files to be transferred.
Let us know more about the procedure.
Step 1: Download and Install AirMore Application on Both Mobile Phones
Initially, you would be needing to download and install the AirMore application on both mobile devices. If the other gadget is an android device, you do not need to worry since AirMore is as well readily available in Google Playstore. Here is how the application looks like.
Step 2: Launch the Application and Secure the Connection between Two Mobile Phones
Once done with the installation, immediately open and launch the application and head to the “More ” menu which is located at the bottom right corner of your phone’s screen.
Once ticked, you will be directed to a new window wherein you will be seeing the “Phone Transfer ” button right under “Other Tools”. Once completed, you will now be seeing all the available devices. You can now perform the connection between the two gadgets you have.
Step 3: Select the MP3 Files to be Transferred
After a successful connection, you can now have your MP3 files transferred from your device to your iPhone. In the “Music” tab, you just need to choose the MP3 files you desire to be transferred then hit the “Send” button to finally transfer.
Part 3: Bonus – How to Convert DRM Protected Apple Music to MP3 Format?
Nowadays, many people are facing the issue of the inability to play and transfer songs from Apple Music due to DRM (Digital Rights Management) protection. Well, the answer to this problem would be the conversion of your Apple Music to MP3 which is a DRM-free format. But, how are you going to do it?
It is too simple! DumpMedia actually had offered an extra amazing way which surely will solve this issue.
DumpMedia, being a great tool offering video and audio converters, has been a great help for many users nowadays.
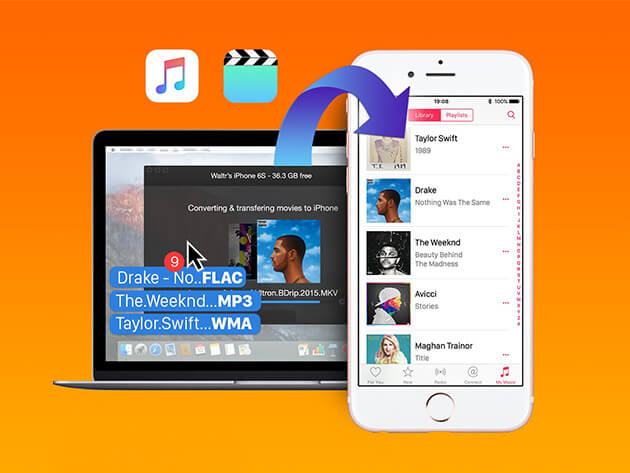
Aside from having amazing video/audio converting features, it also has an Apple Music Converter which lets you convert your favorite and most loved music to MP3 format to be highly playable in any media player!
This tool is capable of removing DRM protection and allows you to convert songs to thousands of available formats. It even lets you listen to Apple Music songs offline, and even keep your songs running although your subscription has ended! Great, right?
Well, here is how you can proceed with Apple Music to MP3 conversion using this DumpMedia Apple Music Converter.
Step 1: Download and Installed DumpMedia Apple Music Converter
Of course, we need to ensure that DumpMedia Apple Music Converter has been downloaded and installed on your personal computer. Once installed, open and launch the program. Under the “Library ” menu, tick “Music” and select the desired file to be converted to MP3.
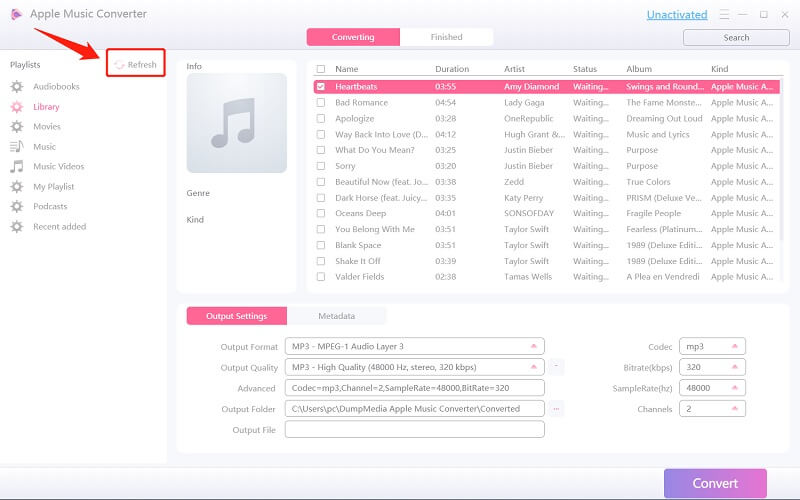
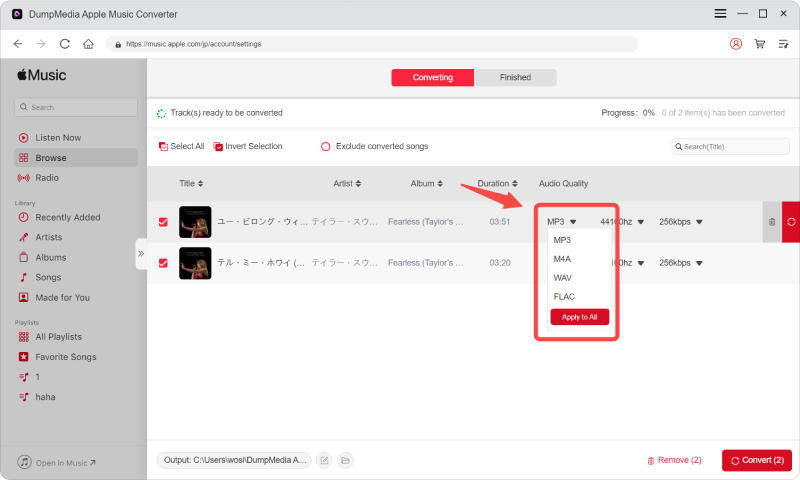
Step 2: Select the Desired Output Format
Once the music file has been selected, head to the “Output Format ” section which you will see at the bottom portion of the screen. Make sure to choose MP3 among the selections that would be listed.
Other than this, you can also choose the bit rate or even rename the file if you prefer to.
Step 3: Tick the Convert Button to Begin the Process
Upon finishing above, just proceed and click the “Convert” button to finally begin the conversion process.

By just performing these three easy steps, you got to have your Apple Music converted to MP3 format. Once converted, you are now capable of playing the converted files anytime anywhere.
Part 4: In Conclusion
This article is a great help for those people who are in the look for the simplest and easiest ways they can do in order to transfer MP3 to iPhones. Two amazing ways on how to do it were actually highlighted at the beginning of this post – the use of iTunes application and a professional application named AirMore (which is highly capable in computers and even mobile devices).
In addition to these, we had also introduced an amazing Apple Music Converter under DumpMedia. If you are in need of a tool you can utilize to convert your Apple Music to MP3 format, DumpMedia is the tool most recommended and trusted by numerous people.
Have you found this post engaging and informative? What can you say about this topic? Do you have any other suggestions and ideas in mind? Leave all your thoughts in the comment section.

30% Off >>>