


How to Burn AVI Videos to DVD Discs Effectively
Although there are a lot of ways to store your files nowadays (online storage locations such as google drive and the like), people are still in the look for the methods and options they can resort to in case they wanted their files to be kept in several storage devices or tools such as USBs and DVD discs.
This article will actually be more of discussing the ways one can use to burn AVI videos to DVD. If you are interested to find those ways, we recommend you stay on this page and keep reading.
Contents GuidePart 1. Why Many People Select DVD Disc?Part 2. Methods on Burning AVI Videos to DVDsPart 3. Highly Recommended Converter to Convert Your Videos
Part 1. Why Many People Select DVD Disc?
Actually, DVD discs are more convenient for some people since they got to access the files they need and want even without a secured internet connection. In addition, having those saved in DVD discs lessened the chance of having a corrupted file or media. Moreover, if you have your media files stored in the disc, you can have it viewed even in a standard DVD player if you desire to. Some people may still have some doubts about the DVD formats, check the link to learn more that!

Part 2. Methods on Burning AVI Videos to DVDs
Method 1: Burning AVI Videos to DVDs Using VideoSolo DVD Creator
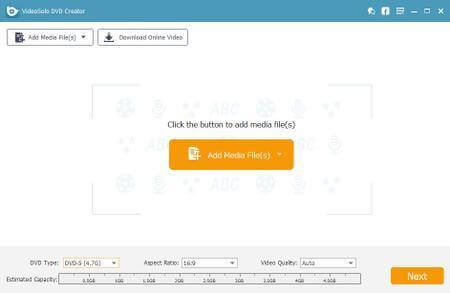
One good method of having your AVI videos burned onto a DVD disc is by using this VideoSolo DVD Creator. This has been included in the list of the most reliable, trusted, and efficient burning tools one could ever have. Aside from the ability to burn videos in AVI format, you also got the chance to burn any other videos in several other formats such as 3GP, MP4, MPEG, and a lot more. In addition, while using this software application, you can as well burn several other media files including images and audios. Having a built-in DVD menu template, you need not worry if you would be able to create your own. You can as well easily identify if there would still be areas that need adjustments since the tool provides a way to preview the DVD files.
Because of its easy and user-friendly interface, one could experience using this tool at ease without having to worry if the process would be successful or not. We are of course to present the procedures needed to be accomplished to have your AVI format videos burned into a DVD disc. Check this out!
Step 1: Ensure that you have this VideoSolo DVD Creator downloaded and installed on your personal computer.
Step 2: Launch the program. Once opened, you will immediately see the tool’s main interface.
Step 3: You can begin the process by ticking the “Add Media Files ” button located at the upper left corner of the screen which will allow you to add your AVI video files. You have the option to upload one file or a folder if you would like to have those processed in a batch. Alternatively, it is your choice if you would like the files to be dragged and dropped onto the interface.
Step 4: The program offers an editing function wherein you got to perform customization of the video. Located just in the right part of the screen, you can easily see the video editing tools which would allow you to personalize even the audio or add subtitles if you want to.
Step 5: As mentioned above, the tool also supports showing preview. Once you are done with editing, you can tick the “Preview” button to take a glimpse of your file. Menu templates are as well readily available. There are actually a lot of designs wherein you can choose from.
Step 6: If you are already satisfied with your changes, you may then begin the burning of your AVI video files by hitting the “Burn” button situated right below the screen.
The whole process would just take some minutes. A progress bar will also be shown on the screen wherein you can track the status of the burning procedure.
Method 2: Burning AVI Videos to DVDs Using DVD Creator for Mac/Windows
As the header implies, this second method would be focusing on another tool which as well allows the burning of AVI videos onto DVDs. DVD Creator is amazingly suitable in both Mac and Windows personal computers. This offers plain, simple, and easy to follow steps of video burning. What is more fascinating is that you can even add external audios or photos and even put subtitles if you want to.
The below steps are mainly for Mac computers. Let further dig in.
Step 1 : Have this DVD Creator installed on your Mac or Windows computer.
Step 2 : Once installed, open the program and begin by loading the AVI files onto the software. This could be done by ticking the “+” icon you will see on the screen. You can perform the dragging and dropping of files if you intend to. In addition, you got to see how much the added videos took from the disc storage space. This allows you to track how many more AVI files you can load and burn onto the disc (this is indeed amazing).
Step 3 : The software also allows video customization because this also has a video editor tab wherein you can perform basic editing functions such as cropping, trimming, and even adding video effects. Once finished, ensure that you have the “Save” button ticked so that all changes will be kept and saved.
Step 4 : By hitting the “Menu” option which is located alongside “Source” and “Preview” buttons, you can see numerous built-in templates that you can utilize depending on your preference.
Step 5 : By heading to the “Preview ” tab, you got to see the preview of your disc and check if everything was done great.
Step 6 : Finally, upon ensuring that all is well done, you can now tick the “Burn” button to begin the whole process.
Bonus Tips: One of the most visited entertainment websites nowadays is YouTube. Most people like to watch videos on the YouTube platform. So many people maybe want to know how to burn youtube videos to DVD. See the detailed guide about "How to Burn A YouTube Videos to DVD on Windows and Mac".
Part 3. Highly Recommended Converter to Convert Your Videos
Are you looking for a tool to convert your video file into an AVI file format? Do you know that there is this one tool that is capable of performing a lot of functions most especially the conversion function mentioned which you desire?
If you are one in need, you might want to check this DumpMedia Video Converter which has been used and trusted by a lot of users in the modern era.
The main feature of this tool is video conversion to different desired formats without quality loss, even maintaining the original look. This supports numerous formats such as the popular MP4, AVI, WMA, WAV, FLAC, and a lot more! In addition, you can easily convert DVD and videos to GIF, video or audio. This as well as editing and enhancing functions wherein you can perform adjusting of brightness, contrast, saturation, and volume control. Even adding subtitles is possible! Aside from its main function, this one is software with a user-friendly interface and offers easy steps to perform the desired processes.
Downloading and even the installation of this program could be done in just a few minutes and would require only a few clicks. You got to have your converted video by just following a few and simple steps.
To proceed with video conversion, you must do this simple step by step guide.
Step 1: Of course, you are required to ensure that this DumpMedia Video Converter would be downloaded and installed on your Windows of Mac computers.
Step 2: Launch the program and click the “Add files” button to select the desired media file to convert. You can as well drag and drop the files directly from the location to the main interface of the application.
Step 3: Select the desired output format by ticking the “Convert All Tasks to: ”. You got a lot of options you can choose from such as MP4, MOV, WMV, AVI and many more.

Step 4: Once done, choose the destination folder wherein the output or converted file would be saved by clicking the “Browse” button.
Step 5: Click the “Convert” button to begin with the conversion process.
Once you are done with these steps, you can preview the video and check the converted file by tapping the “Open Folder” option. By performing just these five simple steps, you go to have your converted video in just a few minutes.
In Conclusion
Two methods of burning AVI video files into DVD discs are presented above. Both, of course, can produce amazing output which every user wanted to have. The step by step guides to easily navigate both are as well presented above. The choice as to which among the two you will utilize will absolutely be yours.
In addition, we have also presented an amazing application software (DumpMedia Video Converter) that supports and contains several helpful features most especially the conversion function which we believe you can definitely use in the future.
These two are just some of the ways, do you know any other? Wanted to share it with us? We would love to hear your thoughts, suggestions, and recommendations by leaving your comments below!

30% Off >>>