


How to Burn A YouTube Video to DVD on Windows/Mac
Are you planning on burning your favorite YouTube video to a DVD for playback on your own private DVD home theaters? If so, you have come to the right place! In this article, we have laid out a step-by-step guide on how you can burn your YouTube Video to DVD whether on your Windows or MacOS computer.
But first, you need to make sure that the YouTube video format that you are going to burn to a DVD will be recognized by your DVD player. So in the next section, we will give you a video format guide to make sure that you won’t have any compatibility issues when playing your burned DVD on your DVD players.
The second step you need to do is download your YouTube video then convert it to a DVD player-recognizable format. So in Part 2 of this article, we give you the steps on how you can do this by using DumpMedia Video Converter Software. Lastly, all that’s left to do is burn your converted YouTube video to a DVD. Keep on reading to know more!
Contents GuidePart 1. Formats Supported by DVD PlayersPart 2. A YouTube Video Downloader and DVD Converter Tool for YouPart 3. Burning Your YouTube Video to DVD on Windows and MacPart 4. In Conclusion
Part 1. Formats Supported by DVD Players
As you may know, not all formats for recordable discs will be compatible with your DVD player whatever model you have. But the majority of DVD players can support a variety of the most typical disc formats which allow you to play movies in specific formats using your private theater and DVD player.
Generally, the specifications of your DVD player found online should be able to tell you whether it supports any of the formats that will be discussed below. The majority of them will also have logos of the DVD formats on the DVD player box or on the player itself (in some cases both) which indicate what formats they can play.
Older models of DVD players usually show only CDs and DVDs but the latest ones offer more options. Furthermore, newer models often have a high definition feature for upconversion as well. Without further ado, below are the common formats that are compatible with most DVD players.

1. Basic DVD Player Formats
#1 DVD Video
DVD Video is the most popular DVD format used in mass-producing movies because it is universally playable on all DVD players. The presence of a DVD Video icon somewhere on your DVD player’s case is a usual thing. Unless your DVD player is a multi-region one, you are only limited to playing DVDs having similar region code with your DVD player.
Tip: Here is a guide on how to bypass DVD region code on your computer.
#2 MPEG-2
The MPEG-2 format is the most standard format used by DVD players. It is also known as H.262 or H.222 and it is a type of compression allowing for a very clean audio and video playback on your DVD players. MPEG-2 has a wide distribution in the world of media entertainment.
#3 MPEG-1
DVD players can also read compact discs (CDs) and VCDs which used the MPEG-1 compression. MPEG-1 has a lower video quality compared to MPEG-2.
2. Other Formats
Aside from the basic DVD player formats, there are also many DVD players that are able to support WMA, MOV, WMV, and others. Check your DVD player’s specs online to confirm if your player can support the video formats below.
#1 WMV
WMV or Windows Media Video is a common format for digital videos used by a lot of computers.
#2 SVCD
SVCD was meant as a DVD Video alternative but has never gained outspread acceptance. So some DVD players may support SVCD and some may not. Moreover, SVCD is designed for compact disc use.
#3 DivX
DivX is among the high-compression format for digital videos. It is widely used in fitting relative amounts of video data into a small file. DVD players will decompress DivX files before playing them. But you should note that DVD players can only recognize DivX files if they have an encoded AVI in them.
Part 2. A YouTube Video Downloader and DVD Converter Tool for You
DumpMedia Video Converter is a powerful and high-speed all-in-one audio and video converter, downloader, editor, and player. Enjoy the convenience of a friendly interface equipped with a lot of features to meet all of your video needs. The software supports many formats including MPEG, 3GP, FLV, MKV, AVI, WMV, MOV, MP4 along with other regular video formats. To convert your videos to a DVD format playable in your home DVD player, download the software first and follow the steps below.
First, you have to download your YouTube video using DumpMedia’s Online Downloader which will be discussed in the next section.
#1: Downloading Your YouTube Video Online
DumpMedia’s Online Downloader only allows you to convert your videos to MP4, 3GP, or WEBM if you want to download it as a video (we will convert this to a DVD format later in the next section). To do this, follow these steps:
Step 1. Go to the YouTube Website.
Step 2. Search for the video that you want to burn to a DVD in the site’s Search bar.
Step 3. From the search results, click on your video.
Step 4. Copy the URL of the video (the URL starts with ‘https’).
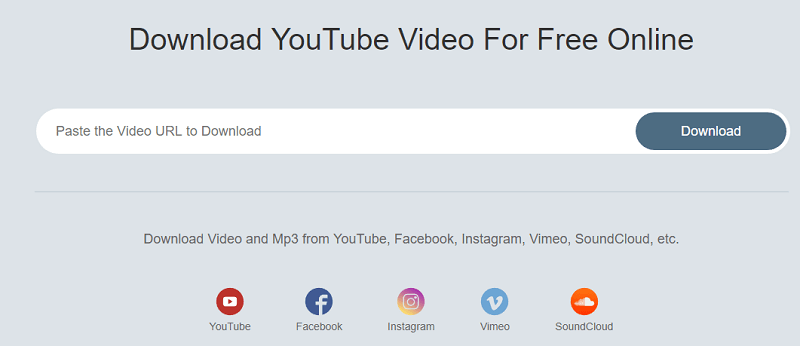
Step 5. Navigate to DumpMedia’s Online Downloader.
Step 6. Paste the YouTube video’s URL in the text box. Wait for the loading icon below the text box to load. where you can set the output format. This is set to MP4 by default. Leave it as is.
Step 7. Click on the Download button beside the output video quality that you prefer. You will be directed to a new window.
Step 9. Right-click on the video and choose to Save video as.
Step 10. Browse for your video’s output location on your computer and click Save.
#2: Convert Your Downloaded YouTube Video to a DVD-Player Readable Format
Step 1. Launch the DumpMedia Video Converter.
For Windows users :
Step 1a. Go to the Search icon (magnifying glass) beside the Windows icon in your computer’s Task Bar.
Step 1b. Type DumpMedia on the text field.
Step 1c. Click on the DumpMedia application on the search results.
For MacOS users :
Step 1a. Click on the Launchpad icon in your computer’s Dock. The launchpad icon is a gray circle with a darker gray rocket at the center.
Step 1b. Type DumpMedia on the Search bar at the topmost part
Step 1c. Hit the Return button in your keyboard to launch the application.
Step 2. Click the Add Files button located at the top-left section of the interface to import your files or you can drag-and-drop them directly into the main interface.
Step 3. Look for the Convert all tasks to text at the top right corner of the interface. Select your desired output format.
Step 4. At the bottom of the interface, click on the Browse button and browse your computer to the desired destination folder of the converted files.
Step 5. Click the Convert button to start the conversion of your audio file.
Step 6. Wait for the conversion to complete.

Part 3. Burning Your YouTube Video to DVD on Windows and Mac
Below are the initial steps you need to do before you start the burning process on your Mac or Windows computer.
Step 1. Get an empty DVD
You need to get an empty disc where you can burn your YouTube video into. Blank DVDs can be found in any electronics or audio store. Choose between 4 GB or 8GB disc sizes depending on your video’s length. A 4GB disc is enough for movies having lengths of about one and a half hours. If your video’s length is more than this, you should get an 8-GB disc.
Step 2. Insert the empty DVD to your computer’s CD or DVD drive
You can find your computer’s CD or DVD drive in front of its CPU and on your laptop’s side if you are using one. If your computer does not have a CD/DVD drive, you can use an external one. You can buy an external CD/DVD drive from any electronics store. It does not need any installation, all you have to do is plug it on your computer’s USB port.
Step 2a. Look for the drive’s button and press it to open the drive.
Step 2b. Insert the empty disc inside the drive.
After doing the previous steps, follow the succeeding methods to burn your YouTube video on your Windows or Mac computer.
Method 1. Burning Your YouTube Video To A DVD In Windows
Step 1. Choose Burn from the options.
After inserting the empty DVD into your computer’s drive, an auto-run window appears on your screen asking what it should do with your inserted DVD. Click on the Burn files to disc option to open the window for Burn a disc.
Step 2. Type your desired name for your DVD in the provided text field.
Step 3. Choose the With a CD/DVD player option to allow your DVD to be recognizable on computers and DVD players.
Step 4. Click on the Next button. Your DVD’s drive will open in a separate window.
Step 5. Drag your converted YouTube video towards your DVD’s drive window to copy it to the DVD for the burning process to start.
Step 6. Look for the Burn button located at the top-left corner of your DVD drive’s window and click on it. The window for Burn to Disc will open.
Step 7. Type the name for your DVD again in the Burn to Disc window. Leave the default Recording Speed settings as Windows automatically detects your DVD’s copying speed.
Step 8. Click on the Next button. The burning process will start.
Step 9. Wait until the burning process is done.
Step 10. Click on the Finish button. Your DVD will be ejected automatically from your computer’s drive. The burning process is now complete.
Method 2. Burning Your YouTube Video To A DVD In MacOS
Step 1. Download the Burn software to your computer. This tool allows the copying of documents and files from your Mac onto blank DVDs.
Step 2. After downloading, click on the Burn icon inside the folder. This launches the application.
Step 3. Look for the Video tab on the menu and click on it.
Step 4. Type your desired DVD name on the text area provided. You’re allowed to use alphanumeric characters for the disc name.
Step 5. Click on the drop-down button beside the text field for Disc Name. Four choices will be shown to you where you can select the type of CD that you are burning. Since you are creating a DVD, choose DVD-Video from the options.
Step 6. Click on the Burn button located at the top-left corner of your Mac’s menu.
Step 7. Click on Preferences from the list. The window for Burn Option will open.
Step 8. Click the tab for DVD Video located at the top portion to open the options for the video.
Step 9. Click on the drop-down Region menu.
Step 10. Choose NTSC from the options. This will set your DVD disc’s file format so that your DVD player will be able to recognize your disc.
Step 11. Click on the red button located at the top left portion to close the Options window.
Step 12. Navigate to the folder where the YouTube video that you want to burn to your DVD disc is located.
Step 13. Select the video and drag it towards the Burn application window.
Step 14. Wait for the Burn app to load your video file. If you encounter a prompt notifying you of an Incompatible file after dragging your video to the Burn window, just click on the Convert button in the prompt. This will convert your video’s file format to one that it can recognize.
Step 15. Click on the Burn button located at the bottom-right corner of your screen to proceed.
Step 16. On the new window that will open, choose the appropriate speed for copying during the burning process by clicking on the drop-down button for Speed.
Step 17. Choose 4x from the options. This ensures that your video will be burned to your DVD at the right copying speed without the quality being compromised.
Step 18. Click on the Burn button once again to start the burning process.
Step 19. Once the burning process is completed, a shortcut icon for your DVD is created on your Mac’s desktop.

Part 4. In Conclusion
In this article, we discussed the common formats supported by DVD players. Then we gave you our most recommended software, DumpMedia Video Converter, which you can use to download and convert your YouTube videos into one of the above formats. Lastly, we showed you a step-by-step guide on how to burn your YouTube videos to a DVD in Windows and Mac. Have fun watching your homemade DVDs on your own home’s comfort!

30% Off >>>