


[Pictures Support] How to Import DVD to iTunes
DVD discs have contributed a lot to the lives of people. Before, these are the main storage devices used. You can easily burn and keep all your songs or even videos in it making it one of the most used tools by many not only for business purposes but as well as for personal and educational reasons.
However, using DVD discs nowadays is somehow outdated. And, what if you still got important files or favorite videos or movies in it? Ever experienced the need to rip those for importing DVD to iTunes? We will discuss the options you can choose to import DVD to iTunes.
Contents Guide Part 1: What Are The iTunes-Supported Formats?Part 2: How to Convert and Import DVD to iTunesPart 3: What if You Only Aim to Import Music Files from DVD to iTunes?Part 4: In Conclusion
Part 1: What Are The iTunes-Supported Formats?
If you are one of the many iTunes lovers or you just love watching videos or movies on your Apple devices such as iPhones and iPads and it happened that you have had a collection of files on different DVD discs, you probably encountered the issue of inability to copy the files directly to mentioned devices and it could be troublesome and tiring for you to always open your DVD discs every time you wanted to access your files.
Well, that is a common issue. The solution left for you is to proceed with conversion (from DVD format to any iTunes supported formats) and then file syncing. But, how will you do it?
Before heading to the answer, do you have any ideas about those iTunes-supported formats?
iTunes has been popularized as one of the many music media platforms which are being enjoyed by a lot of users up to now. This application was created and introduced by Apple to handle a lot of functions such as being a media player or library or an audio and video organizer.
iTunes supports lots of audio formats including MP3, AAC, WAV, AIFF, Audible file format, M4P, and M4A. This as well supports numerous video formats such as MOV (QuickTime file format), M4V, and MPEG-4.
Tips : People like sharing DVD video files to YouTube. Do you know how to upload DVD video files to YouTube? See the best guide: How to rip and upload DVD video files to YouTube?

Part 2: How to Convert and Import DVD to iTunes
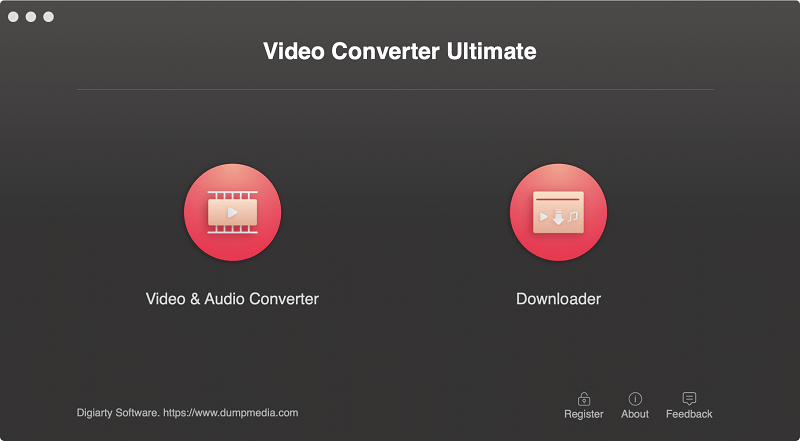
The best tool you can use to have your DVD files converted to any available iTunes format is this DumpMedia Video Converter!
This tool has been trusted and used by a lot of users in this modern era because its abilities and features have been proven to be amazing and with great results. The conversion has been made effortlessly and efficiently using this tool.
The main feature of this tool is video and audio conversion to different desired formats without quality loss, even maintaining the original look.
This supports numerous formats such as the popular MP4, AVI, WMA, WAV, FLAC, MOV, and a lot more! In addition, you can easily convert DVD and videos to GIF, video or audio.
This as well as editing and enhancing functions wherein you can perform adjusting of brightness, contrast, saturation, and volume control. Even adding subtitles is possible!
Name it and DumpMedia Video Converter will do it for you!
We are definitely recommending this converter for users.
Aside from its main function, this one is software with a user-friendly interface and offers easy steps to perform the desired processes.
Downloading and even the installation of this program could be done in just a few minutes and would require only a few clicks. You got to have your converted video or audio files by just following a few and simple steps.
Here is a simple guide on how you can import DVD to iTunes.
Step 1. Have this DumpMedia Video Converter downloaded and installed on your personal computer.
Step 2. Launch the program and import the DVD file to be converted.
Step 3. Input any iTunes supported format as the output format and proceed with the conversion.
Step 1: Download and Install DumpMedia Video Converter
Of course, you are required to ensure that this DumpMedia Video Converter would be downloaded and installed on your personal computer.
As stated on the heading above, this is a tool that you can utilize offline (without an internet connection) as long as properly installed on your computer. To begin with DVD ripping, your disc should be correctly inserted into the drive.
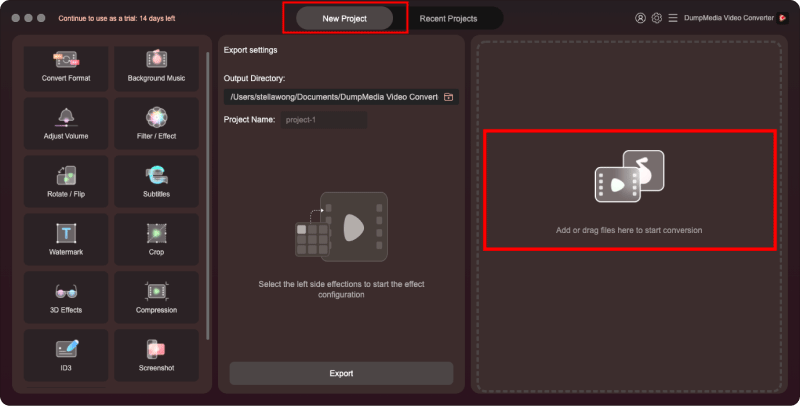
Step 2: Launch the Program and Import the DVD File to be Converted
Upon finishing the installation, the next step would be launching the program and clicking the “Add Multiple Videos or Audios” button to select the DVD file you desire to convert. You can as well drag and drop the file directly from the location to the main interface of the application. You can select a number of files since this application supports batch conversion.
Step 3: Input Any iTunes Supported Format as The Resulting Format and Proceed with Conversion
Once files have been added and imported, next would be the selection of the desired output format which you can do by ticking the “Convert Format”. You got a lot of options you can choose from such as MP4, AVI, WMV, MPG, and many more.
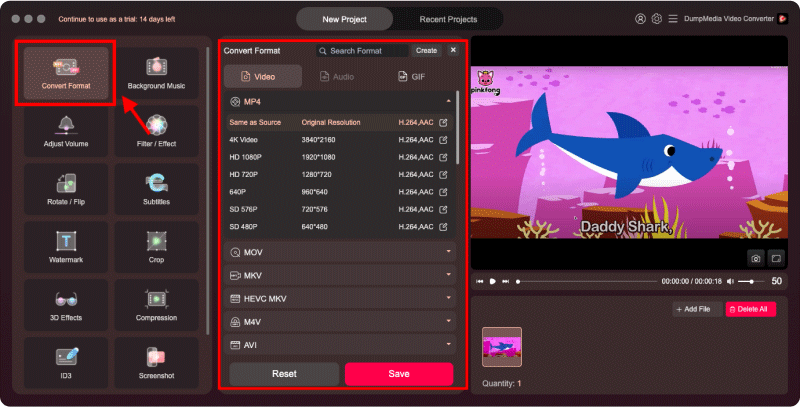
In this case, we ought to convert the file to any iTunes supported format (samples mentioned in the first part of this post). Make sure to select one from the list that you will see on the screen.
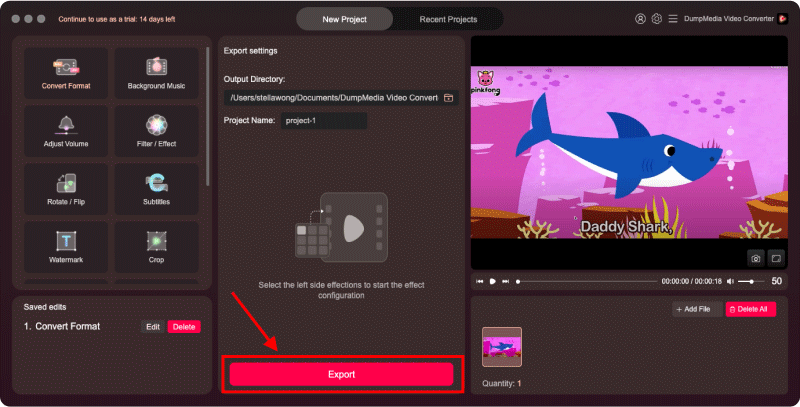
Once done, choose the destination folder wherein the output or converted file would be saved by clicking the “Save ” button. Once everything has been set up perfectly, just click the “Convert ” button to begin with the conversion process. You can find the converted files by clicking "Recent Projects".
The next procedure would be the importing of the file once converted. You would need to open your iTunes application to proceed.
Once opened, just head to the “File” button located at the left corner of the screen. Tick the “Add File to Library ” option and you will be directed to a new window wherein you have the chance to select the ripped file to be imported. Alternatively, you can do dragging and dropping. Finally, you can proceed to the syncing of files to your device.
Part 3: What if You Only Aim to Import Music Files from DVD to iTunes?
Well listening to songs stored in DVD discs is absolutely boring and tiring! If you are a music lover you have been experiencing the difficulty of having your favorite songs transferred to your iTunes library from DVD discs, this portion would definitely help you!
Do you even know that iTunes itself can do the abovementioned?
Well, if you are only to import music files from your DVD discs onto your iTunes library, this is what you can do. The procedure is just too simple.
Here is a guide for importing music files from DVD to iTunes.
Step 1: Insert the DVD disc correctly onto the computer’s drive.
Step 2: Head to the iTunes application and perform changes in the import settings.
Step 3: Import the desired song.
Want to know more about each step? Let us then take a look.
Step 1: Insert the DVD Disc Correctly Onto the Computer’s Drive
The initial step needed to start is to ensure that the DVD disc has been properly installed and inserted on your personal computer’s drive. Once the disc has been inserted, you should be able to see it on your computer.

Step 2: Head to the iTunes Application and Perform Changes on the Import Settings
Once inserted, the next you should do is to choose and select the music files to be imported (from the disc). If the songs are in the format supported by iTunes, you can continue. If those are in any other format, the best move is to use the option presented in the first part of the article.
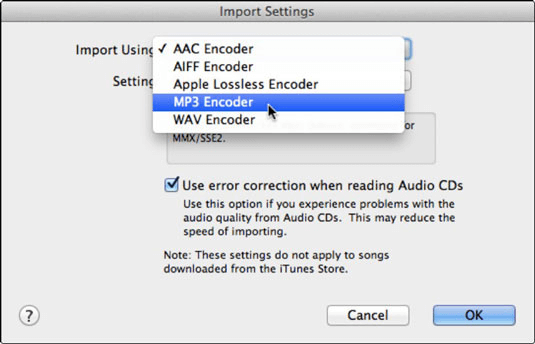
Head to the iTunes application and perform changes on its import settings. Go to the “iTunes” button, then tick “Preferences”. Once you have seen the window, click the “General” option followed by “Import Settings ”. The default format is AAC but you can choose any other depending on the file to be imported (as long as supported by iTunes).
Step 3: Import the Desired Song
Once initial steps have been performed, you can now import the desired music files to iTunes. This can be done by just ticking the “File” button located at the upper left part of the screen then “Add File to Library ” button.
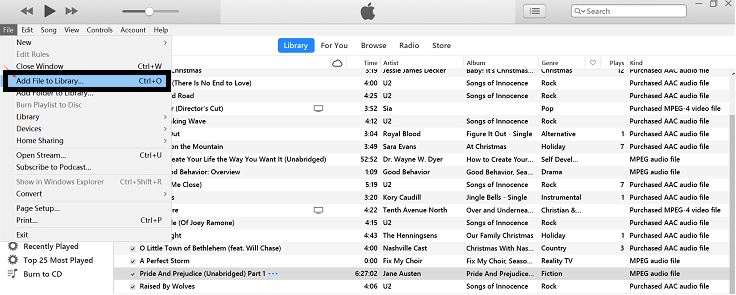
A new window will prompt which will let you choose the songs to be imported. Browse from the selection and tick the “OK” button once done. This is when iTunes will begin importing your chosen music files to its library.
Part 4: In Conclusion
This article had provided the most effective and best way to be able to import DVD to iTunes library.
In the first part, an amazing tool was presented – the DumpMedia Video Converter. This one has been considered as the top converter which will help you import DVD to iTunes. This is the most recommended and trusted among all. Therefore, if you encountered such an issue, replying to this would be the best thing you can do.
If you only aim to import music files, iTunes can do it for you. The simple guide was presented in the second part of this article as additional information for you.
Have you found this post educational and informative? Will you also make use of DumpMedia Video Converter in the future? Or, have you ever tried it before? Share your experiences with other users by leaving your comments down below!

30% Off >>>