Two Simple Ways to Save DVD to Mac [Efficiently]
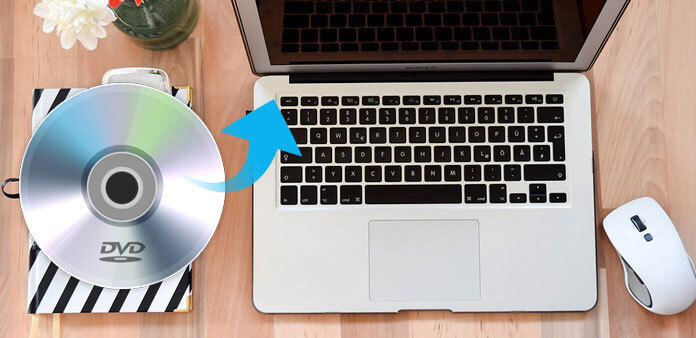
Do you want to save DVD to Mac ? If yes, you’ve come to the right place. This article is about how you can save DVD to Mac.
Take note that you need a DVD player for this process. If your laptop or your computer already has one, good. If it does not have one, then you can use an external one.
If you save DVD to Mac, you digitize the file by storing it right on your computer. That way, you can use QuickTime or other similar players within your computer to view it. You no longer need to bring your DVD player along with you.
Contents GuidePart 1. Why Would You Want to Save DVD to Mac?Part 2. Simple Ways on How to Save DVD to MacPart 3. How to Save Your DVD In Most File FormatsPart 4. In Conclusion
Part 1. Why Would You Want to Save DVD to Mac?
There are different reasons as to why you want to store a bunch of DVDs on your Mac. One of which is to take some of your favorite movies with you on the road. Instead of bringing a bunch of DVDs with you, you can just leave them behind and take your Mac. Another reason why you might want to save DVD to Mac is that you just want to back up your favorite movies. That’s a valid reason. You can never tell the longevity of your DVDs. They can get lost or damaged. The sooner you back them up, the better.
Before you start ripping any DVDs to hard disk or trying any settings out, keep in mind that there are three ways to save DVD to Mac. You can save it as a .iso file, which is a full copy of everything on the DVD. Hence, it’s a very large file.
If you only want to copy the movie and at the same time, save a little file storage on your Mac, then it’s recommended that you save DVD to Mac as MKV Passthrough. This does not convert or distort the video in any way. It just extracts the video from the DVD and saves it on your Mac. The third way to save DVD to Mac is by using the MP4 or AVI format. MP4 is highly recommended since it’s a universal standard, meaning you can also watch it on your tablet and your iPhone. MP4 will also take the least amount of space.

Part 2. Simple Ways on How to Save DVD to Mac
There are two simple ways to save DVD to Mac. Now, you have to be careful because there are a lot of ways to do it. What you will find here are simple and safe ways to save DVD to Mac. It’s important to use a safe method.
Method 1. Save DVD To Mac Using The DumpMedia Video Converter
The DumpMedia Video Converter is very easy to use. It’s also safe to use since it’s on a very reliable website. Follow the steps below to see how it works.
Step 1. Click on this link and click on the Video Converter.
Step 2. Click the Mac version link.
Step 3. Download the DumpMedia Video Converter.
Step 4. Start to save DVD to Mac.
Click on the Link to Turn to the Video Converter
The link will take you to the DumpMedia Video Converter. You will find that the website is clean and it does not have any ads on it. That’s a guarantee that you won’t be downloading any other software. Take your cursor to the top right-hand side of the screen and click on the Video Converter.
Click the Mac Version Link
This link is on the bottom part of the screen. The Free Download and the Buy Now buttons will appear soon as you click on the link.
Download the DumpMedia Video Converter
For starters, you can choose the Free Download button first. It’s very easy to upgrade a free version of the DumpMedia Video Converter. After you download, you can immediately install the program on your Mac.
Start to Save DVD to Mac
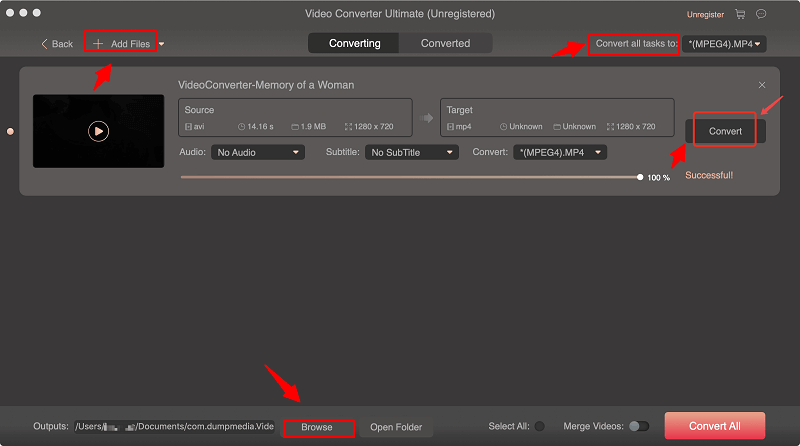
Launch the DumpMedia Video Converter for you to start to save DVD to Mac. Just click on the Add Files button to add your DVD file. Choose the preferred format you want to save your DVD. Select a location on your Mac for your new file. Click on the Convert button to save DVD to Mac.

Method 2. Save DVD To Mac Using The Disk Utility
This is a free option you can consider to save DVD to Mac. Check out the steps below.
- Insert DVD in your Mac.
- Go to Finder on your Mac.
- Click on Go.
- Select Utilities from the drop-down menu.
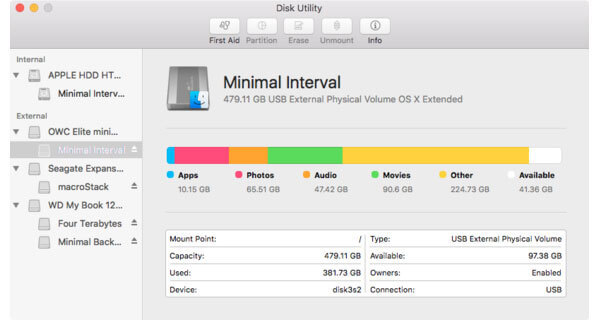
- Look for Disk Utility inside the utility folder. Double click on it.
- Click on the DVD that you see on the left-hand side of the screen.
- Make a disk image of the DVD to put it on your Mac. Go to File. Select New from the drop-down list and select Disk Image from “…”
- Save it to your preferred location, like your desktop. Select which format you want to save it in. Choose none on the encryption field. You can change the name of the file if you like. Click on the Save button.
From the image on your Mac, you can copy it onto a blank DVD again. You might need to do this if, in case, you lose the original copy of the DVD or you want to share a copy with someone. Here’s how to do it.
- Put in a blank DVD in your DVD player.
- Click on the Burn button on the menu above. This is the third icon from the left.

That is how easy it is to save DVD to Mac using the Disk Utility.
Part 3. How to Save Your DVD In Most File Formats
The good thing about the DumpMedia Video Converter is that you have a lot of file formats to choose from. So, if you want to save DVD to Mac, you have a lot of options. That is something to think considering the three formats you can save a DVD to Mac.
Another good thing about it is that you can even enhance your video file with the HD video formats of the DumpMedia Video Converter. It’s something worth considering.

Part 4. In Conclusion
If you want to save DVD to Mac, now is the best time to do it. Try out the DumpMedia Video Converter and find out how easy it is to use.
Have you ever had to save DVD to Mac? How did you go about it? We would love to hear from you.

30% Off >>>
