


How to Burn DVD With VLC Media Player
You may want to burn your videos to a DVD without any hassle whether for transferring to another computer, file archiving, or playing on your DVD players. If so, then you have come to the right place! As in this article, we will show you how to burn DVD with VLC Media Player. But first, let us discuss what VLC Media Player is and its capabilities in the next section.
And if you are planning to play your DVDs on your DVD players, which mostly is the case, you need to familiarize yourself with the DVD formats that your player will be able to recognize. We will also discuss the following in this article:
- Common Formats Recognized by DVD players,
- Recommended Formats for CDs or VCDs,
- A short introduction about the old and new DivX,
- Latest DVD formats, and
- Other DVD formats.
After which we are going to give you a video converter software you can use to convert your videos to a format readable by your DVD player before burning it on a DVD which is DumpMedia Video Converter Software. Finally, we will give you a step-by-step guide on how to burn DVD with VLC Media Player.
Contents Guide Part 1. Things You Need to Know about VLC and DVD FormatsPart 2. Convert Your Videos to DVD Format Playable in Home DVD PlayerPart 3. How to Burn DVD With VLC Media Player For FreePart 4. Wrapping All Up
Part 1. Things You Need to Know about VLC and DVD Formats
1: What Is VLC Media Player
VLC Media Player is an open-source and free cross-platform framework and multimedia player that is able to play the majority of multimedia files including different streaming protocols such as VCDs, Audio CDs, and DVDs. The media files in.VLC extension accompanying the players are container formats for videos saved incompatible video codes including FLV, MP4, MOV, WMV, and AVI.
VLC Media Player provides a lot of features and options. Burning DVDs using VLC Media Player cannot be said to be fully supported. Meaning, VLC is able to burn video files but the videos must first be formatted properly for DVD burning. VLC is not going to do this job for you. However, once you have properly formatted your video into a DVD file, you can easily burn DVD with VLC.
Before you can burn DVD with VLC, the video file must be properly encoded into a DVD format such as MPEG-2. This video and the audio-coded standard are used in the compression of digital broadcast videos and DVDs. They are usually formatted in NTSC or PAL.
PAL format is the standard used by most countries in Western Europe, Asia, South America, Australia, and some countries in Africa. On the other hand, the NTSC format is the standard used in Japan, Canada, the United States, and other countries.

2: Types of Formats That DVD Players Can Support
DVD players play discs, you probably know this for sure. But have you ever wondered what your players can actually do? More specifically, what types of DVD formats they play? Let us discuss what the various DVD formats are and how to make sure that your player can play them.
#1: Common DVD Player Formats
The majority of the typical DVS are formatted in MPEG-2 discs. DVD Players in your homes can also normally play PCM or AC-3 audio discs. The MPEG-2 format is also known as an H.262 or H.222. These are the types of compression that allow the playback and reproduction of very clean audio and videos. Since these are commonly distributed in the market, there is probably no place where you will not be able to encounter these codecs.
To ensure that your burned DVD is going to play, double-check that the program you are burning the DVD with has options in creating DVDs that are playable in-home devices. This process is known as DVD authoring which helps guarantee that your DVDs are indeed going to play correctly.
Ever heard about directory structure? There is software that can create video object files which can be read by many DVD players as:
- Commands
- Menus, and
- Audio/Video files.
You can see these on your screen when you play a DVD (or hear if it is an audio).
#2: Recommended Formats for CD or VCD Players
VCDs or Video CDs are compressed using MPEG-1 which has a poorer video quality compared to MPEG-2. Some players can play these videos and some can even read DVD data discs. If you are given the chance to burn these to SVCD format, do so as this will result in images of higher quality on your discs.
Aside from the basic CD/VCD formats, you can find other DVD players which are able to support WMA, WMV, and MOV discs. The online specifications of the box or the player should be able to tell you if your player can support these formats.
#3: A Short Introduction About The Old And New DivX
DivX is an entirely different format that came in two various forms. The first one is the old DivX which came out during the middle 1990s in stores of Circuit City as alternatives to DVDs used as rentals. The second one is the new DivX which is a video format. These two are not associated with each other even if they share a single name. The new DivX format allows its users to have videos of high-quality with smaller file sizes that use less space on hard drives.
Newer players are able to recognize DivX formats but the DivX files need to have encoded AVI in them. These newer players are able to read a wide variety of video formats including data CDs and data DVDs. Many movies that you download from the internet are of DivX format.
If you are able to find players that can recognize DivX discs, then you can burn your movies to a compact disc using your computer for playback on your entertainment centers at home. The compression method makes the data fit inside a CD. This is way cheaper compared to a blank DVD.
#4: Newer DVD Formats
The latest DVDs are compressed using MPEG-4 or H.264 standard or widely known as Blu-rays. H.264 is also the video format that iTunes is using for its movies. You can find videos of high-quality in this format on YouTube also.
Mand HD videos broadcasted by satellite and cable companies are also in the MPEG-4 format. Blu-ray players are able to play DVDs. However, DVD players cannot play Blu-ray discs. Bluray video compression can put huge data into special discs with equal physical sizes as regular DVDs.
The MKV format is also a Blu-ray compression format but it is the type that is normally found on home burned DVDs rather than commercial ones. Another format is MPV which is one of the universal formats capable that are able to handle huge amounts of data. It is a free open-standard container format allowing it to be highly adaptable to your needs.
#5: Other Formats
You may have some of your homes burned DVDs in the AVI video format. Depending on the DVD player in your home, the DVD in AVI may either be recognized or not by your player. Most of the players will not be able to unless the video is coupled with DivX.
Some of home DVD players can also read rewritable discs though this is very rare. Home DVD players can recognize DVD-R or DVD+R discs more likely. And between these two discs, DVD+R discs are the ones that are universally recognized by DVD players even the cheapest ones.
DVD players that are higher-end can handle MPEG-4 and WMA video discs along with JPEG image discs. This allows movies from iTunes and Windows Media Player to playback on home machines. Nero uses the MP4 format a lot as the compression standard. However, this is not a universal one compared to the others.
Audio discs can be played by the majority of DVD players specifically if these are CD audio (known as CDA) or MP3 discs.
Part 2. Convert Your Videos to DVD Format Playable in Home DVD Player
DumpMedia Video Converter is a powerful and high-speed all-in-one audio and video converter, downloader, editor, and player. Enjoy the convenience of a friendly interface equipped with a lot of features to meet all of your video needs. The software supports many formats including MPEG, 3GP, FLV, MKV, AVI, WMV, MOV, MP4 along with other regular video formats. To convert your videos to a DVD format playable in your home DVD player, download the software first and follow the steps below.
Step 1. Launch the DumpMedia application.
For Windows users :
Step 1a. Go to the Search icon (magnifying glass) beside the Windows icon in your computer’s Task Bar.
Step 1b. Type DumpMedia on the text field.
Step 1c. Click on the DumpMedia application on the search results.
For MacOS users :
Step 1a. Click on the Launchpad icon in your computer’s Dock. The launchpad icon is a gray circle with a darker gray rocket at the center.
Step 1b. Type DumpMedia on the Search bar at the topmost part
Step 1c. Hit the Return button on your keyboard to launch the application.
Step 2. Click the Add Files button located at the top-left section of the interface to import your files or you can drag-and-drop them directly into the main interface.
Step 3. Look for the Convert all tasks to text at the top right corner of the interface. Select your desired output format.
Step 4. At the bottom of the interface, click on the Browse button and browse your computer to the desired destination folder of the converted files.
Step 5. Click the Convert button to start the conversion of your audio file.
Step 6. Wait for the conversion to complete.

In the next part, let's talk about how to burn DVD with VLC.
Part 3. How to Burn DVD With VLC Media Player For Free
Step 1. Add the video file you want to burn DVD with VLC.
Step 1a. Launch VLC.
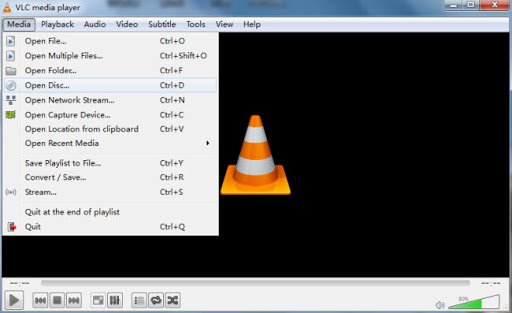
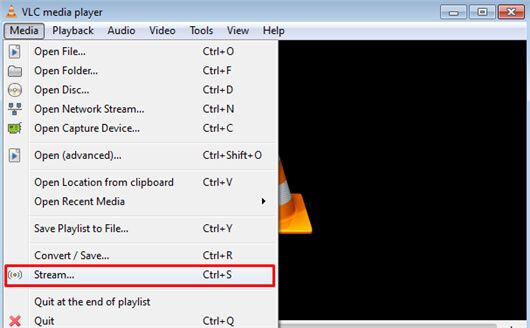
Step 1b. Click on the Media tab in VLC’s menu.
Step 1c. Choose Stream from the choices.
Step 1d. On the Open Media window that will show up, click on the File tab.
Step 1e. Click on the Add button.
Step 1f. Browse for the location of your movie file.
Step 1g. Double-click on the file that you want to burn.
Step 2. Configure the settings to your desired ones before burning.
Step 2a. If you have a subtitles file that you want to add to your video, tick the Use a subtitles file checkbox.
Step 2b. Click on the Browse button below the checkbox and select your subtitles file. Your subtitle is going to be embedded in your movie.
Step 2c. Click on the Stream dropdown button at the bottom-right side of the window.
Step 2d. Choose Play to test if your video is working properly.
Step 2e. If everything is fine, click on the Stream dropdown button again but this time, choose Stream instead of Play.
Step 2f. Double-check if the source in the Source text box matches the filename of the movie file you have entered previously.
Step 2g. Click on the Next button.
Step 2h. In the Destinations section in the new window that will appear, tick the Display locally checkbox to make the burning process faster.
Step 2i. In the dropdown menu , choose File.
Step 2j. Click on the Add button.
Step 2k. Click on the Browse button to choose the destination folder.
Step 2l. Choose the DVD drive where you are going to burn the video.
Step 2m. Append the name of the movie that you want to save it as.
Step 3. Begin the burning process.
Step 3a. In the Miscellaneous Options section, tick the Stream all elementary streams checkbox.
Step 3b. Double check the contents of the dialog box under the Generated stream output string section.
Step 3c. If everything is fine, click on the Stream button. Be patient as the burning time will depend on your movie’s size and your DVD drive’s writing speed.
Part 4. Wrapping All Up
In this article, we discussed the following:
- What VLC Media Player is
- The formats recognizable by DVD players,
- DumpMedia Video Converter Software - a software you can use to convert your videos to a format recognizable by your DVD player before burning it to your DVD, and
- How to burn DVD with VLC Media Player.
Hopefully, we were able to give you all of the necessary information that you need for a hassle-free DVD burning and DVD viewing.

30% Off >>>