


Simplest Guide on How to Transfer Music To Fitbit Ionic
The technology has been so advanced for it continuously offers new gadgets to people. And one of the latest innovations is this Fitbit Ionic device. If you are into technology as well, then you are surely excited to learn more about this Fitbit Ionic.
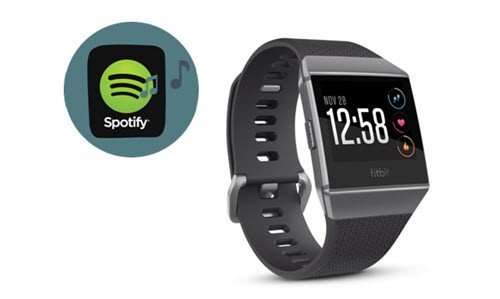
Many people would want to know how to transfer music to Fitbit Ionic. Who would not want to exercise and listen to music at the same time with just your watch, right? For health-conscious and music individuals who are always on the go, having such watch with them is surely an advantage.
And, before we get to the procedure on how we can integrate our most loved songs, specifically Spotify songs into Fitbit Ionic, we will first learn some basic idea about it which we are to discuss on the first part of this article.
Contents Guide Part 1: What Is Fitbit Ionic and Its Features?Part 2: How to Transfer Music To Fitbit IonicPart 3: Summing It All
Part 1: What Is Fitbit Ionic and Its Features?
What Is Fitbit Ionic?
Fitbit Ionic was actually known to be the first smartwatch product of Fitbit. Initially, people are looking at Fitbit as synonymous with devices for fitness tracking, but they found a way to improve and expand more by introducing this Fitbit Ionic.
Apart from being an aid for health status monitoring, Fitbit Ionic is as well used and patronized by users because of the many other things you can do with it.
Check out below amazing features of Fitbit Ionic.
Features of Fitbit Ionic
Below are the great things you can do using your Fitbit Ionic device.
- As mentioned, the main feature of this is for you to track your health status or fitness progress. You can even set your starting points and even your target or goal. This will serve as your reminder about the progress in what you are doing.
- With its lightweight design, you would not feel uncomfortable while wearing it with your wrist which you can absolutely bring anywhere you go.
- Fitbit Ionic promotes easy navigation because it has a touch screen and three small buttons with it.
- It can support many other applications and the installation of such is too simple as well.
- You can use your Fitbit Ionic even in setting alarms and even reminders to keep you on track on all your goals.
- Another fascinating feature of this smart watch is that you can be able to make online payments and purchases by simply using both your debit and credit cards. Because of the chip the watch contains, these online transactions would not be that difficult.
- You can listen to songs and podcasts with your Fitbit Ionic! Imagine? You can bring your most loved music with you as long as you have this Fitbit Ionic on your wrist!
Smart watches such as Fitbit Ionic is totally great because of the several advantages it offers to users. Upon knowing much about it, we will now be proceeding with the simplest method you can do to successfully how to transfer music to Fitbit Ionic.
Part 2: How to Transfer Music To Fitbit Ionic
Since our main focus in this article would be the integration of songs to Fitbit Ionic, specifically Spotify songs, we are to highlight a third-party software application which will aid in the transfer. Well, you are surely asking now about the reason as to why there is a need for such application.
Answer to that is because Fitbit Ionic does not support the Spotify application itself. This is why we are to use one tool for how to transfer music to Fitbit Ionic. The name of this application is DumpMedia Spotify Music Converter.
What Is This DumpMedia Spotify Music Converter?
DumpMedia Spotify Music Converter is a tool developed and created by DumpMedia. This software application has the ability to transform or convert your favorite Spotify songs to any format you want. It supports a lot including the most used and most popular including MP3, WMA, WAC, AAC, FLAC, and many more.
In addition to this, during conversion, the removal of DRM (Digital Rights Management) protection will also be done. This means that you can have those songs streamed and played offline in other devices easily without having to worry on whether the songs will play or not.
How Can You Use This DumpMedia Spotify Music Converter?
The steps are actually quite easy. Here are those.
- Download and install DumpMedia Spotify Music Converter.
- Choose any you desire as the resulting one.
- Proceed with conversion by ticking the Convert button.
Let us look into these steps further.
Step 1: Download and Install DumpMedia Spotify Music Converter
Of course, the first thing you need to do is to have this DumpMedia Spotify Music Converter downloaded and installed on your personal computer. Once done, just open and launch the program to start as well as your Spotify application.
You can begin adding the files by performing dragging and dropping or even adding just the file’s URL (link). This program supports batch conversion which makes it possible to convert not only a file but a number. Converting a lot at a time is not an issue.
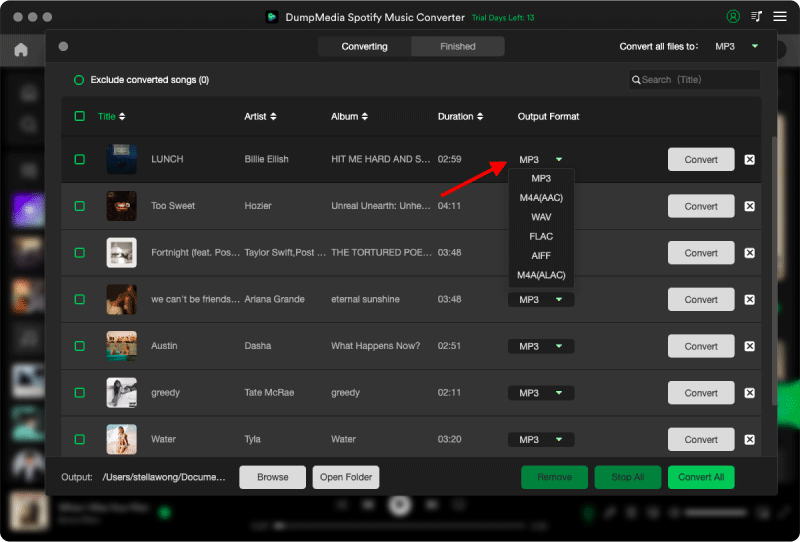
Step 2: Choose Any Format You Desire as The Resulting One
Upon importing and uploading the songs to be converted, the next step would be the selection of the output format. Make sure that you will choose any format you desire among those that you will be seeing in the screen.
In this case, we ought to convert the songs to a format that has been generally supported by numerous media players and of course by Fitbit Ionic. You can have the songs converted to MP3 format if you want. You can do this by heading to the “Convert All Tasks To ” button located at the top right corner of the screen.
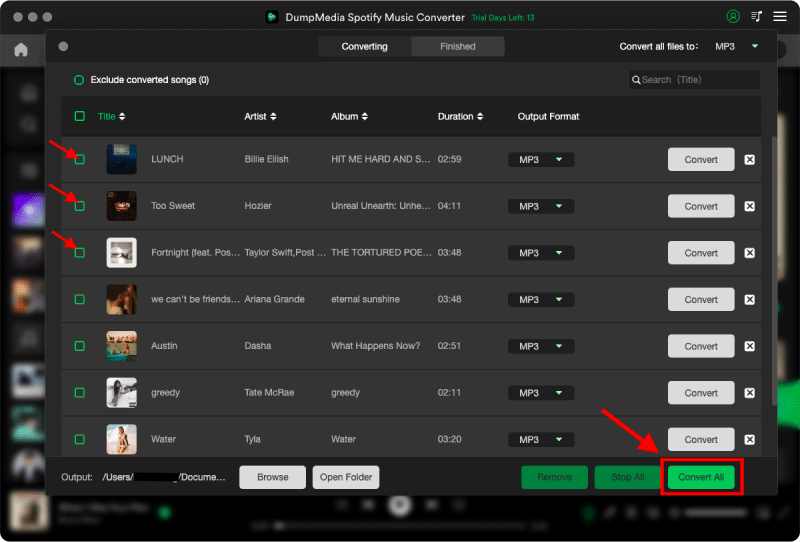
Step 3: Proceed with Conversion By Ticking The Convert Button
The last step would be hitting the “Convert ” button to begin the conversion process. This will only take some time since the program is designed to function five times faster than any other converters. While conversion is being done, status bars will be shown in the screen wherein you can monitor the progress of the process for each song.
By simply performing the above steps, you can have all those Spotify songs downloaded and saved on your personal computer, the next thing you need to do is to identify the steps needed in order to finally how to transfer music to Fitbit Ionic.
Transfer Downloaded Music to Fitbit Ionic
In order for you to proceed with the transfer, apart from having the downloaded songs with you, you would also need the Fitbit application installed on your personal computer. Once you have it installed, you can now head onto the steps below.
- Create a playlist on iTunes or Windows Media Player.
- Open your Fitbit application.
- Perform the importing and transferring of songs.
Here are the steps in detail.
Step 1: Create A Playlist On iTunes or Windows Media Player
The first thing you need to do is to create a playlist either on your iTunes account or in Windows Media Player. If you have decided to use iTunes instead, you have to ensure that the application to share playlists with your Fitbit Ionic.
You can do this by heading to the “Edit” button followed by hitting the “Preferences ” tab, “Advanced ”, and then hitting the “Share iTunes Library XML with other applications ” button before finally ticking the “OK” option.
Step 2: Open Your Fitbit Application
As mentioned, you need to have the Fitbit application installed on your personal computer. Open and launch it and make sure to create your own account which you will be using during the transfer of songs.
Step 3: Perform The Importing and Transferring Of Songs
Once you have logged on, you can now proceed with the importing of downloaded songs on the playlist created. Just make sure that both your personal computer and Fitbit Ionic have been connected to the same WiFi network. The importing of songs will be done by clicking the “Account ” icon on your Fitbit application, “Ionic File ” then click “Media ” followed by “Personal Music ”.
Now, you need to open your Fitbit Ionic’s music app and then tap “Transfer Music” to finish. After some time, the playlist would be visible on your Fitbit Ionic watch.

Part 3: Summing It All
The steps needed in order to how to transfer music to Fitbit Ionic watch has been explained in full in this post. Apart from this, you also learned about a tool capable of downloading songs directly from the Spotify application.
Have you tried doing this on your Fitbit Ionic watch? What was your experience?

30% Off >>>