


How to Download Music To iPhone in 2025
Listening to music anytime and anywhere you are is surely an amazing thing for most people especially if you are traveling or you do not have anything to do in a certain period. Being able to play and stream your favorite songs on any gadget you have most especially on your iPhone gadget is very relaxing.
But, how are you to listen if you do not have any songs stored on your iPhone? No need to worry about this much as we have created this post for you to easily download music to your iPhone.
If you are an iPhone user for a long period, you are surely using your iTunes application to be able to listen to several songs. However, you should also be aware that for you to experience an uninterrupted listening feeling, you would be needing to pay some subscription fee. If you cannot pay for such an amount, then looking for ways to finally save and download music and songs to your iPhone device will be the answer to your problem.
Let us now start with the solutions.
Contents Guide Part 1. How to Download Music To iPhone Using iTunesPart 2. How to Download Music To iPhone Using Dr. Fone - Transfer (iOS)Part 3. Additional Tip: Convert Apple Music to Other FormatPart 4. In Summary
Part 1. How to Download Music To iPhone Using iTunes
iTunes has been a great music streaming service alongside with Spotify, Amazon Music, Tidal, and many more. And, if you got an iPhone, you surely have this on your device. This is an application you can download for free from the Apple Store. Do you know that you can have songs downloaded to your device by using this application?
Check out these steps you would need to follow to proceed.
- Make sure to launch iTunes and connect your iPhone.
- Select any songs you wanted to download.
- Enjoy the songs downloaded to your iPhone.
Below are the details of each step initially mentioned.
Step 1. Make Sure To Launch iTunes And Connect Your iPhone
The first step that you would need to do is to make sure that the iTunes application has been launched and your iPhone device has been connected to your personal computer properly through the use of a USB cable. Once your iPhone has been detected by your personal computer, you can just tick the name of it and head to its “Music” tab.
Step 2. Select Any Songs You Wanted To Download
Once you have arrived on the “Music” tab, you would need to hit the “Sync Music” option. You can do this by ticking the checkbox alongside the “Sync Music” option. In this step, you can also freely select all the playlists, songs, genres, albums, artists, and more by hitting all the checkboxes as well.
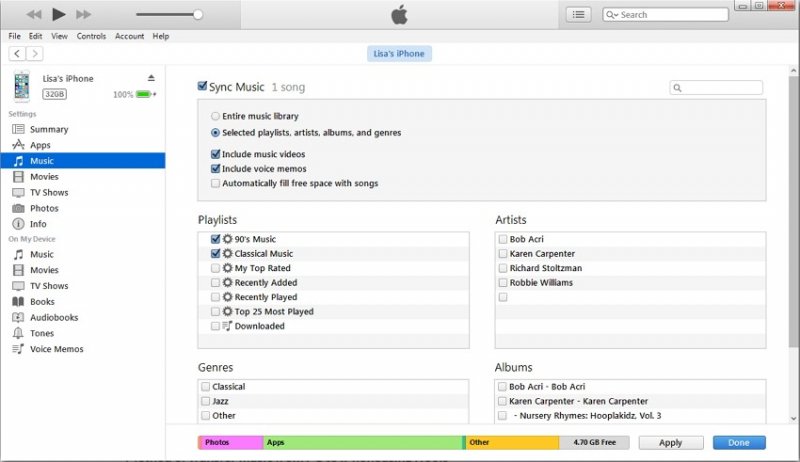
Once you are done with the selection, you can just hit the “Apply” button which you can immediately see at the bottom right corner of the screen. Once you have hit this button, all the songs you have selected from your iTunes library will now be saved and synced on your iPhone.
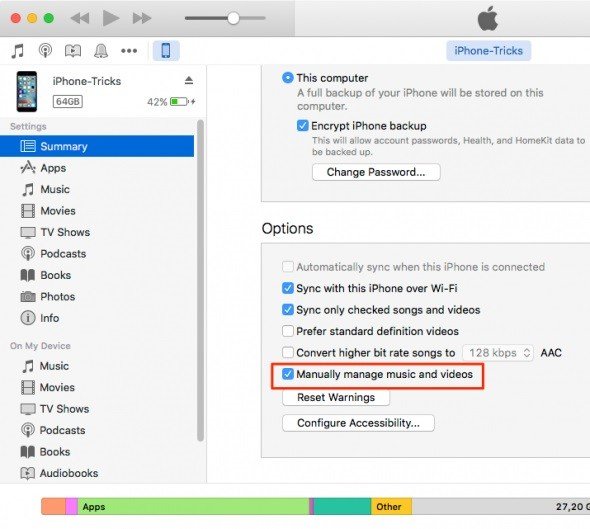
If you are not aware, you also have the option of manually selecting and transferring songs from your library to your iPhone. You can do this by heading to the “Summary” tab which is at the left portion of the screen.
By clicking this, you will be seeing more options. Make sure to check the box with the option “Manually manage music and videos”. The next thing you would need to do is to manually perform the dragging and dropping of songs you prefer to transfer from your library to your iPhone device.
Step 3. Enjoy The Songs Downloaded To Your iPhone
Finally, upon performing all the steps, you can now enjoy all the songs you have downloaded on your iPhone device anywhere and anytime you want.
Upon knowing one way to sync and download songs to your iPhone, we will now be heading to another.
Part 2. How to Download Music To iPhone Using Dr. fone - Transfer (iOS)
dr. fone - Transfer (iOS) is an application that is capable of transferring not only music or songs but as well as files, contacts, videos, messages, photos, and a lot more from your personal computer to your iPhone device.
This has a very easy and user-friendly interface which makes it easier to navigate and control. And, what is good about this is that if you do not have the iTunes application on your computer, you can fully make use of this as an alternative. You just need to have the following steps completed.
- Download and install the Dr. Fone - Transfer (iOS) application.
- Open the application and head to the “Music” tab to select songs.
- Import the songs that were chosen.
Now, let us explain each in detail.
Step 1. Download And Install The dr. fone - Transfer (iOS) Application
You would need to ensure that the dr. fone - Transfer (iOS) application will be downloaded and installed on your device. Alongside this, you need to ensure that your iPhone has been properly connected to your computer for the successful downloading of songs.
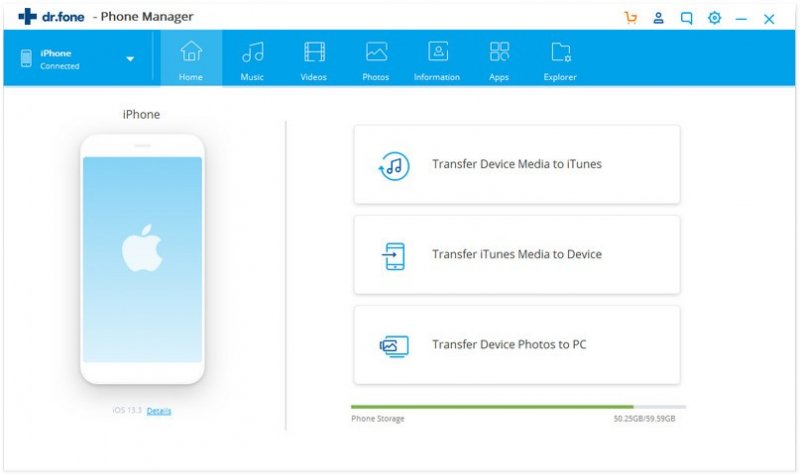
Step 2. Open The Application And Head To The “Music” Tab To Select Songs
The next thing that you need to accomplish is to open the application and head to the “Music” tab which you can immediately notice at the left-most part of the interface. Just make sure to click on this tab to be able to see all those songs which are stored on your device.
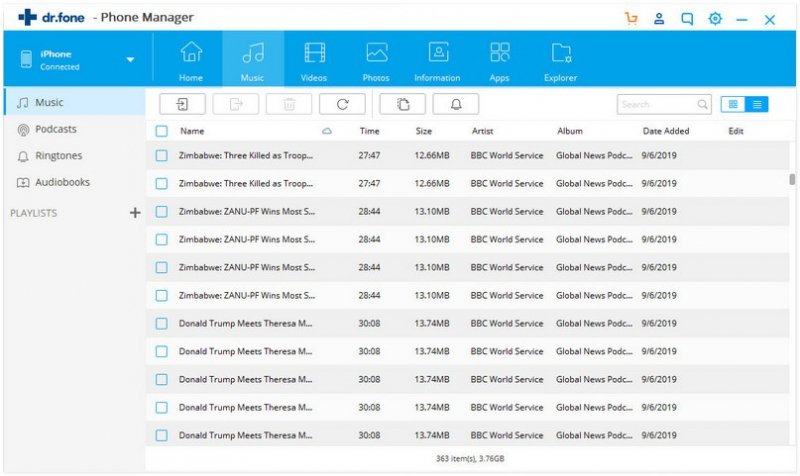
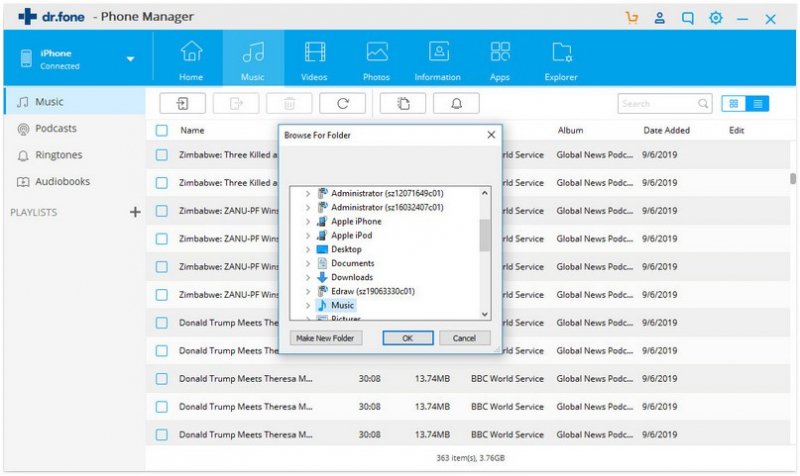
Step 3. Import The Songs Chosen
Now that you have completed the first two steps, we can now proceed with the importing process. You can do this by clicking the “Import” icon which is located at the top area of the toolbar. You can choose whether you will be adding a file or even a folder. Once you have selected one, a new popup window will be shown and you would need to choose a specific folder or file to be loaded on your iPhone.
Upon presenting ways on how you can download music to your iPhone device, we also wanted to impart some additional tips. This a tip that you can make use of to be able to transform and download your most loved Apple Music songs to any format your desire. Now, if you are on the look, the next portion would be beneficial to you.
Part 3. Additional Tip: Convert Apple Music to Other Format
There are many software applications that you can find on the web which are capable of converting Apple music songs from one form to another. In this portion, an amazing professional converter, the DumpMedia Apple Music Converter will be tackled. This tool is not just for downloading songs to the iPhone.
This is very much helpful since it can convert your favorite Apple Music songs to any format supported and even remove the DRM (Digital Rights Management) protection for you to be able to share your most loved songs with others.
Let us now take a look at how you can use this DumpMedia Apple Music Converter to enjoy Apple Music songs anytime and anywhere you want to.
Step 1. Download and install DumpMedia Apple Music Converter.
Step 2. Perform adjustments to the settings of the resulting output.
Step 3. Tick the convert button to begin the process.
Let us look into these steps in detail.
Download And Install DumpMedia Apple Music Converter
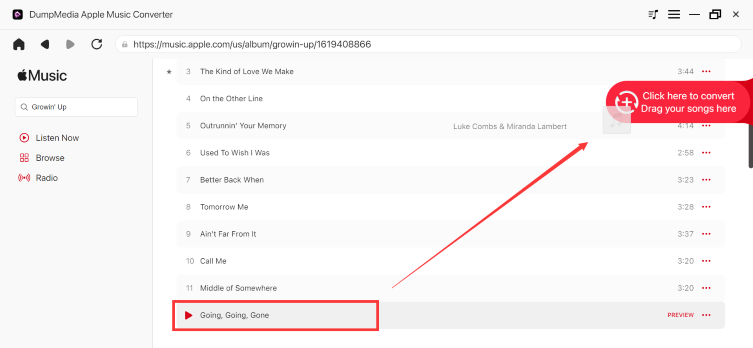
Of course, we need to ensure that DumpMedia Apple Music Converter has been downloaded and installed on your personal computer. Once installed, open, and launch the program. Once the program has been launched, iTunes will also be activated. No need to worry about this just proceed with the process. Under the “Library” menu, tick “Music” if you wanted to copy the songs you have.
Once done, you will now be seeing all the songs and playlists stored in your iTunes library. To be able to choose the songs to be downloaded and converted, you can either tick the checkboxes right next to each or make use of the search bar to easily find the specific songs you wanted to be downloaded.
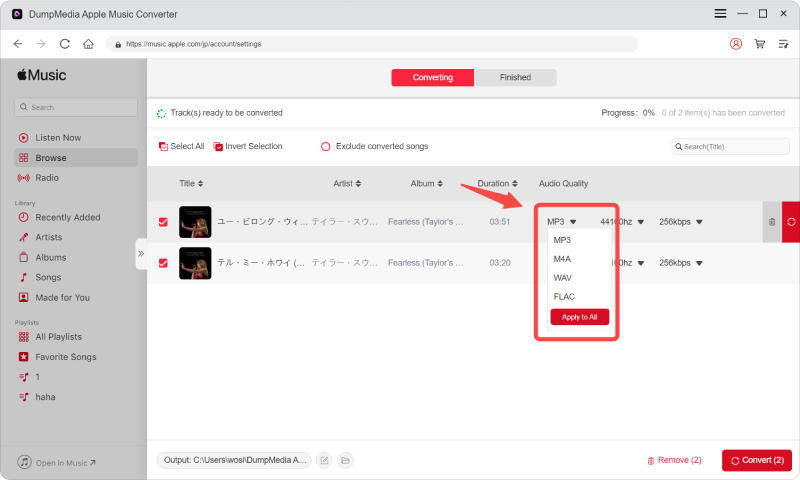
Perform Adjustments On The Settings Of The Resulting Output
The next step that should be done is to perform the adjustments on the settings of the resulting output. You can choose any format from those that would be listed. The application supports many DRM-free formats including MP3. This as well supports those in AC3, M4A, M4R, AIFF, FLAC, AU, and even MKA format. Selecting any of those formats you prefer will do. The tool will also allow you to change other options such as the bit rate and sample rate. You can as well perform the renaming of the resulting file. In this step, you would also need to specify the output path or the target location wherein the files will be saved.
Tick The Convert Button To Begin The Process
Upon completing all the adjustments wanted for personalization or customization, the final step would now be the conversion process. You can just hit the “Convert” button which is located at the bottom right corner of the screen.

Part 4. In Summary
Now, you got to learn the ideas and options wherein you can choose from to finally download music to your iPhone. Well, everyone will agree that an iPhone without music and songs in it is boring. Aside from the options, you also got to learn about an amazing software application that can convert any Apple music songs to several formats – the DumpMedia Apple Music Converter.
What else would you look for?

30% Off >>>