


How to Add Family to Apple Music in 2026
Sharing is indeed caring. For Apple Music enthusiasts, that saying is very fitting. With the Family Sharing plan of Apple Music, it’s pretty obvious that the concept is not just about sharing but caring as well.
The Family Sharing of Apple Music allows you to share iTunes and iBook with a group of six people. That could be six people in your family. You guys don’t have to end up sharing accounts. So, if you’re eager to share with people you love, it’s best to add family to Apple Music. This article will show you how to that.
Contents Guide Part 1. The Practicality of Adding Family to Apple Music Part 2. How to Use Family Sharing to Add Family to Apple Music Part 3. An Alternative to The Family Sharing of Apple MusicPart 4. Conclusion
Part 1. The Practicality of Adding Family to Apple Music
The unique thing about it is that the family organizer of the account approves and pays for the family purchases. Aside from sharing purchases, the Family Sharing of Apple Music allows all of you to share locations, photos, calendars, and reminders.
In terms of cost, Family Sharing is more practical. For about fifteen dollars a month, six people in the family can share and use Apple Music. It’s a lot more practical to sign up on the family plan than on an individual plan. With the family plan, you get to control the purchases of the kids since it would have to be approved first.
These limitations aren’t possible if everybody in the family is on an individual plan. You would be spending more. Even worse, you would have no idea what the kids are purchasing. The Family Sharing of Apple Music is better and no doubt, safer.
Part 2. How to Use Family Sharing to Add Family to Apple Music
If you’re keen on using the family sharing of Apple Music, you need to use iCloud first. The steps below show how you can set up family sharing.
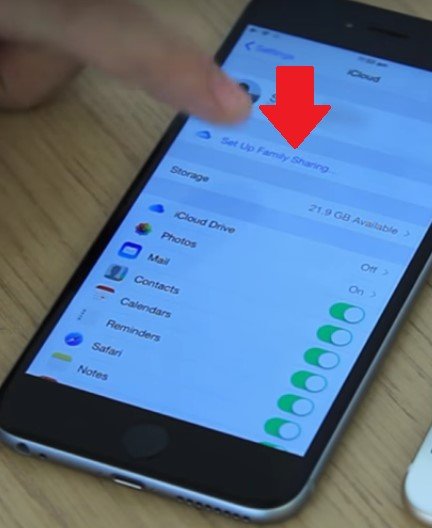
Step 1. Open iCloud
Go to settings and open iCloud. You will see Set up Family Sharing. Tap on it. You will be on directed to the next window, the Family Sharing window. Here, you can tap on Get Started.
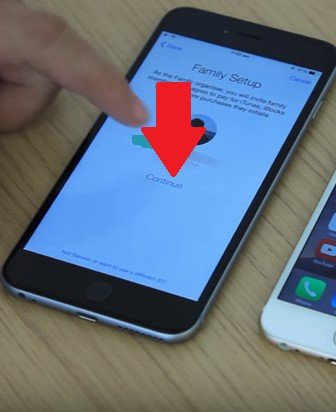
Step 2. Set up Organizer
As an organizer of the Family sharing account, click on the Continue tab to go on. You will be brought to another window to allow share purchases, Click on Continue on the next windows. These are just confirmations that you will be sharing purchases, locations, and other stuff.
Step 3. Add Family to Apple Music
After confirming what you want to share on Family Sharing, you can now add family to Apple Music. There are two ways to do this. You can either have the person you’re adding to Apple Music to add a password or you can send an invitation. These two options will show up on the Add Family Member screen. Click on which one you prefer.

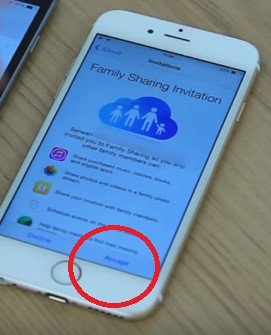
Step 4. Accept Invitation
If you sent out an invitation, you can accept it by going back to iCloud. You will see Invitations there. Click on it to get on the next page where you can click on the Accept button. If you want to add another family member, simply click on the Add Family Member.
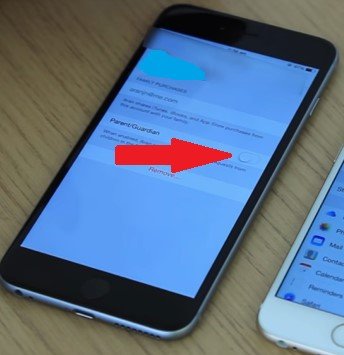
Step 5. Enable Parent/Guardian
If you’re a parent and you want to see all the purchases under the account, enable the Parent/Guardian option. You can do this by clicking on your profile of your kids. There you will find the Parent/Guardian button that you can enable. Go to App Store and tap on Updates. You will see a Purchase button on the bottom part of the screen. Tap on this button to see the purchases of every family member.
Part 3. An Alternative to The Family Sharing of Apple Music
The Family Sharing of Apple Music is, no doubt, more practical. The question is, what if you don’t want to spend? Or maybe you just want to settle for the individual plan? Do sharing and caring to have to stop? Of course not.
The DumpMedia Apple Music Converter is an alternative for you if, in case, you don’t want to go for the Family Sharing feature of Apple Music. It is a professional tool that allows you to download music and audiobooks so that you could share with more than just six people. It removes DRM protection. The steps below will show you how you can use the DumpMedia Apple Music Converter to share music with people you care for the most.
Step 1. Download and install the DumpMedia Apple Music Converter.
Step 2. Add whatever it is you want to share.
Step 3. Choose a file format.
Step 4. Convert, download, and share.
Continue reading to see how the DumpMedia Apple Music Converter can be used as an alternative.
Step 1. Download and Install the DumpMedia Apple Music Converter
You can download the DumpMedia Apple Music Converter on their website or you can just click on this link to get there. When the DumpMedia Apple Music Converter is downloaded on your computer, install and open it.
Step 2. Add Whatever It Is You Want to Share
When you open the DumpMedia Apple Music Converter on your computer, you will see everything you have in your playlist on the left panel of the screen. That means you don’t have to open any more files on your computer. You can find any files that you want to share on the DumpMedia Apple Music Converter.
Just click on what you want to share so that it comes out on the main screen. For example, you want to click on music, just click on Music for it to come out on the main screen. Then check the music you want to share on the main screen.

Step 3. Choose a File Format
You can choose a file format underneath the Output Setting. Take your cursor to this area to choose a file format. If you click on the field that corresponds to Output Format, you will find a list of formats. Then click on the field that corresponds to Output Path to set a location to save your file.
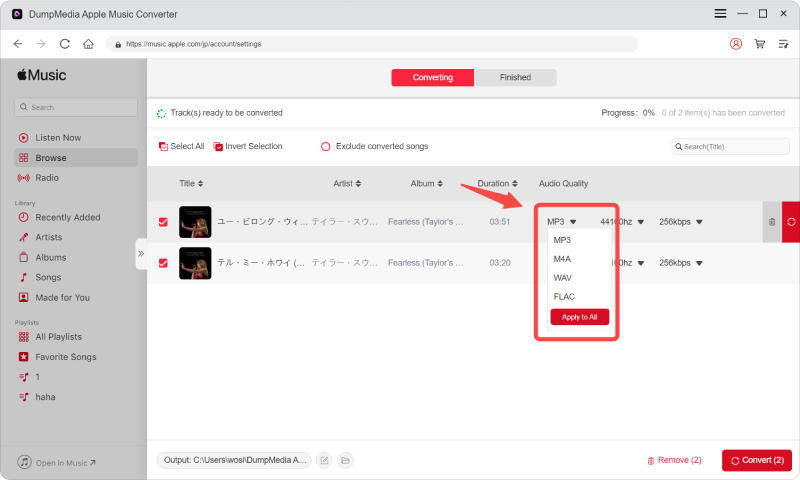
Step 4. Convert, Download, and Share
Click on the Convert button to start downloading. Once the downloading is done, you can check out the file on the location you’ve saved it in. From there, you can transfer the file easily. Since the DRM is stripped off by the DumpMedia Apple Music Converter, it will be very easy to transfer and share the file.

Part 4. Conclusion
There you have it. You now have two options. You can opt for the Family Sharing or the DumpMedia Apple Music Converter. Whatever you choose between the two, you will still be able to share with your family members files that are worth sharing.
How do you share your files? Feel free to share some of your tricks with our readers.

30% Off >>>