


How to Posting Youtube Videos on Instagram [2026 Guide]
A lot of people love YouTube. Every day, the amount of videos that are being uploaded to YouTube is simply unimaginable. As the second largest search engine in the world, YouTube is a very reliable source for people with hobbies, even professionals due to the variety of videos found in it. Not to mention the entertainment that YouTube provides us.
With all that being said, have you ever wished you could post a YouTube video you like on Instagram and share it? It may be a video about Beauty Tips, a DIY guide, or even just a simple video that can make someone smile. Some of those videos may also be fit for your Instagram audience.
Contents GuideStep-By-Step Guide for Posting YouTube Videos on InstagramImportant Note
Step-By-Step Guide for Posting YouTube Videos on Instagram
For most people, sharing or posting YouTube videos on Instagram can be very difficult and tricky. Others consider it impossible. But there is a way. It can be very tricky but it’s possible. You just have to go through a step-by-step process. Some of these steps may and will require you to be focus and patient on downloading and editing the video files you want to post on your Instagram.
Step 1: Downloading the video file from YouTube
For you to post and share a YouTube video on Instagram, first you need to download the video that you want to share or post. If you have an iPhone, you can go to Appstore and get an app that downloads videos from or you can search “YouTube video downloader”. Any application that is approved by Apply and is available in Appstore will do. But please make sure that the application you want to download is active.
Start the application once you finished installing it. A lot of people know how to navigate YouTube and you, of course, are familiar with it. You just search for a video that you want to download. Choose one from the search results and it would start to play automatically. You will notice an icon of the app that you installed earlier as you watch the video. Most of the time, it hovers over the screen as the video starts to stream. Tap this icon and you will notice a popup that will prompt you to download the video you are currently watching.
The download may start immediately after you tap on the download icon. Sometimes, it will take you to another step that is why you need to be focus and patient. If the download does not start immediately, there could be another button for you to tap to start the download.
As long as you have an active internet connection, there’s nothing much to worry about as your video starts to download. You can even put your iPhone or iPad in sleep mode and your download will not be interrupted.
Once you finished downloading, you can find your video file within the app’s video library or in your files manager. Please be reminded that some apps automatically rename the video files that are being downloaded. So it is strongly advised that you rename or put a title that will help you recognize your file easily.
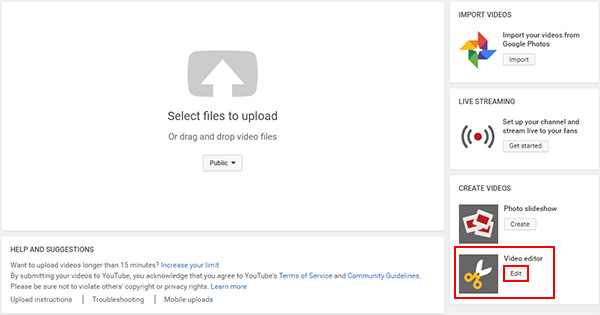
Step 2: Prepare your YouTube video (Editing and Converting)
We are all aware of Instagrams video requirements. Explicit contents are strictly prohibited by YouTube. There is also a requirement on durations and length of the video. Instagram only allows you to upload, post or share a one-minute video. This means that if your desired video is longer than 60 seconds or 1 minute, you need to edit and cut some parts of your YouTube video. And don’t forget that the best video format for Instagram is MP4 and MOV with H.264 Codec.
You may find it easier to change the video file extension and edit the duration of your desired video easier and simpler if you are using a PC or a Mac, than using some video editing apps that are accessible for iPhones and Android Smartphones.
Nevertheless, it is still possible to edit and convert videos directly on your iPhone or Android Smartphones. There are applications out there that have video downloader and an internal video editor and video converter for you to change the duration and the format of your video. If possible, give your video an Instagram-worthy makeover. You can add filters or add a custom cover if you want. And don’t forget to consider the video quality. You do not want to upload a low-quality content.
Final Step: Uploading the video to Instagram
The final step on sharing or posting your YouTube videos on Instagram is the easiest part of all. The video file you want to upload and post should already be on your Camera Roll. Now to upload the video, you just need to open your Instagram app, tap on the “+” button that you can find on the bottom part of the Instagram app. These steps are applicable on iPhone or Android.
Next would be to select or tap the Library option located on the bottom left of your screen. Choose the video file that you have edited and converted from your Camera Roll and then tap “Next” to share and post the YouTube video on your Instagram. Add description on your post as well as tags or hashtags and even location tags if it’s relevant. Tap the share button and you’re done! So there you have it, you have successfully posted YouTube videos on Instagram!
Important Note
Always remember that posting YouTube videos should always be for personal use only. Posting YouTube videos that you do not have permission to use on your Instagram account is not advisable. Copyright infringement is a very serious offense which may lead to terrible penalties. If you do not own the content, make sure to attribute it to the owner of the video and source the original. Remember that it is much safer to be unique and produce content specifically made for Instagram.

30% Off >>>