


This Is How You Can Save GarageBand As MP3! [2025 Guide]
How to save GarageBand as MP3? Surely, if you have been fond of using the GarageBand app, you might also be asking how to save GarageBand as MP3 files. The whole process is actually too easy to perform. In this article, we will be sharing how to save GarageBand as MP3 using your Mac computer and your iPhone.
GarageBand is a good feature for both Mac computers and iPhone devices. It’s actually a music studio that’s already built in on your Mac. With a complete sound library including instruments, guitar, and even voice presets, drummers, and more, you would surely enjoy everything you can do with GarageBand.
If you are into making music, using GarageBand would surely be a good starting point. It actually makes it easier for you to create, record, and even share your music anywhere in the world. There is no need for you to have physical instruments for the background music or sounds because GarageBand can handle that for you.
However, while using this GarageBand feature, you should know that it can only export files under one format – that is, AIFF (or Audio Interchange File Format). Before it can export files in MP3 and AAC but unfortunately, it has been moved to the higher versions. AIFF is indeed a good file format.
But there are also drawbacks that most people are worried about. Files in this format are usually big in size (would consume large storage space and can’t be shared via e-mail) which a lot of people find as a disadvantage.
Thus, music enthusiasts keep on looking for ways how to save GarageBand as MP3 files. This will also make their files playable on various and several musics and media players. So, as mentioned, we’re here to help share how to save GarageBand as MP3 files. You’ll find out immediately the step-by-step procedure as you head to the first part of this post.
Contents Guide Part 1. How to Save GarageBand as MP3 on Mac?Part 2. How to Convert GarageBand to MP3/ OGG/ WAV?Part 3. How to Save GarageBand as MP3 on iPhonePart 4. To Sum It All
Part 1. How to Save GarageBand as MP3 on Mac?
As you may have read in the introduction part, exporting to MP3 format from GarageBand is still possible as long as you have an updated version. If you do, we’ll share how to save GarageBand as MP3 files in this portion using your Mac computer.
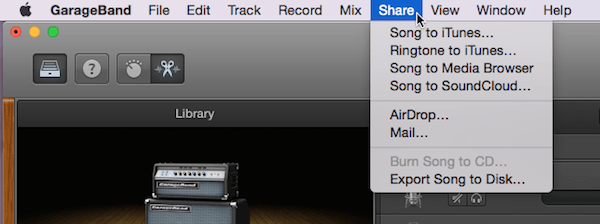
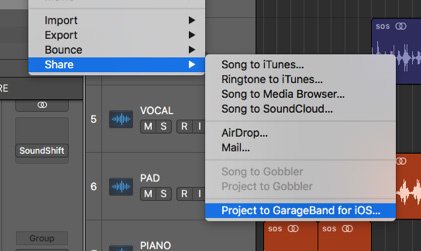
Step #1. Let’s head right away to your GarageBand project. You shall see the “Share” menu that is at the top area of your screen. Click on it to see new options.
Step #2. Now, you have to select the “Export Song to Disk…” button from the new options displayed.
Step #3. A window shall pop up on your screen. There are selections of the output format to use. You have to choose “MP3”. You can also edit the name of the song or specify where the file will be saved in this step. You’ll notice that in the song name, there will always be an extension. This is automatically added and you don’t have to do something about it.
Step #4. Just choose what audio quality you want and then just click the “Export” button.
Now that you are very well aware already of how to save GarageBand as MP3 files, we will be sharing a tip that we know will surely be helpful to you.
Tip: It is always recommended that you save your GarageBand project during the beginning of your project-making process. By doing so, you can be assured that you can return or resume editing the project in case you have an important thing to do first. To do this, just follow the below.
Step #1. Right away, in the menu bar at the top of the screen, tick the “File” button, and then from the options shown, choose the “Save As…” button.
Step #2. Define a name for your project and then choose an output folder before clicking the “Save” button.
You have to take note that this is only for saving purposes that is why you’ll see the “.band” filename extension. You can have the project saved as an MP3 file by following the steps we discussed in the previous texts.
Part 2. How to Convert GarageBand to MP3/ OGG/ WAV?
If in any case, you have encountered an issue while trying to follow the above procedure of how to save GarageBand as MP3 files or you just cannot upgrade the version, you don’t have to worry that much. There are still tools that can help you convert your GarageBand project to MP3 or any other formats that you’ll possibly like including WAV or OGG.
You can use professional applications like this DumpMedia Video Converter. This app is actually an all-in-one app that can be used as an editor, a player, and even a downloader. DumpMedia Video Converter is capable of not only transforming your video files but as well as your audio files.
It has a lot of output formats supported including MP3, OGG, and WAV. While using the app, you even have the ability to do enhancements and editing.
You can put watermarks or effects on the videos or audios as you wish. This also has an ultra-high-speed of 6x faster than other professional apps while ensuring the best output quality possible. What makes this converter appealing is that it’s simple to use and there are only a few important things you need to complete prior to the installation of the app on your computer.
To guide you, we have here the steps of how you can use the DumpMedia Video Converter to aid in the process of how to save GarageBand as MP3 files or OGG or WAV files.
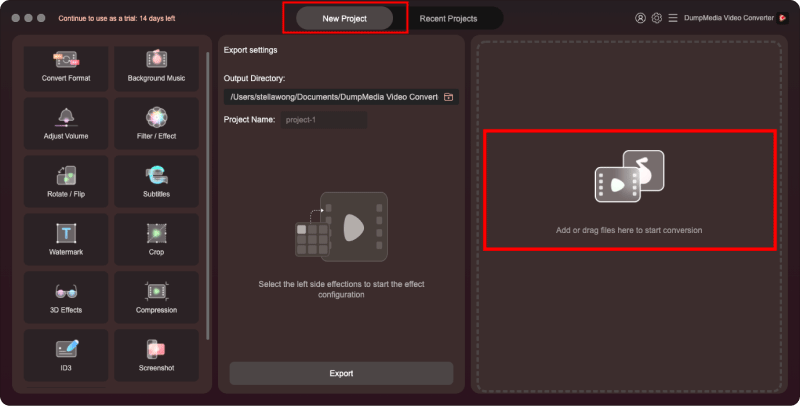
Step #1. You have to complete the things needed to install the app on your computer then you just have to launch the app afterward. Start importing the GarageBand files to be converted to MP3 or any other format by either using the “Add Files” button or just dragging and dropping the files onto the main screen of the app.
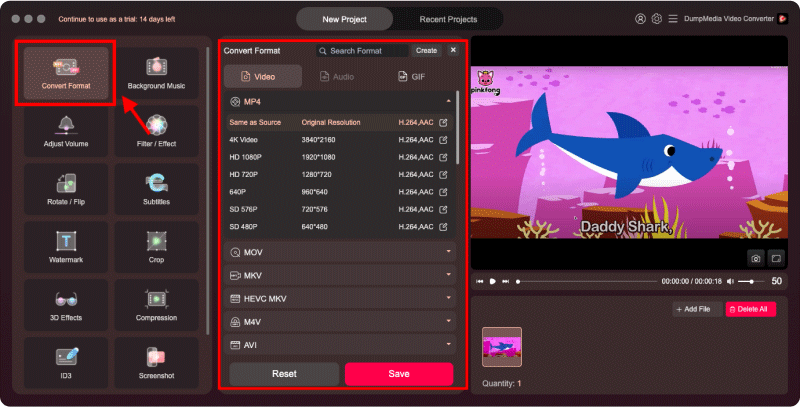
Step #2. As you hover your mouse to the “Convert All Tasks to” menu at the top area of the screen, you’ll see the output formats available wherein you can choose from. Select the format desired. You can also perform customization of the output in this step if you want to.
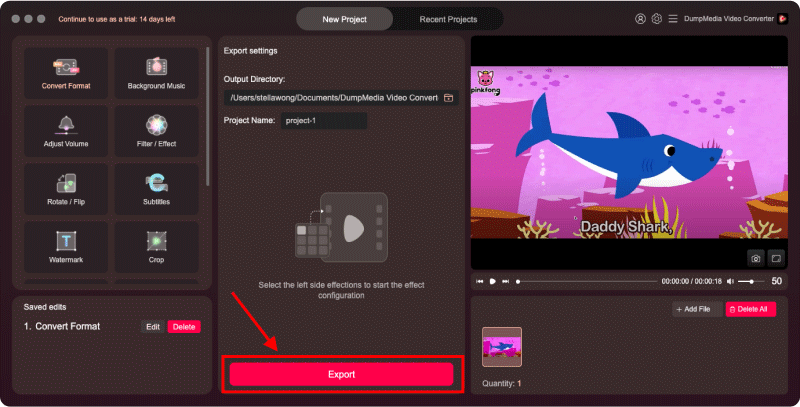
Step #3. Tap the “Convert” button and the app shall process the conversion of the files accordingly.
You just have to follow the above three steps in order to save the GarageBand files that you have in MP3 or any other formats you like. Since this professional converter works at a pretty fast speed, you shall expect that the converted files will be ready right away.
Now, you can have the files accessed or played on any device or media player or even have them shared with anyone you like since the file format is now flexible and playable on a variety of devices. The procedure of how to save GarageBand as MP3 files is too easy using the DumpMedia Video Converter, right?
Part 3. How to Save GarageBand as MP3 on iPhone
Now, this portion of the article will be discussing more how to save GarageBand as MP3 files using your iPhone. As mentioned in the first part, GarageBand is as well supported by iPhone so you can also have the files saved using your iPhone device. Actually, we will be talking about two methods of how to save GarageBand as MP3 files using an iPhone in this section.
Method #1. Use GarageBand, Files App, and The Document App
Luckily, there are lots of improvements that have been made by Apple Inc. on their iPhone models. In fact, there is already this “Files App” that you can further utilize. So, in this topic of how to save GarageBand as MP3 files using your iPhone, you will be needing the help both of the File application and the Document application. Basically, the whole process would be exporting the GarageBand files as M4A files via the “Files” app and then open in the “Document” app.
Using the built-in browser, this is where we’ll convert the M4A files to MP3 format and then download it. Of course, we have here the details for each step to help you understand further how to save GarageBand as MP3 files on your iPhone.
Step #1. You need a folder to be created under the “Files” application. By creating one, managing your GarageBand files will be much easier. You just have to take note and make sure that you will have the files stored under the “On My iPhone” storage rather than on your iCloud drive.
Step #2. You need to tick the “three-dot” icon and from the options shown, just choose the “Select” button.
Step #3. Choose which song you wish to share. You need to click the “Share” icon to start sharing the file. It’s located at the bottom left area.
Step #4. Choose “Open In..” and then select “Document”.
Step #5. As mentioned, there is a built-in browser in the “Document” app. Use that and just try visiting or using trusted online converters.
Step #6. Now, using a converter, just upload the M4A file and then have it downloaded as an MP3 file.
The procedure of how to save GarageBand as MP3 files using your iPhone via this first method is as well so easy to follow. As stated, we will be sharing 2 methods in this portion of the article. And so, we will be presenting the next one.
Method #2. Access Your GarageBand (iOS) Using Your Computer
It would be very tedious in case you have lots of GarageBand files to process. The economical and most convenient way is to have them transferred to your computer and then save them as MP3 files. Here, you need to use the “Files” App again and this DearMob iPhone Manager.
Here are the steps of how to save GarageBand as MP3 files on your iPhone using this second method.
Step #1. Make sure to connect your iPhone to your personal computer. Once the connection has been established, just launch this DearMob iPhone Manager.
Step #2. Head to the “Files” button (located at the upper part of your screen) and then click “GarageBand”. Then, create a new folder.
Step #3. On your iPhone device, open GarageBand and tick the “three-dot” icon for you to be able to select the GarageBand project or music projects.
Step #4. You need to share the selected files to the “iOS Files app” and then choose the subfolder that you created previously in the second step.
Step #5. Turn back to your personal computer and then have it refreshed. After some time, you shall be able to see the newly GarageBand music files added.
Step #6. Just choose these files and then export them to your computer. Now that you have the files on your computer, you are free to convert them to MP3 using free converters or professional apps like this DumpMedia Video Converter. You can just follow the tutorial we have shared in the second part of how to save GarageBand as MP3 files using the app mentioned.
Part 4. To Sum It All
Overall, the procedures of how to save GarageBand as MP3 files that we shared here are so easy to perform and follow. We hope that upon reading this article, you’ll be able to have your GarageBand music projects saved under a format that you like and are comfortable with. It’s always best to seek help from professional apps like this DumpMedia Video Converter to enjoy lots of advantages and ensure greater output and results. If you have other queries about this topic, just let us know in the section below and we’ll surely get back to you!

30% Off >>>