


Best 3 Ways to Upload Spotify Music Playlist to YouTube Music
Spotify Premium is now pricier than several famous music services. With so many options for music streaming services and they may all seem similar, you’ve likely considered switching to a cheaper one, such as YouTube Music. Though audio quality on YouTube Music falls short compared to Spotify, upgrading to YouTube Music Premium, as with Spotify, removes all the ads, allows downloads, and gives you full-service features.
But, starting all over again from scratch on a different service can be annoying. Plus, Spotify and YouTube Music don’t have a native functionality to let you transfer playlists. So, that leaves you at the mercy of third-party tools to upload Spotify music playlist to YouTube Music. If you don’t want to lose all your perfectly curated playlists on Spotify after switching to YouTube Music, follow the simplest ways we have listed to transfer your Spotify playlists to YouTube Music and resume your listening!
Contents Guide Option 1. Upload Spotify Playlist to YouTube Music ManuallyOption 2. Upload Spotify Playlist to YouTube Music Online via Playlist BuddyOption 3. Upload Spotify Playlist to YouTube Music Online via TuneMyMusicConclusion
Option 1. Upload Spotify Playlist to YouTube Music Manually
Can you upload music playlists to YouTube Music? Luckily, YouTube Music allows users to upload up to 100,000 songs to their YouTube Music library. But why have people reported that they failed to upload Spotify downloads to YouTube Music? It's essential to remember that all music downloaded from Spotify is in Ogg Vorbis format with digital rights management (DRM) encryption and the upload on YouTube Music is limited to unencrypted content.
To safely upload Spotify music playlist to YouTube Music, you need a solution that can remove DRM protection from Spotify songs and convert them to YouTube Music-supported audio formats like FLAC, M4A, MP3, OGG, and WMA. Here's where DumpMedia Spotify Music Converter comes into play.
Whether you have Spotify Premium or not, DumpMedia Spotify Music Converter can help you download and convert Spotify singles, albums, playlists, and podcasts to multiple DRM-free formats, such as MP3, M4A, WAV, FLAC, AIFF, AAC, and ALAC. So you can easily manage them as safe backups, or listen to them offline using any media device you own. You can also keep Spotify music after canceling your subscription.
🏆More Highlight Features of DumpMedia:
- ✅30-day Free Trial
- ✅100% Clean. No Risk in Using
- ✅Preserve Metadata Info and ID3 Tags
- ✅Free Updates & Technical Support
- ✅Keep the Original Audio Quality
- ✅Enjoy Swift Conversions with 35x Faster Speeds
- ✅Work for Both Spotify Premium and Spotify Free Users
- ✅Access the Full Music Library from the Built-In Spotify Web Player
How to Use DumpMedia Spotify Music Converter:
How can I upload Spotify music playlist to YouTube Music manually Before adding music to YouTube Music, follow the steps below to convert music to YouTube Music-supported files using DumpMedia Spotify Music Converter.
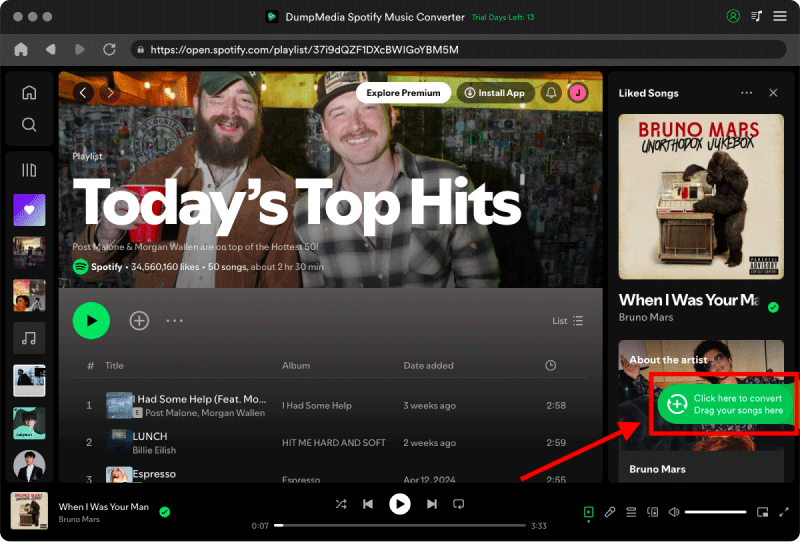
Step 1. Download and install DumpMedia Spotify Music Converter to your Mac/PC. Launch it and you will see the interface. Use your Spotify Premium/Free account to log in.
Step 2. Then, directly drag the songs or the playlists you want to upload to YouTube Music to the floating "+" icon for adding to the conversion queue to prepare for the download.
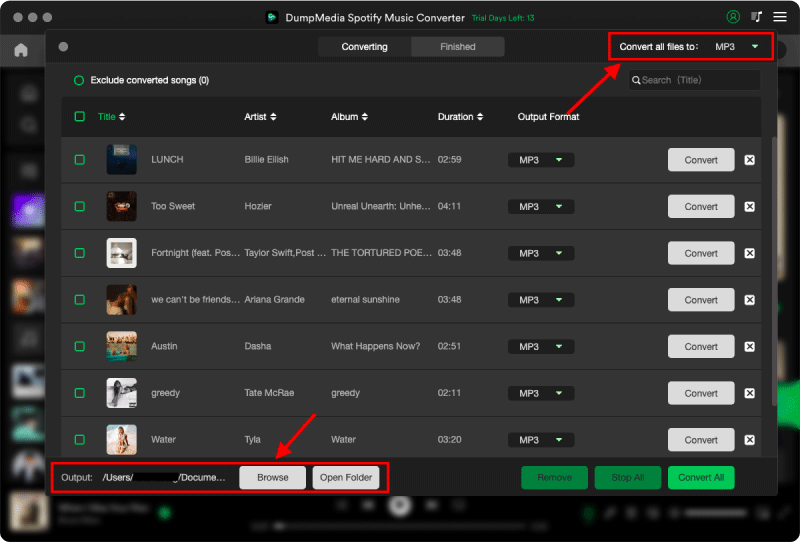
Step 3. To add Spotify songs to YouTube Music, click the Format panel to choose MP3 or FLAC as the output format. Other remaining output parameter settings can also be changed as you like.
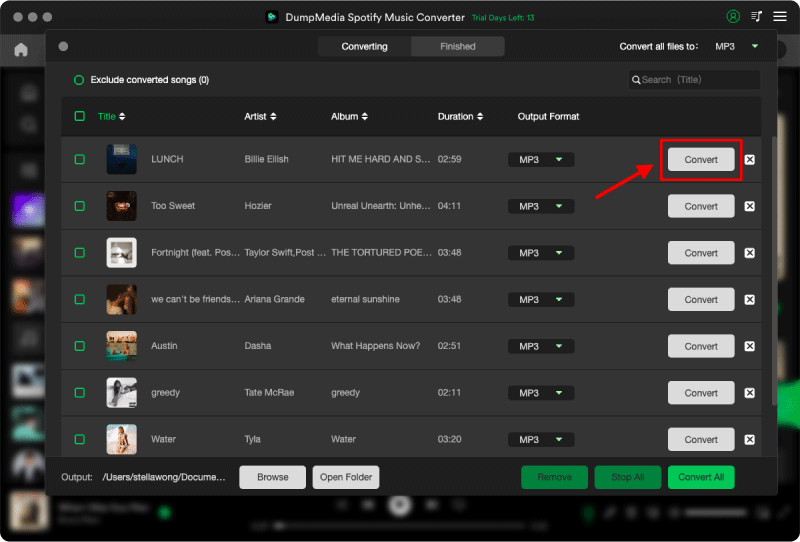
Step 4. After you have finalized everything, you can now begin converting your selected tracks by clicking the "Convert" button. Once the conversion process is complete, you can finally view your chosen track in the folder that you set earlier.
Upload Spotify Downloads to Your YouTube Music Library
After you have converted your Spotify music playlist to DRM-free files, you are all set to upload to YouTube Music. Uploading music files to YouTube Music manually is pretty straightforward. We have mentioned the steps below:
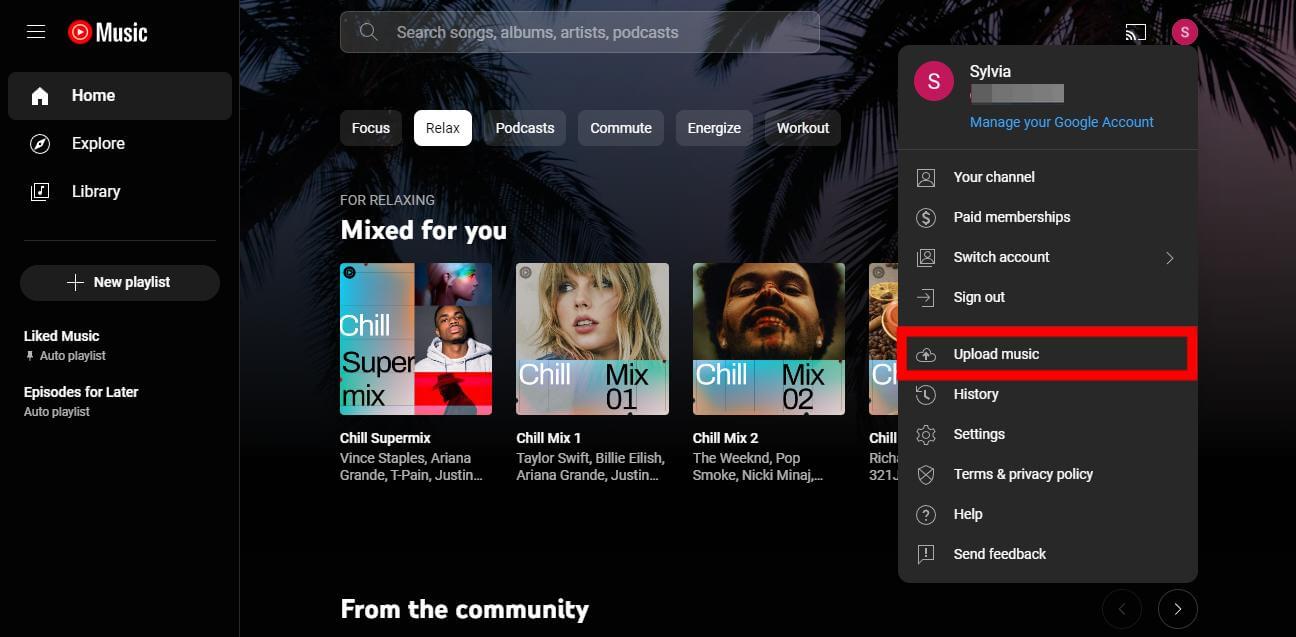
Step 1. On your computer, head to music.youtube.com. And then sign in to your account.
Step 2. Click on your profile icon on the top right-hand side of the screen. Select the "Upload Music" option.
Step 3. Now, a file browser window will open. Locate the Spotify downloads you want to upload and select it to upload.
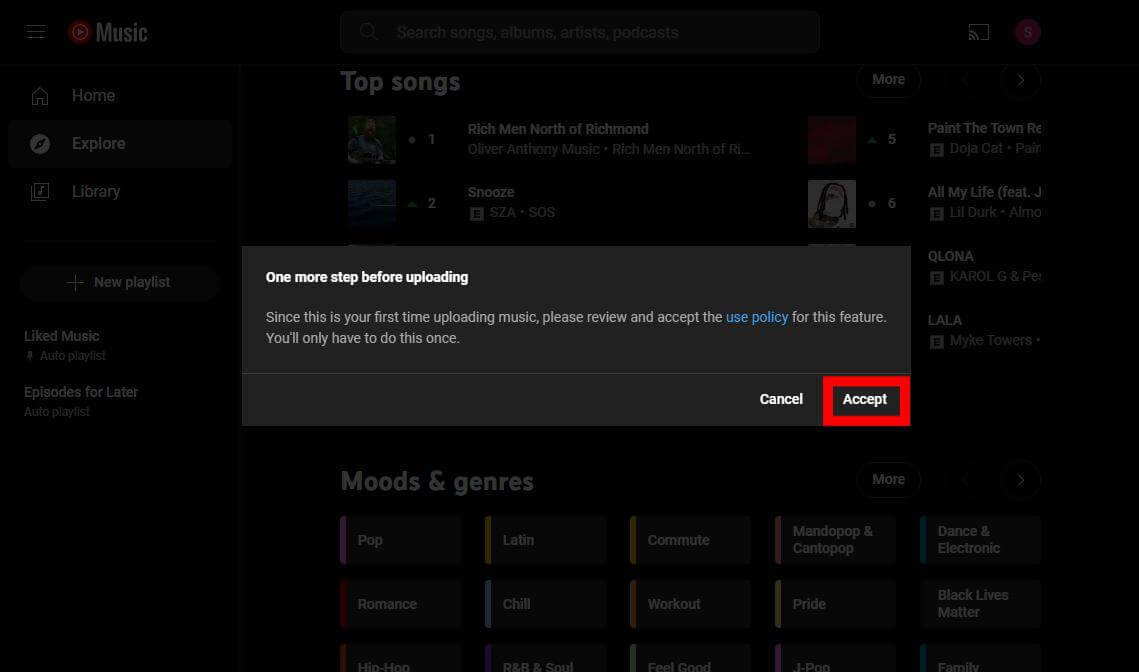
Step 4. Before uploading the songs, you need to accept the user policy of YouTube. Click on "Accept."
Step 5. You can see the progress of each file in the window. You can also cancel or pause the upload at any time by clicking on the Stop.
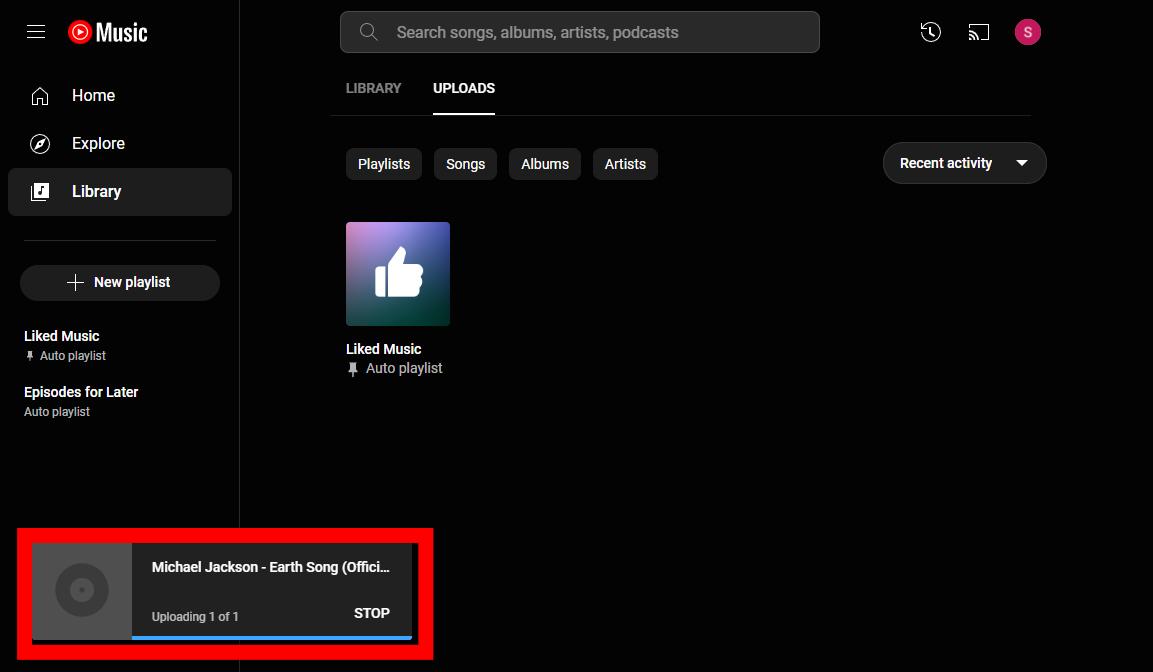
Once the upload and processing are complete, you can find your music in the Library tab under Uploads. That’s it! You have just learned how to upload Spotify music playlist to YouTube Music manually in easy steps.
Option 2. Upload Spotify Playlist to YouTube Music Online via Playlist Buddy
Playlist Buddy is one free playlist conversion app that you can use to transfer your Spotify playlists online. However, this web app only offers playlist conversions between Spotify and YouTube Music. In other words, you can’t use it with other music streaming services.
To upload Spotify music playlist to YouTube Music, follow the steps below:
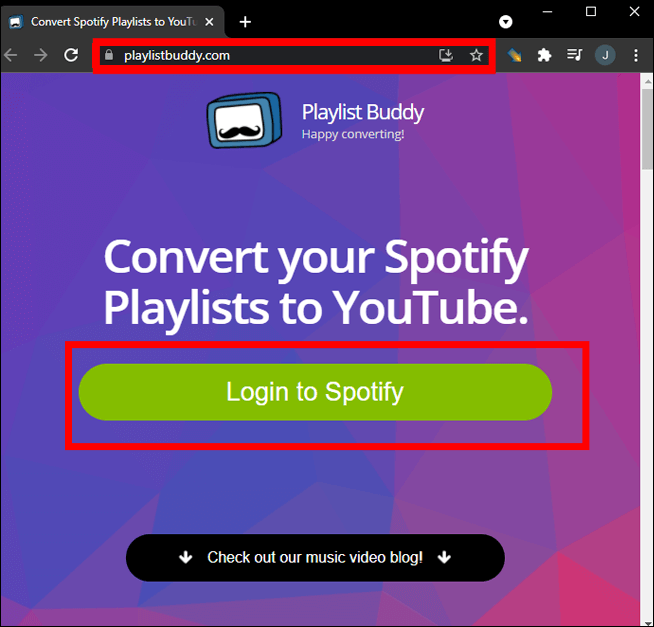
Step 1. Go to the Playlist Buddy website in your browser. Click on the Login to Spotify button.
Step 2. And then select Agree to allow Playlist Buddy to access your Spotify account data.
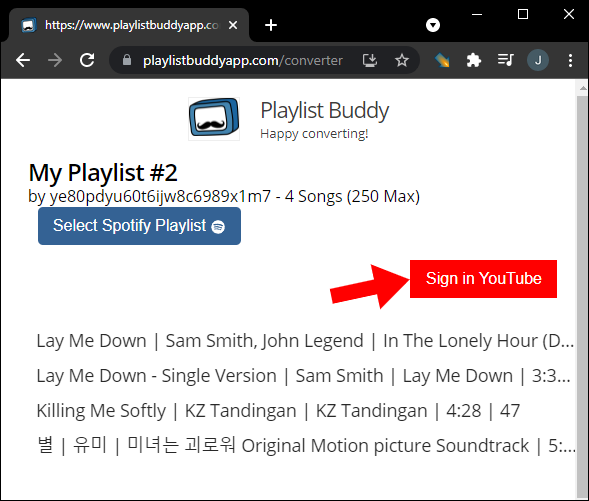
Step 3. Click the Sign in YouTube button on the right side of your screen.
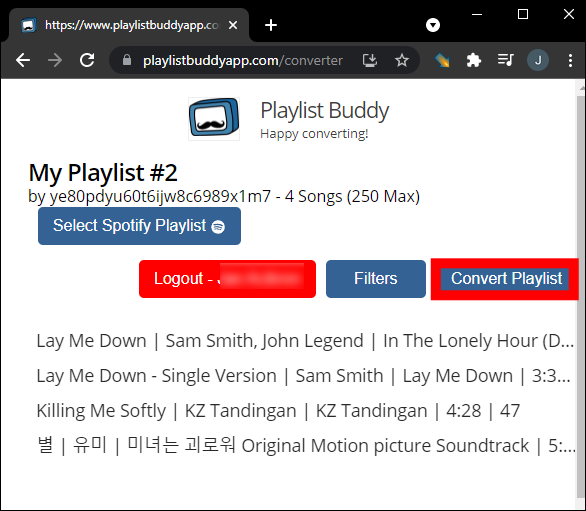
Step 4. Choose the Spotify playlist that you want to transfer on the left sidebar. elect the Convert Playlist button on the right side.
That’s all there is to it. Depending on how many tracks it contains, it will take Playlist Buddy a few minutes to transfer your playlist. While Playlist Buddy will let you know if not all tracks were transferred, it doesn't let you know which ones didn't make it. Also, remember that this third-party app limits you to up to 250 songs total per playlist, but it is free!
Option 3. Upload Spotify Playlist to YouTube Music Online via TuneMyMusic
TuneMyMusic is an entirely free service that sets itself apart by making it easy to move your Spotify playlists in batches. It also supports numerous music streaming apps, including Amazon Music, TIDAL, SoundCloud, Deezer, Apple Music, and YouTube Music. The best thing about TuneMyMusic is that you don’t need an app to execute the transfer of your Spotify playlists to YouTube Music. Instead, you can head over to your PC or mobile’s desired browser and access the web version.
You get up to 500 tracks to convert for free. However, TuneMyMusic also offers a premium option that adds unlimited conversions. To upload Spotify music playlist to YouTube Music online using TuneMyMusic, this is what you need to do:
Step 1. Go to the TuneMyMusic web app on your browser and click on the Let’s start button.
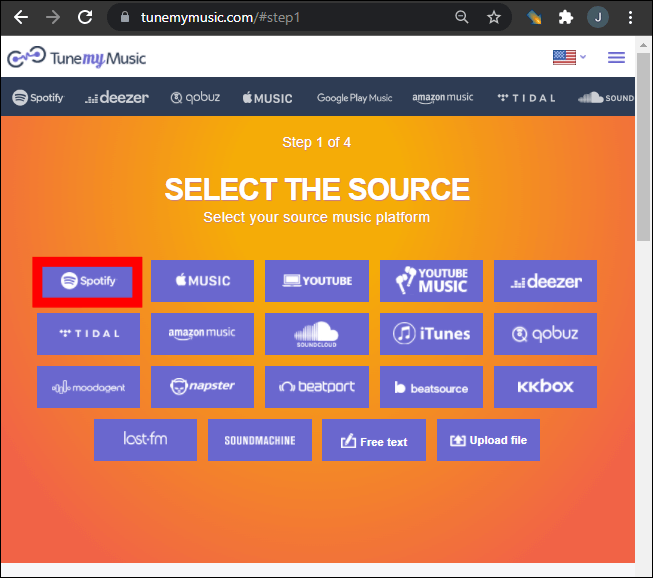
Step 2. Then, from the list of available apps, click on the Spotify icon.
Step 3. In the pop-up window, log in to your Spotify account and click on Agree to "Allow Spotify to connect to: TuneMyMusic".
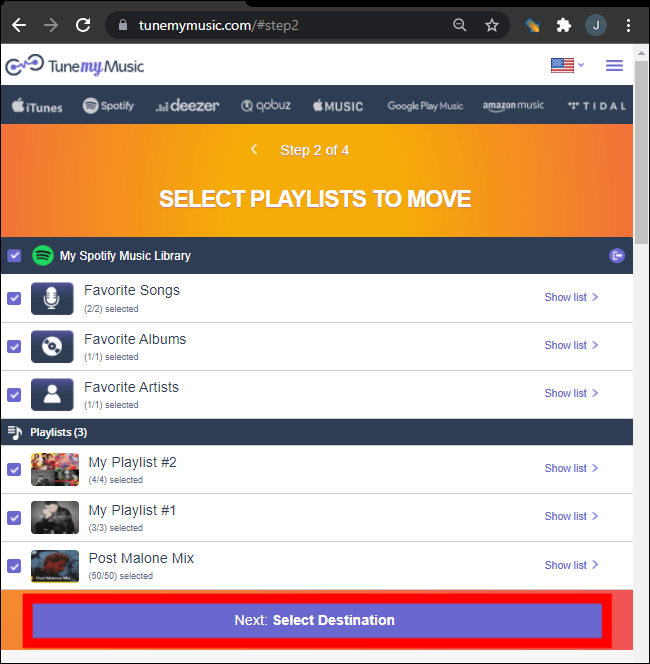
Step 4. On the next page, select Load from Spotify account or copy/paste its URL in the box provided.
Step 5. Your playlists will load up in a while. Once done, select Select Destination from the bottom and select the YouTube Music icon from the list of available icons.
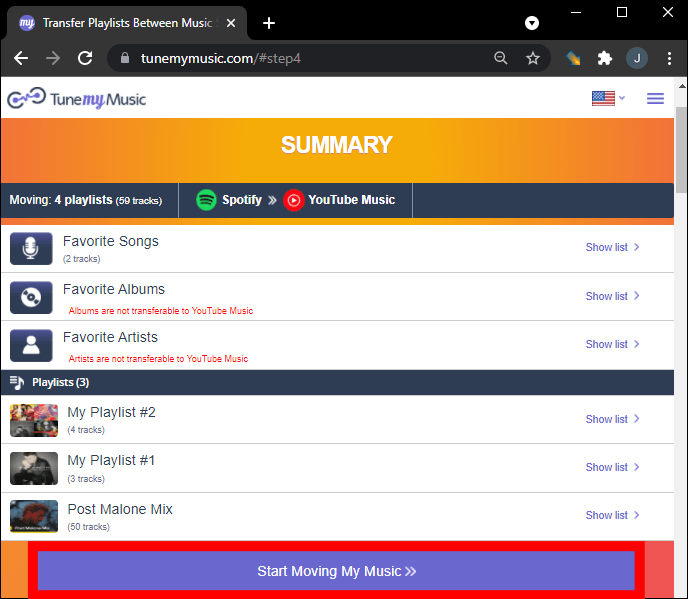
Step 6. Then, just like with Spotify, you will need to log in to your YouTube Music account. Once that’s done, hit Start Moving My Music.
And, that’s it. You can simply head over to your YouTube Music to find the transferred Spotify playlists. Note that during the transfer process, you will see some tracks being "missing". This indicates that those tracks are missing from YouTube Music’s catalog itself. This is generally rare, but when it happens, it is better to download a whole playlist using DumpMedia Spotify Music Converter and upload it to YouTube Music manually.
In addition, the transferring service like TuneMyMusic needs access to both your music accounts, which might be concerning if you never share your passwords. You should revoke third-party permissions through the settings menu on Spotify after using TuneMyMusic.
Conclusion
In conclusion, transferring your beloved Spotify playlists to YouTube Music is now easier than ever. Whether you choose DumpMedia Spotify Music Converter, Playlist Buddy, TuneMyMusic, or others, there is a method that suits your needs. With these tools at your disposal, you can effortlessly upload Spotify music playlist to YouTube Music and continue enjoying your favorite tunes on YouTube Music.
When there’s a lack of metadata in the songs you’re converting, you may find some don’t make the jump on Playlist Buddy and TuneMyMusic. Sometimes this can happen when an artist isn’t on the platform you’re moving to. If this happens, you can consider using DumpMedia Spotify Music Converter to download Spotify content as local files and then import them to YouTube Music, so you can listen to them without worrying about other transferring issues. Now, press the button below and give it a shot!

30% Off >>>