


How to Use DumpMedia Spotify Music Converter (A Complete Guide)
DumpMedia Spotify Music Converter is designed to help you convert and manage music from Spotify with ease. This user guide will walk you through the key features and basic steps, enabling you to quickly convert your favorite tracks, playlists, and audio content into common formats for flexible playback across devices.
Contents Guide Part 1. How to Activate DumpMedia Spotify Music Converter Part 2. Settings Menu in DumpMedia Spotify Music ConverterPart 3. How to Download Music in Your Preferred FormatPart 4. How to Manage Your DumpMedia AccountFAQs (Frequently Asked Questions)
Part 1. How to Activate DumpMedia Spotify Music Converter
Step 1. Install DumpMedia Spotify Music Converter
Download the installation package for your operating system (Windows or macOS). Open the downloaded file and follow the on-screen instructions to complete the installation. Once installed, launch DumpMedia Spotify Music Converter on your computer.
- (Spotify Music Converter has now been integrated into our new software, Any Music Converter. This updated program includes all the same features and more, with improved performance and compatibility. Please feel free to click the button below to download and install the software)
Common Installation Issues
- Temporarily disable antivirus software if installation is blocked.
- Ensure you download the installer from the official DumpMedia website.
- Run the installer as an administrator on Windows if needed.
Step 2. Purchase a License Key
To unlock all features and remove trial limitations, you need to purchase a license key. Go to the DumpMedia online store. Choose a subscription plan that suits your needs. Complete the purchase using the supported payment methods. After payment, the license key will be sent to your registered email address.
Step 3. Activate the License Key
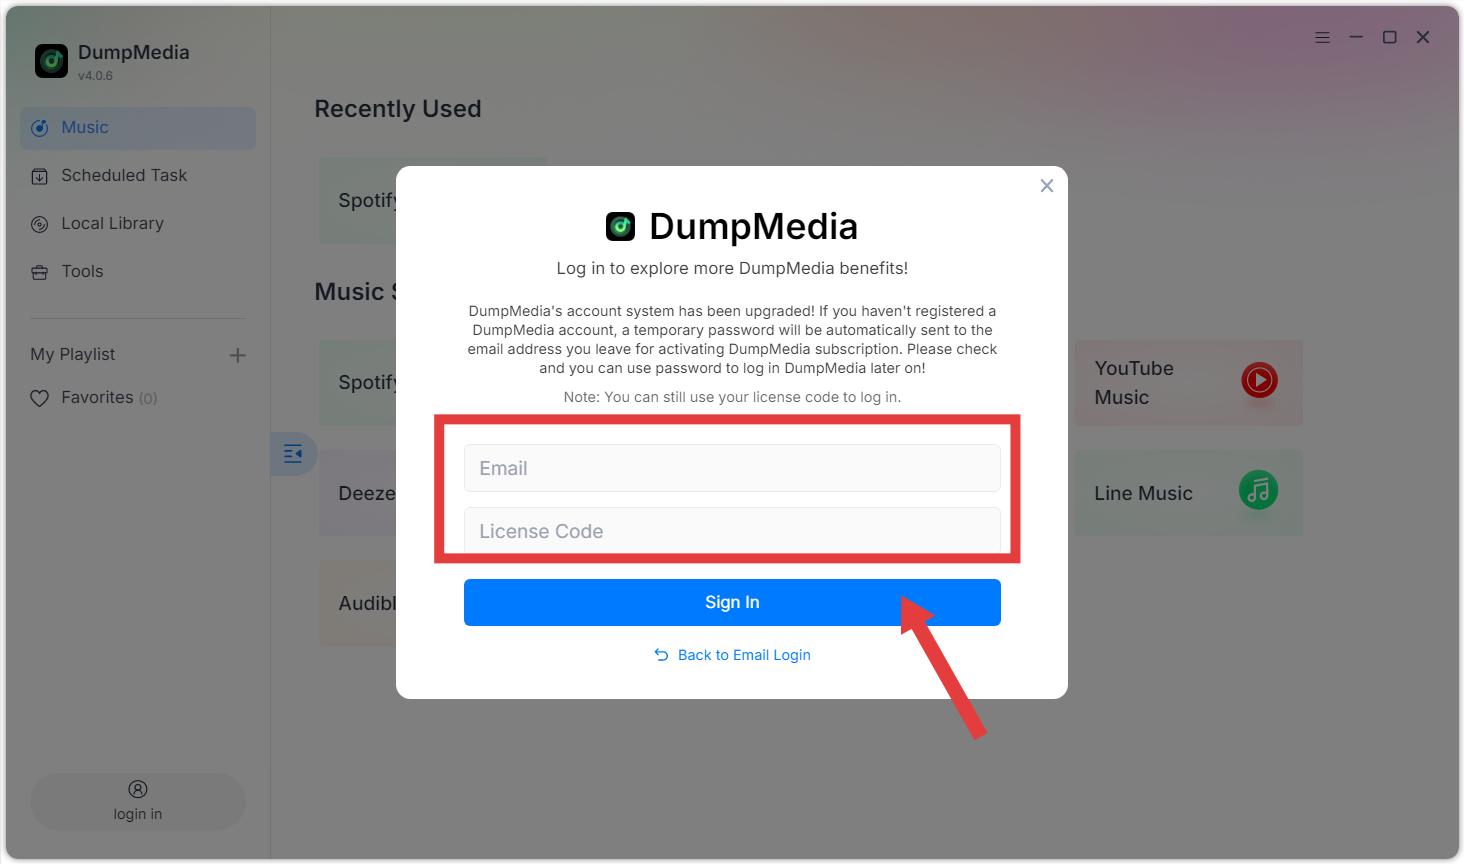
Option 1: Launch DumpMedia. Click the "login in" button or profile icon in the bottom left corner. Enter the email address and license key you used during your purchase. Click "Sign in" to complete the registration. After activation, you can download songs without any quantity limitations.
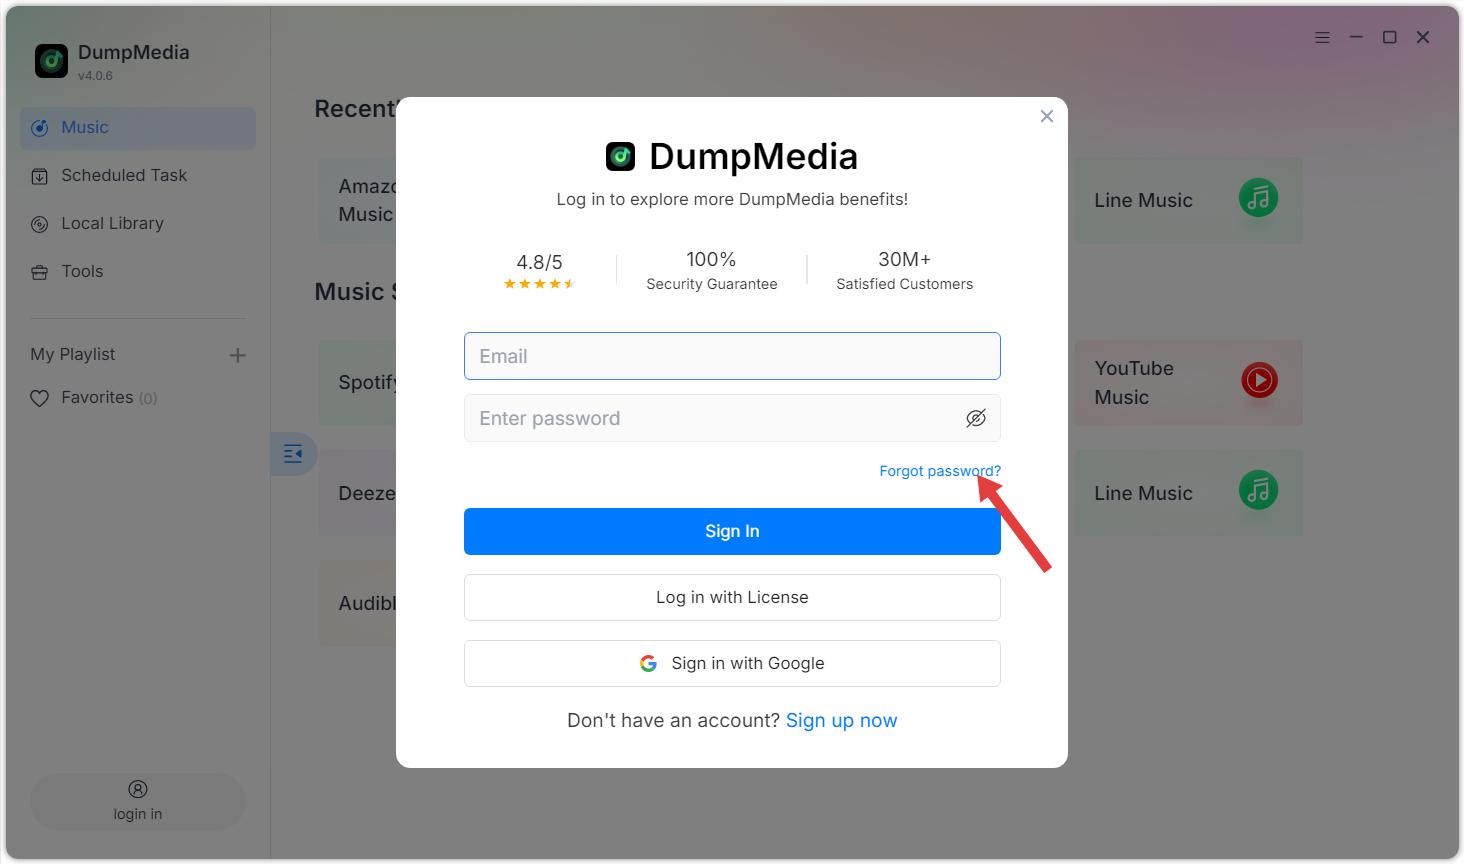
Option 2: Please enter your email address and the default password you received after purchase. If you forgot your password, click "Forgot Password" and you will be navigated to the member center to reset your password.
Additional Tips:
- The license key is only used for logging into the software and cannot be used to log into the web-based member center.
- Free Trial Limitations: With the free trial version, you can only convert 3 full songs for free from Spotify. To convert more songs, activation of the full version is required.
- DumpMedia Spotify Music Converter is a music conversion tool only. It does not provide or include memberships for Spotify Premium. Users must have their own valid Spotify free or Premium accounts.
- DumpMedia Spotify Music Converter is intended for personal, non-commercial use only. Please ensure you comply with local copyright laws and the terms of service of Spotify.
Part 2. Settings Menu in DumpMedia Spotify Music Converter
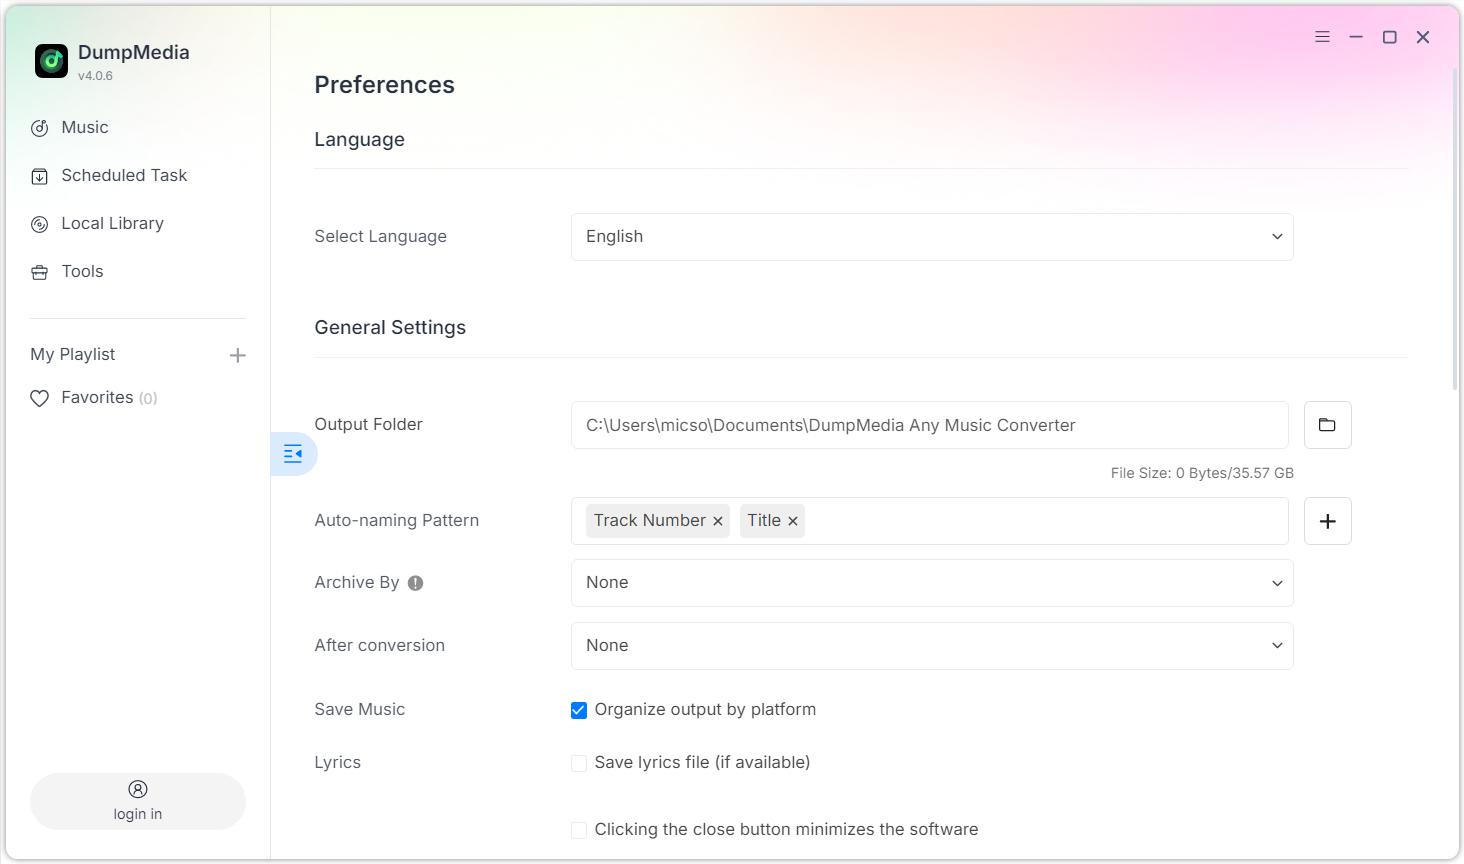
Access the Settings menu by clicking the menu icon in the top-right corner of the program. In the Settings menu, you can customize the software according to your preferences:
Settings > Preferences
- Language: Select language
- General Settings: Output Folder/Auto-naming Pattern/Archive By/After conversion/Save Music/Lyrics
- Parameter Settings: Output Format/Sample Rate (Hz)/Bitrate (Kbps)/Audible Splitter
- Network Settings: Simultaneous Download/Proxy
- Others: Pop-ups
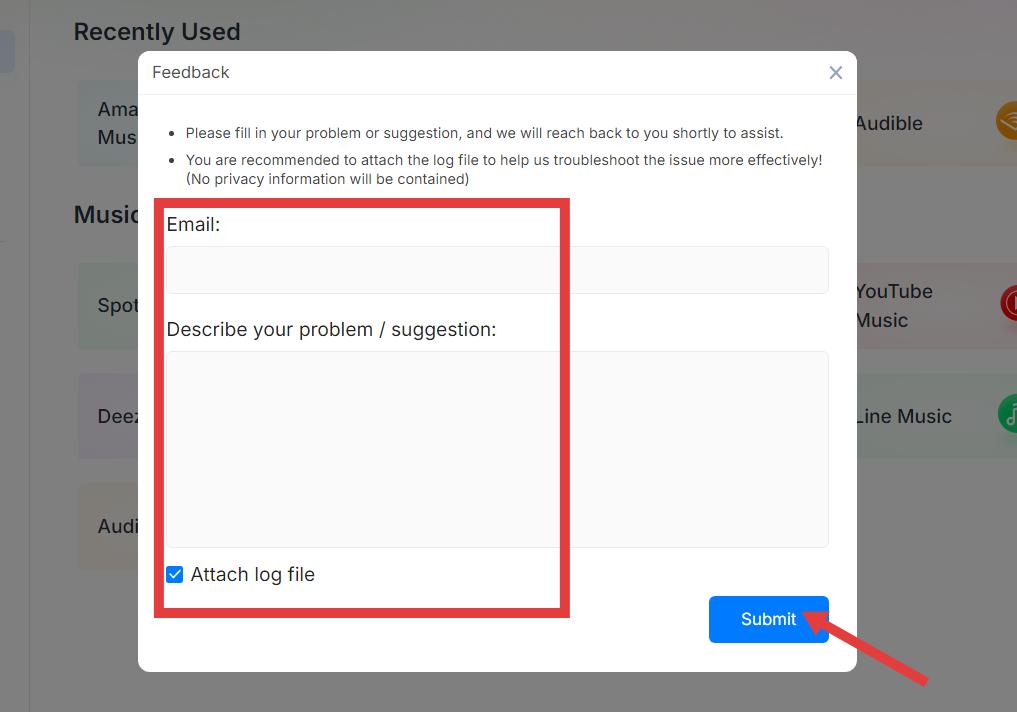
Settings > Send Feedback
You can fill in your problem or suggestion here, and we will reach back to you shortly to assist. Please attach the log file to help us troubleshoot the issue more effectively! (No privacy information will be contained).
Settings > Check Update
Please update to the new version we have released as soon as possible.
Part 3. How to Download Music in Your Preferred Format
DumpMedia Spotify Music Converter allows you to download and convert Spotify music into various formats with high quality and fast speed. Follow the steps below to get started.
Step 1. Select Spotify
Launch the software and choose Spotify from the main interface.
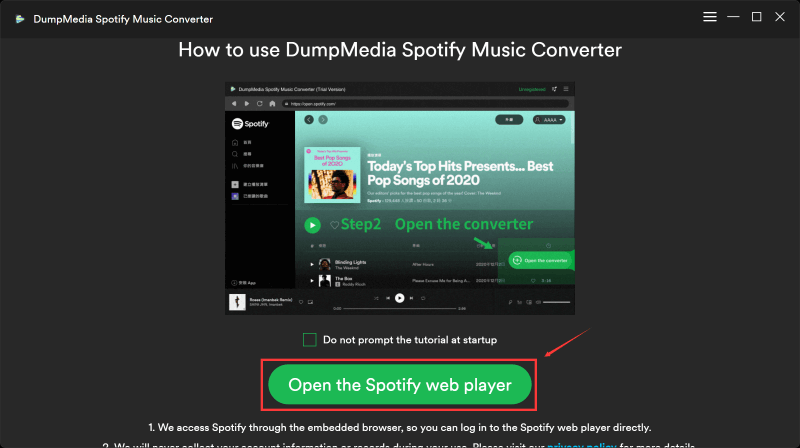
Step 2. Log in to Spotify
Log in using your own Spotify account through the built-in player.
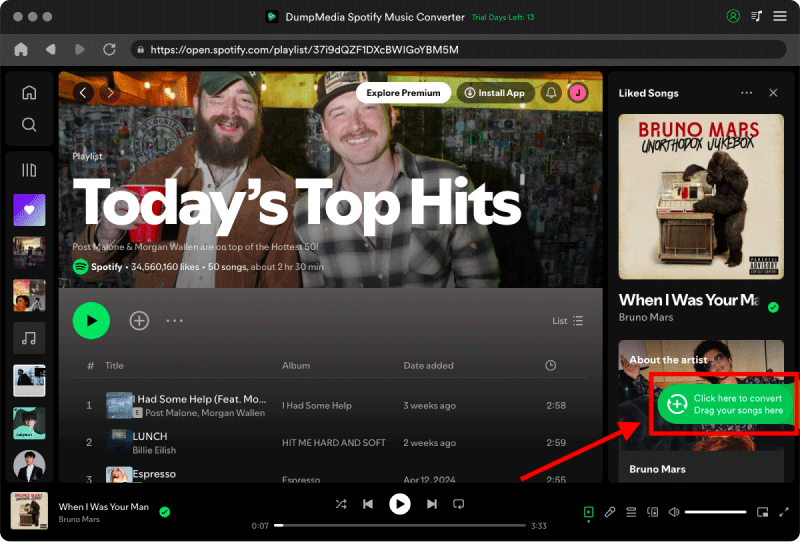
Step 3. Add Songs, Albums, or Playlists for Conversion
Browse or search for the content you want to convert. You can add songs, albums, or playlists by clicking the “Add to Convert” button or dragging them into the conversion panel.
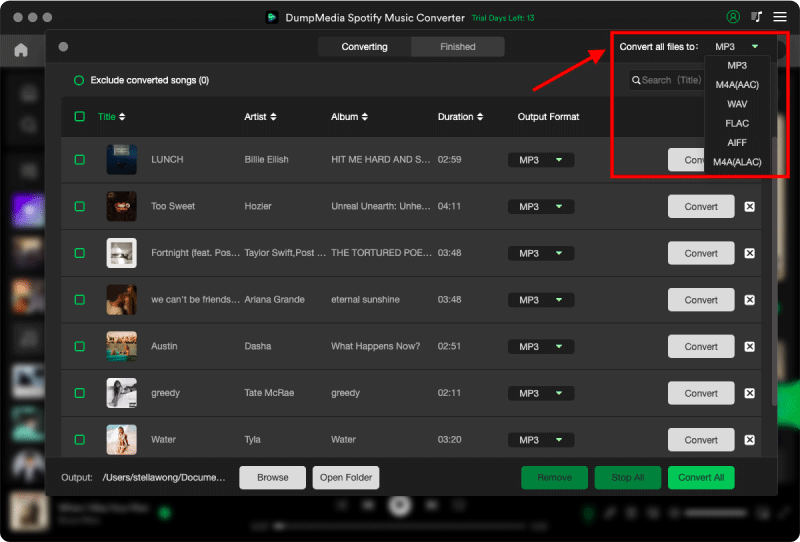
Step 4. Select Output Format
Choose your desired output format and quality settings.
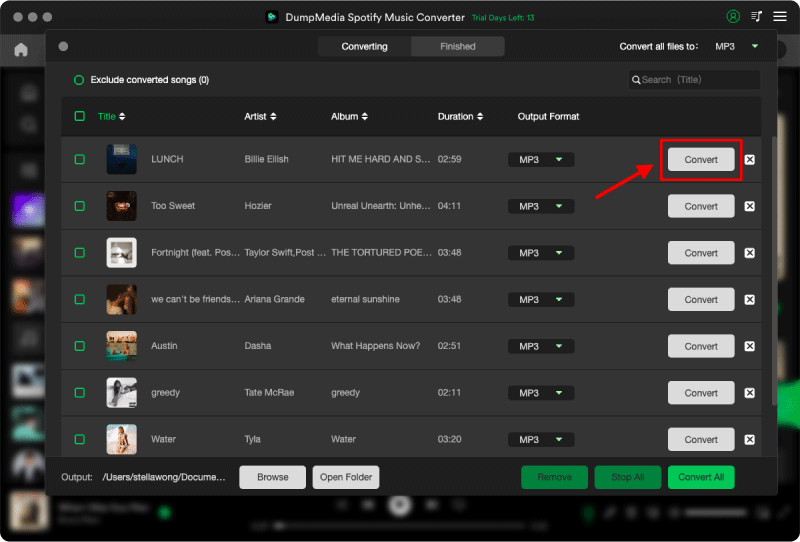
Step 5. Download Music
Click the “Convert” button to start downloading. Wait for the conversion to complete.
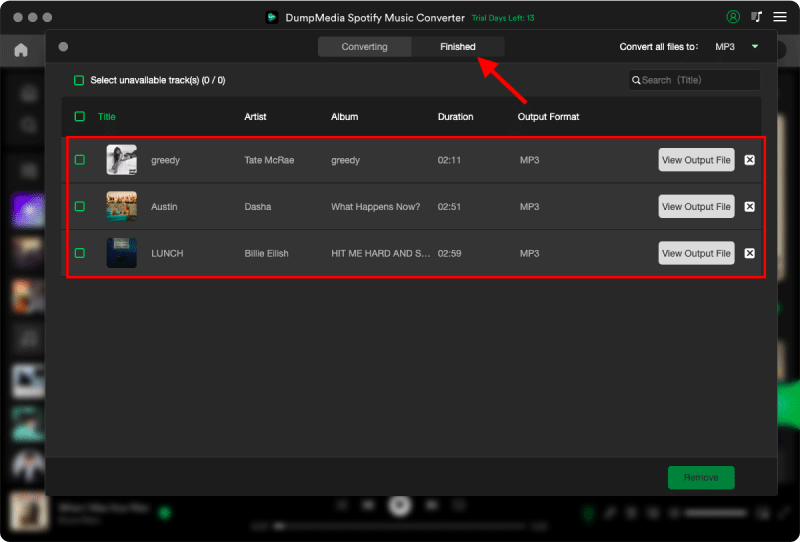
Step 6. Check Converted Music
Once finished, the music will be saved to your selected output folder.
Part 4. How to Manage Your DumpMedia Account
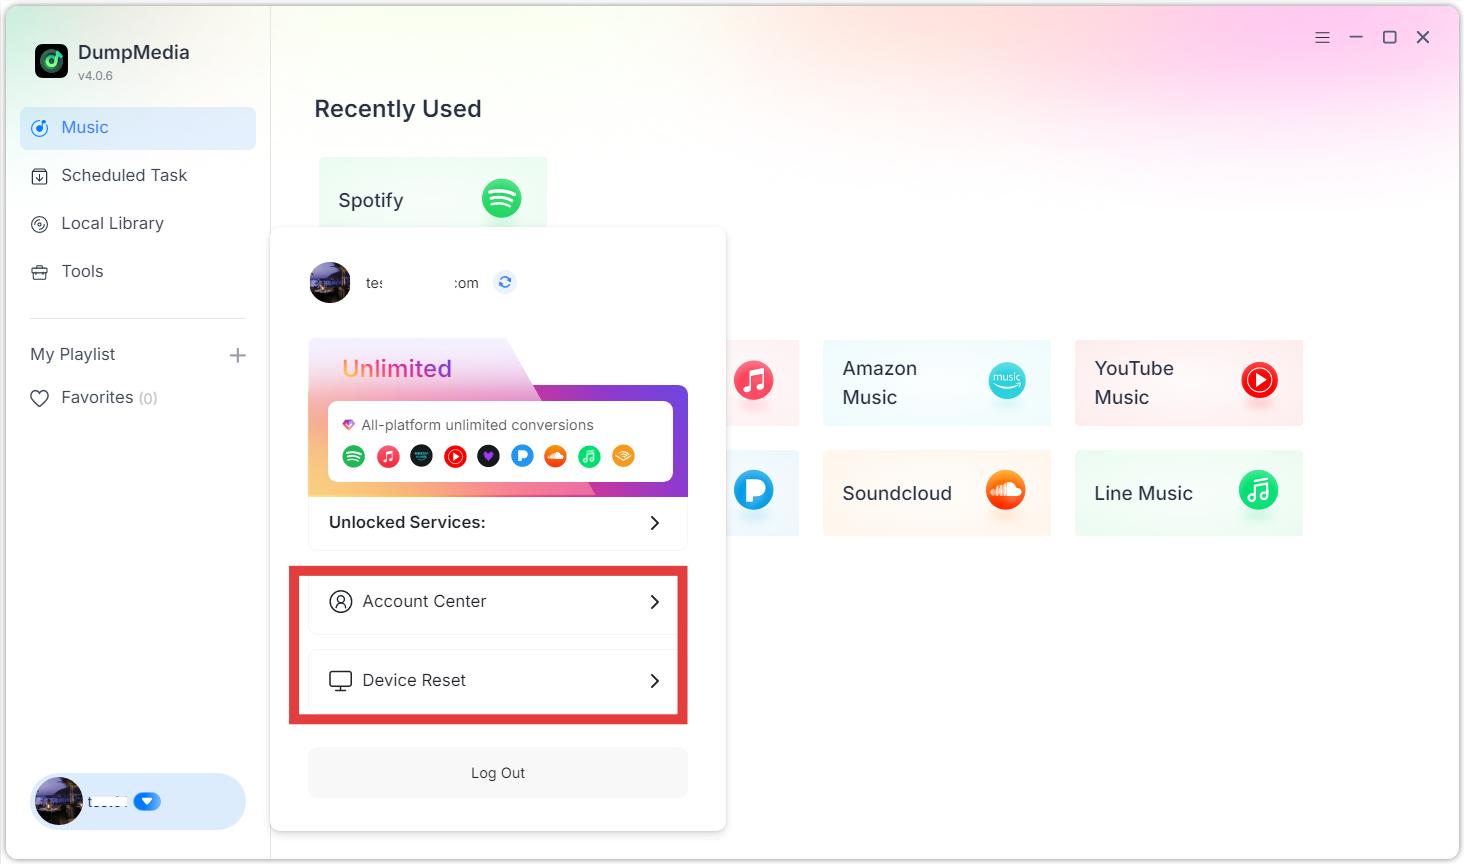
Account-related options are accessible through the profile section in the software. Click the profile icon in the bottom left corner. Here you can view your license status.
- Account Center: Get into the DumpMedia Accounts Center.
- Device Reset: If you are seeing a message indicating that the device limit has been exceeded, it means the license key has already been activated on the maximum number of allowed devices. You may reset the device binding. Please note that the number of self-service device resets is limited. Once the limit is reached, please contact our support team (support@dumpmedia.com) and provide your registered email address and license key so we can help reset the device binding for your license.
FAQs (Frequently Asked Questions)
1. What are the limitations of the free trial?
DumpMedia Spotify Music Converter allows you to convert 3 full songs for free from Spotify. To convert more tracks without any limitations, you will need to register and activate the full version of the software.
2. Why did my conversion fail?
Common reasons include network issues, expired streaming subscriptions, or temporary platform changes. Restart the software and try again. Need more help? Please submit feedback for further assistance.
3. Where can I find my converted files?
Converted files are saved in the output folder specified in Settings > Output.
4. Can I use one license on multiple devices?
No. One license can be activated on one computer at a time. Also, each license key can only be used on the device's OS specified in the purchase.

30% Off >>>