


Convert M4A to MP3 on Macintosh Easily and for Free (2025)
Audio files come in several different formats. Those could be in FLAC, AAC, WAV, MP3, and even M4A. Here, the main topic of discussion will be circling the two most-used audio file formats – M4A and MP3, and how you can convert M4A to MP3 on Macintosh specifically.
Looking for such tools with the ability to convert M4A to MP3 could be difficult for some people who are not much knowledgeable about which one is good. Therefore, articles like this will surely be helpful.
The usual reason why users ought to convert M4A to MP3 on Macintosh is that maintaining M4A as an audio file format could be troublesome in some cases. Though M4A has better quality than MP3, people still would like to find out ways how to convert M4A to MP3 on Macintosh because M4A lacks compatibility.
Usually, it is quite difficult to play M4A on any device as it is not supported by a lot of media players, unlike MP3. This is a common dilemma for users. In case they do not own a player capable of playing M4A audio files, then it would be difficult for them. Learn some ways to solve this.
Contents Guide Part 1: How do I Convert M4A to MP3 on Mac Using iTunes?Part 2: How Do I Convert M4A to MP3 on Mac Without iTunes?Part 3: The Major Takeaways
Part 1: How do I Convert M4A to MP3 on Mac Using iTunes?
One of the simplest ways how to convert M4A to MP3 on Macintosh is through the use of an application that is surely already on your Mac computer. Yes! The subheading is correct. You can utilize your iTunes application as a converter as well. The advantage of using this app is that there is no need for you to do the installation of software, it is free, and this works well in Macintosh.
How can you use iTunes to convert M4A to MP3 on Macintosh? The method that you need to follow is just too simple. Make sure to complete every step mentioned in the below guide.
- Open your iTunes application.
- Set the “Import Using” to MP3 encoder.
- Create an “MP3 version”.
Explanation texts for each step will be presented in the next paragraphs.
Step #1. Open Your iTunes Application
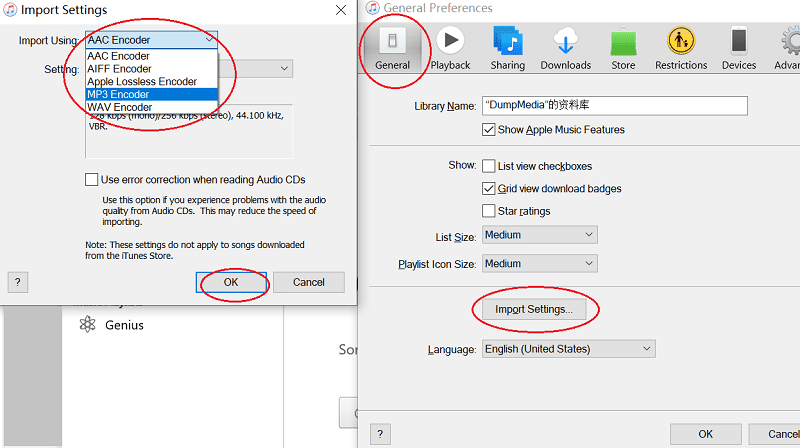
Surely, you have your iTunes application already installed on your Mac computer. You need to open this first to begin. Once you arrived at the main interface, you need to tick the “iTunes” button located in the upper portion of the screen. From the options available, choose “Preferences” and then hit the “General” button.

Step #2. Set The “Import Using” To MP3 Encoder
The next thing that you need to accomplish is to set the “Import Using” to “MP3 Encoder”. There is a drop-down arrow in this option, and you need to click it to see those available encoders.
Apart from MP3, there are encoders for AAC, AIFF, WAV, and Apple Lossless as well. Under the “Settings” option, you can set the bit rate depending on your preference. You can even have this customized if you want. Once completed, hit the “OK” button to save and to close “Preferences”.
Step #3. Create An “MP3 Version”
Thirdly, you need to head to the music list to choose the M4A files that you are about to convert to MP3 format. In case you do not have the files in your iTunes library, you can just drag and drop the files onto the interface from the folder wherein those are saved. After doing so, make sure to highlight and select the M4A files.
Now, you need to click the “File” button, and from the options listed, choose “Create MP3 Version”. You can also right-click the file to see the options in case you do not want to use the first method specified.
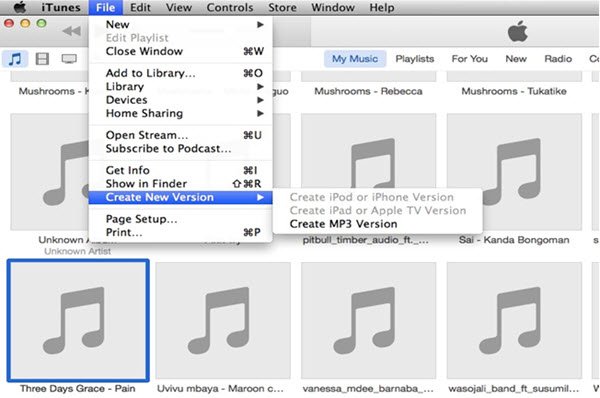
After completing this third step, the MP3 versions of the M4A files will be shown in the iTunes library together with the original audio files. If you wanted the MP3 versions to be saved into other folders in your Mac, you can just drag and drop the files to create copies.
Apart from using iTunes, there are other ways how you can convert M4A to MP3 on Macintosh. Check out the succeeding parts of this article to find out more.
Part 2: How Do I Convert M4A to MP3 on Mac Without iTunes?
Apart from using applications already installed on your Mac computer like iTunes, there are plenty of other alternatives that you can try. Those that would be explained in this portion are also samples of ways how to convert M4A to MP3 on Macintosh. We divided this part into two – using the professional converter and using online converters.
Let us begin with a professional converter first.
Convert M4A to MP3 on Macintosh Using Professional Converter
Another option to convert M4A to MP3 on Macintosh is through the aid of professional audio converters like this DumpMedia Apple Music Converter.
This is very much capable of transforming your M4A audio files to MP3 format in just a few minutes. Aside from this, it has a lot of other advantages that can be enjoyed by every user – fast conversion speed, multiple formats being supported, compatibility with Macintosh computers, amazing output quality, easy removal of DRM protection, batch processing, and a lot more.
It can convert M4P files to MP3 too. If you wish to know more details about the features of this professional converter, you can always visit the website here.
In the meantime, we will be teaching you an easy method on how you can use this DumpMedia Apple Music Converter to convert M4A to MP3 on Macintosh.
- Add the M4A files to convert.
- Select MP3 as the target output format.
- Perform the process of conversion.
The description for each step is presented here as well. Keep on reading to learn more details.
Step #1. Add The M4A Files To Convert
After completing the installation of this tool (the installation requirements can be seen on the official website as well) on your Mac computer, you need to launch this and add those M4A files to be converted. You can add the songs by dragging and dropping. You can process not only one file but a batch in case you need to as this tool supports batch processing.

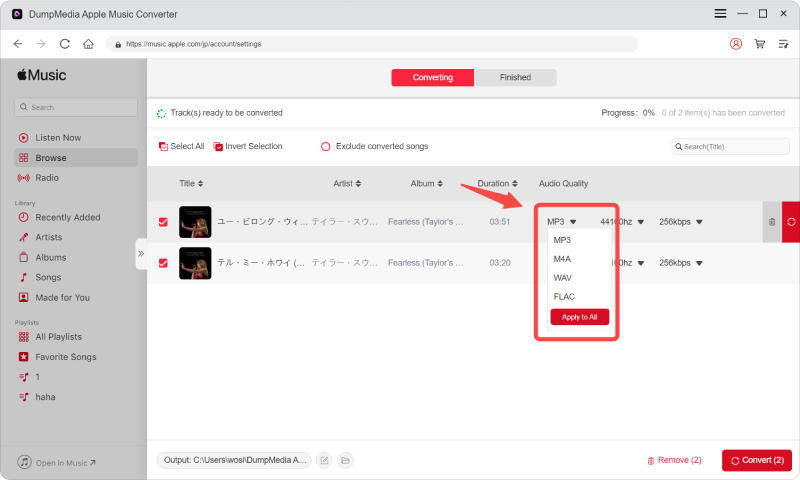
Step #2. Select MP3 As The Target Output Format
Once songs have been loaded onto the software, you can now select the output format which in this case is “MP3”. Under the “Output Format” option, you can hit the drop-down arrow to select the desired output format. You can also modify some other output settings like bit rate and sample rate. Also, you can enter the desired file name and the output path (wherein the converted file will be saved after conversion).
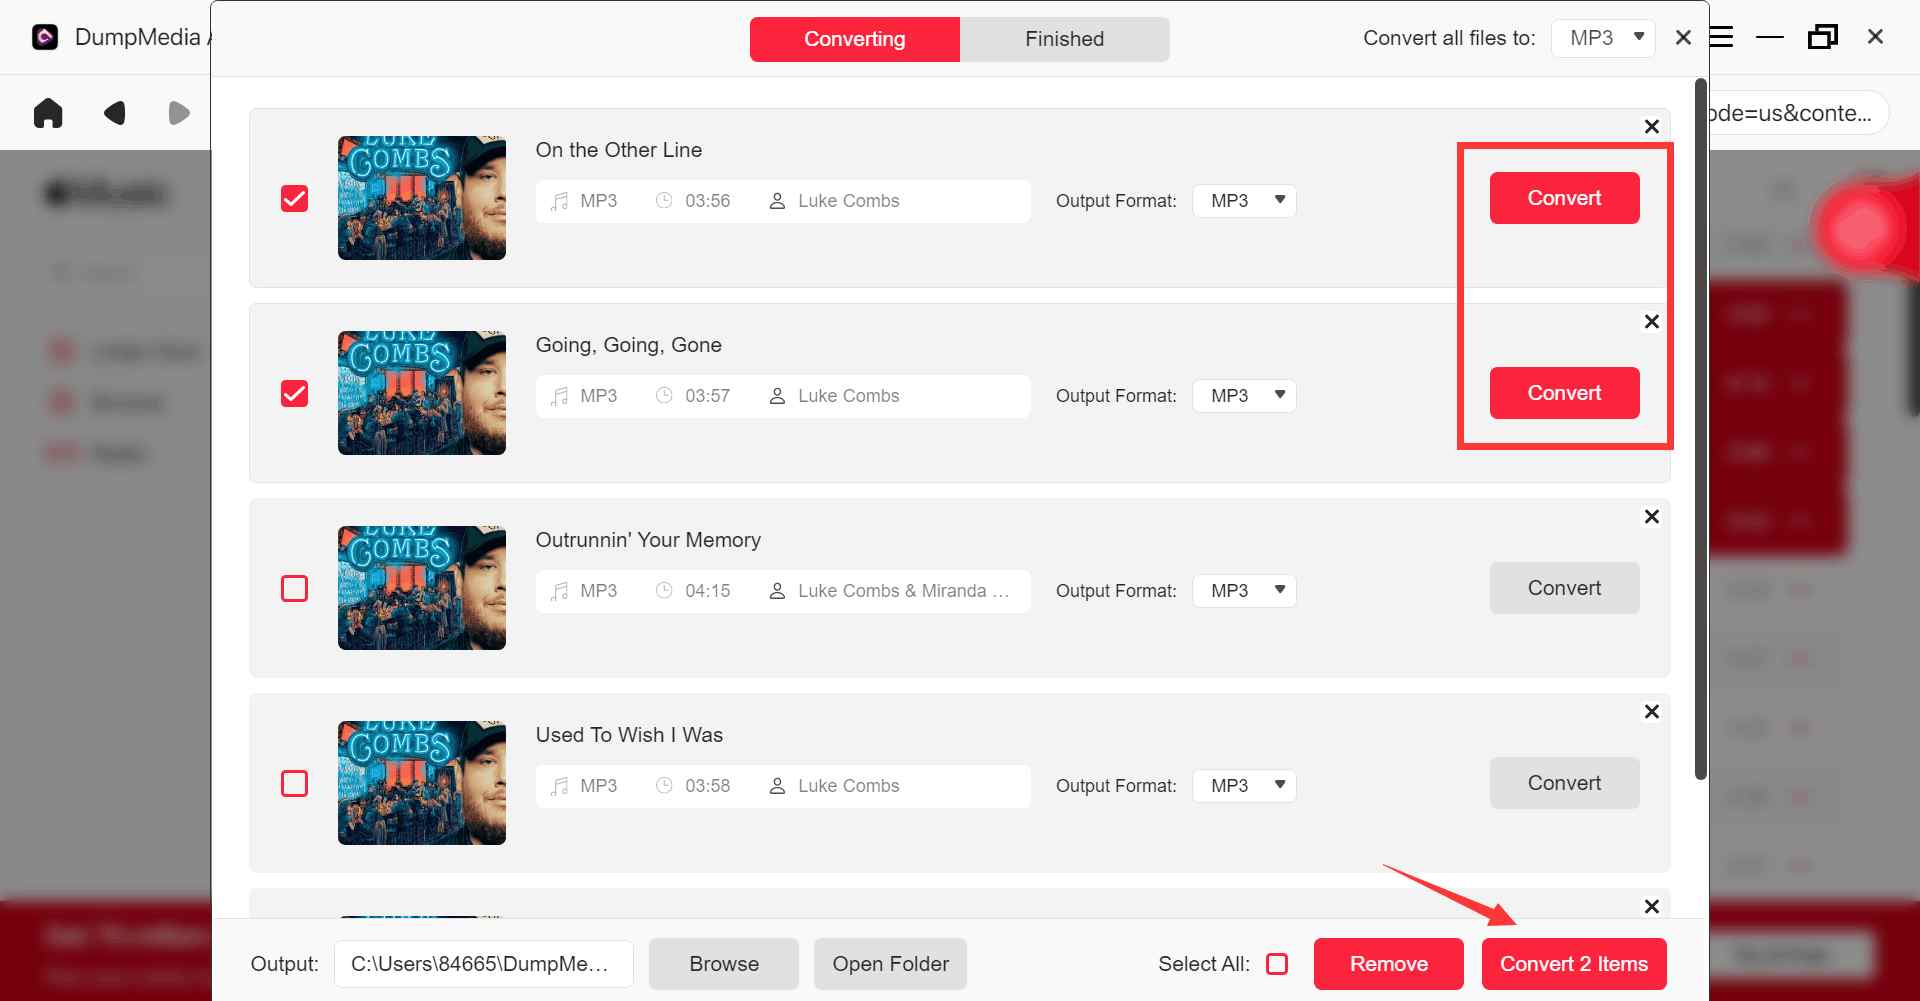
Step #3. Perform The Process Of Conversion
Finally, after the completion of the first two steps, you can now proceed to the conversion process. This can be done by simply hitting the “Convert” button that is located at the bottom right corner of the screen. Since this tool promotes fast conversion and downloading speed, you can expect that output will be ready after only a few minutes.
Convert M4A to MP3 on Macintosh Using Online Converters
The next tools to be discussed are online converters. Online tools also can convert M4A files to MP3 format. You just need to be patient while using such as it might take some time until you have the output ready.
Also, there is a need for you to have a stable internet connection while doing the conversion process. Good thing, you can access these online converters in any browser even on your Mac computer.
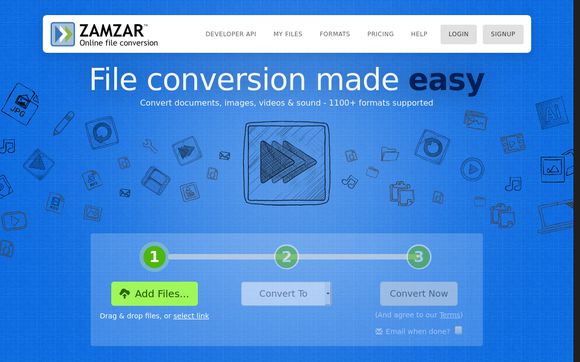
One of the many online converters is this Zamzar.com. You can have it visited on its official website to utilize it during the transformation of the file. The procedure on how to use it is so simple and easy to follow. You can use the below as a reference.
- Head to the official website – Zamzar.com.
- Choose MP3 as the output format using the drop-down arrow that you will easily see under the “Choose the format to convert to:” option. This supports many formats so make sure to choose what is needed.
- You need to enter your email address to receive the converted file.
- Hit the “Convert” button to finally begin the process.
After doing the above, you can expect the output file to be available in the email address you initially provided.
Not only Zamzar, but a lot of other online tools can offer you the same service. You just need to be keen enough to detect which one might damage your Mac computer and files in case those come with viruses and malware.
Part 3: The Major Takeaways
Conversion from M4A to MP3 format on Macintosh is just too simple. You have a lot of options to choose from. You can use your iTunes application, professional converters like DumpMedia Apple Music Converter, or online tools. Which one do you think will work best for you?

30% Off >>>