


How to Play Apple Music on iWatch without iPhone (2025)
The world is an arena of continuous improvement. Back in the day, people can only enjoy simple gadgets and devices which are usually common – the television, mobile phones (which are not as pretty as it is at present), computers of lower versions, and more. Now, there are a lot of developments introduced to the public, you now have tablets, laptops, smart TVs, smart speakers, and of course smartwatches.
If you happened to be an Apple music lover and an Apple smartwatch user, this post is for you. Here, we are about to tackle how you can stream Apple Music songs on an Apple Watch even if you do not have an iPhone.
The topic of this post is pretty much interesting and beneficial to some people who do not want to have their iPhones with them all the time. If you wanted to jog or walk outside the home for some time while listening to your favorite Apple Music songs, carrying an iPhone with you is very much burdensome. If you got your Apple watch with you, you can simply eliminate the mentioned hassle.
But how are you going to do it? Before heading on to that, let us first check out some basic things about the Apple smartwatch.
Contents Guide Part 1: What Is Apple Watch?Part 2: How to Stream Apple Music on Apple Watch EasilyPart 3: How Do I Keep All The Apple Music Songs Even If Subscription Has EndedPart 4: Summing It All
Part 1: What Is Apple Watch?
Apple Watch is a smart device that was introduced and developed by Apple Inc. It has been considered an extension of one’s iPhone as it was made to be integrated with it alongside other Apple devices or iOS devices. The tool or gadget was made to track the fitness and health of the individuals who are going to wear it. You can have your health status monitored using this Apple watch.
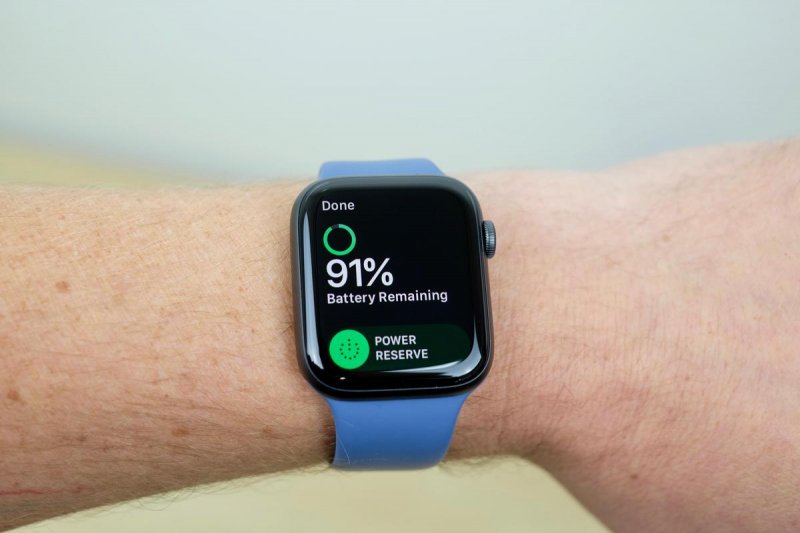
Apart from this, you can also do basic things such as sending text messages, calling, checking out your contacts list, gallery, or even playing or streaming music as it can connect with the internet or WiFi network. You can listen to music and podcasts without iPhone.
The introduction of the Apple Watch opened a new way for people to enjoy the applications in iOS devices anytime and anywhere by just relying on their wrists. You can have it purchased for quite a value or amount but surely, the purchase would be worth it. There are versions created being Apple Watch Series Five the latest (which was launched last September of the year 2019).
Now that we got to know more about the Apple Watch and some of its amazing capabilities, we will now head to the procedure on how one can stream Apple Music songs on his Apple watch easily.
Part 2: How to Stream Apple Music on Apple Watch Easily
For you to listen to Apple Music songs anytime and anywhere you are, whether you have an internet connection or not, you should of course have your account created.
You can listen to songs even if you do not have an internet connection if you have subscribed to Apple Music’s monthly premium. In subscribing, you would be required to pay a certain amount every month. Why not if you will be experiencing the perks Apple Music offers, right?
Here are the basic steps you need to do.
- Make sure to open your Apple Music application on your iPhone.
- Sync all your playlist to your Apple Watch.
- Perform the pairing of either speaker or headphones with your Apple watch.
- Enjoy your Apple Music songs on your Apple watch!
Below are the brief details for each of the four steps stated.
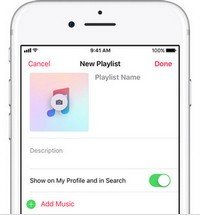
Step 1: Make Sure To Open Your Apple Music Application On Your iPhone
The initial thing you need to ensure is that you have the Apple Music application on your iPhone. Open it and launch. In this step, you can either choose any previously created playlists which you will later sync to your Apple watch, or create a new playlist.
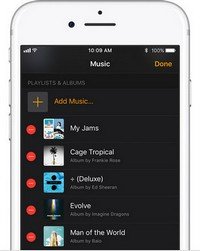
Step 2: Sync All Your Playlist To Your Apple Watch
Once you have a playlist created or you already chose one among those which are created, then you can now proceed with the syncing of the songs in that playlist to your Apple watch. For successful syncing, you should remember two things – you should turn on your iPhone’s Bluetooth and your Apple watch should be in charging mode.
Once assured, you can now tap the “My Watch” tab followed by hitting the “Music” button, then “Add Music”. Now, you can just select the recently chosen playlist to sync.
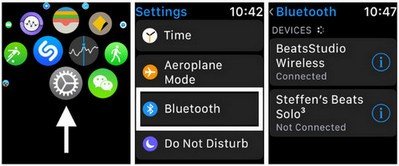
Step 3: Perform The Pairing Of Either Speaker Of Headphones With Your Apple Watch
Next on the list is the performing of pairing either speaker or headphones with your Apple Watches to begin the endless listening experience. You can do the pairing by simply putting both devices in pairing mode. In your Apple watch, you must go to the “Settings” button and then “Bluetooth”. Under “Devices”, just choose your headphones or any speaker.
Step 4: Enjoy Your Apple Music Songs On Your Apple Watch
The last and not the list is of course to enjoy all those Apple music songs you love using your Apple watch. Have the songs play even if you are on a walk or just running and doing some basic jogging
Upon learning the procedure on how you can use your Apple Watch to play and stream your favorite Apple Music songs, we are to give you some additional information! Do you want to find out how you can still keep all those Apple songs even if your Apple Music subscription has ended? Keep on reading the next part if you seemed to be curious!
Part 3: How Do I Keep All The Apple Music Songs Even If Subscription Has Ended
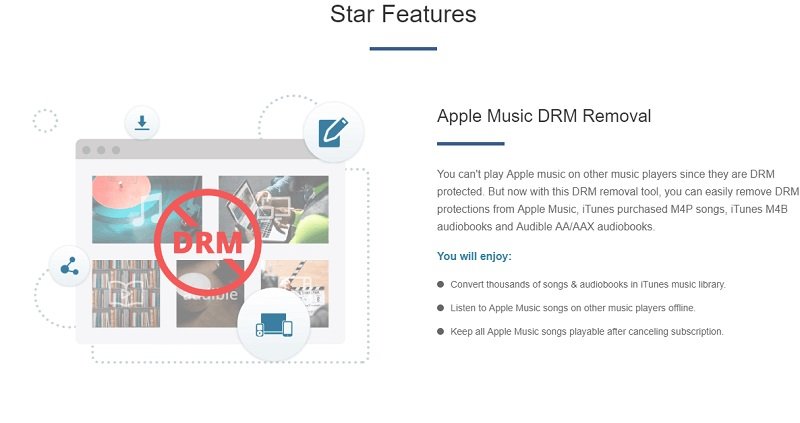
There is absolutely nothing to worry about in case your Apple Music subscription is about to end. You can even keep the songs if you cancel Apple Music. Here, we are to present an application that can download Apple Music songs. The name of the tool is DumpMedia Apple Music Converter.
What Is DumpMedia Apple Music Converter?
DumpMedia Apple Music Converter is a great tool that can remove the DRM (Digital Rights Management) protections of Apple Music songs. Because Apple Music songs are DRM protected, it is impossible for users to download the songs directly and have those played on any other unauthorized devices. But, no need to worry about that.
In addition, with this DumpMedia Apple Music Converter, you can have as many Apple Music songs as you wanted to be converted and downloaded for offline streaming! Plus, you got to have a way to share those songs with friends not worrying about file formats since this converter can also perform the conversion of files!
Now, if you are worried about the procedure you need to undertake, do not think much about that as we are of course to discuss the steps needed in this post as well.
Here are those.
Steps To Use This DumpMedia Apple Music Converter
Here are the simple guides to use this DumpMedia Apple Music Converter.
- Download and install DumpMedia Apple Music Converter.
- Perform adjustments on the settings of the resulting output.
- Tick the convert button to begin the process.
Let us look into these 3 steps further.
Step 1: Download And Install DumpMedia Apple Music Converter
Of course, we need to ensure that DumpMedia Apple Music Converter has been downloaded and installed on your personal computer. Once installed, open, and launch the program. Once the program has been launched, iTunes will also be activated. No need to worry about this just proceed with the process. Under the “Library” menu, tick “Music” if you wanted to copy the songs you have.
Once done, you will now be seeing all the songs and playlists stored in your iTunes library. To be able to choose the songs to be downloaded and converted, you can either tick the checkboxes right next to each or make use of the search bar to easily find the specific songs you wanted to be downloaded.
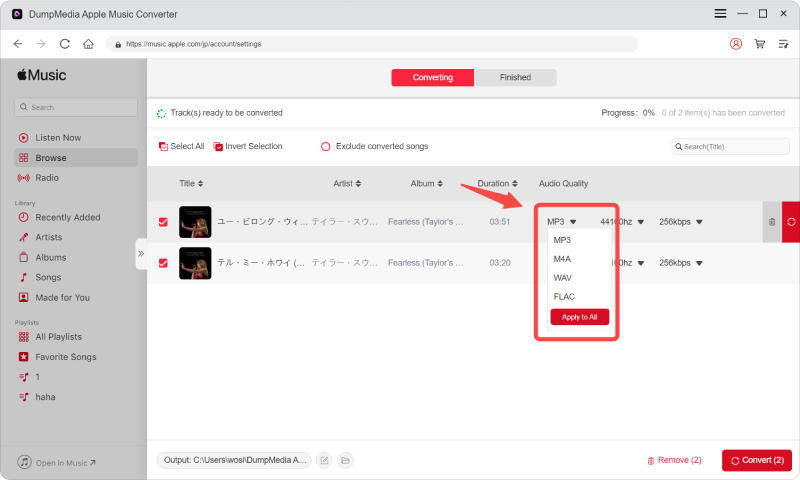
Step 2: Perform Adjustments On The Settings Of The Resulting Output
The next step that should be done is to perform the adjustments on the settings of the resulting output. You can choose any format from those that would be listed. The application supports many DRM-free formats including MP3. This as well supports those in AC3, M4A, M4R, AIFF, FLAC, AU, and even MKA format.
Selecting MP3 or any other format as the output format would of course depend on you. The tool will also allow you to change other options such as the bit rate and sample rate. You can as well perform the renaming of the resulting file. In this step, you would also need to specify the output path or the target location wherein the files will be saved.
Step 3: Tick The Convert Button To Begin The Process
Upon completing all the adjustments wanted for personalization or customization, the final step would now be the conversion process. You can just hit the “Convert” button which is located at the bottom right corner of the screen.

Upon doing these steps presented, the Apple Music songs you love will now be saved on your personal computer. Now, what you only need is to have those synced to your iPhone to be able to perform the initial steps mentioned in the second part of this post.
Part 4: Summing It All
You got to learn the basic steps on how you can stream or play Apple music songs using your Apple watch even if you do not have your iPhone near you. Apart from this procedure, you also got to learn about this DumpMedia Apple Music Converter and how you can use it to keep all the Apple Music songs on your Apple smartwatch even if your subscription has ended.
Do you have any other recommendations? What were your thoughts about this post?

30% Off >>>