


How to Improve Video Quality?
Improving video quality becomes handy nowadays because of the abundance of video editor software applications that are accessible all over the internet. These applications are made to be user-friendly so that, the majority can be able to use it conveniently.
There are various screen resolutions (also called display resolution) that are common to almost everyone yet only a few fully understand what are these terminologies all about. The term resolution is technically the number of pixels per unit of area, rather than the total number of pixels. To get to know what a good video quality must-have, let’s define each resolution that is mostly used.
Contents GuidePart 1. The Definitions Of Common Resolution NumbersPart 2. How To Solve Issues Regarding Poor Video QualityPart 3. In Conclusion
Part 1. The Definitions Of Common Resolution Numbers
- 720p = 1280 x 720 - usually known as HD or "HD Ready " resolution
- 1080p = 1920 x 1080 - usually known as FHD or "Full HD " resolution
- 2K = 2048 x 1080 - refers to displays that have a horizontal resolution of approximately 2000 pixels. Though it is close to 1080p, it is considered as a different resolution standard.
- 1440p = 2560 x 1440 - commonly known as QHD or Quad HD resolution, and typically seen on gaming monitors and on high-end smartphones. 1440p is four times the resolution of 720p HD or "HD ready."
- 4K or 2160p = 3840 x 2160 - commonly known as 4K, UHD or Ultra HD resolution. It is a huge display resolution, and it is found on premium TVs and computer monitors. 2160p is called 4K because the width is close to 4000 pixels. In other words, it offers four times the pixels of 1080p FHD or "Full HD."
- 8K or 4320p = 7680 x 4320 - is known as 8K and it offers 16 times more pixels than the regular 1080p FHD or "Full HD" resolution. For now, you see 8K only on expensive TVs from Samsung and LG.
The above-mentioned screen resolutions depend on the available graphic display and size capacity of your device. Not all the screen resolutions apply to any device; it must be compatible with the available screen size of the device too. If the screen size is large, then there’s a wide scope for any screen resolution numbers. However, if the screen size is small, then there are limitations to what extent of the screen resolution it can cater to.
The importance of knowing the screen resolutions is for you to know the difference of each resolution numbers so that, you may be able to know when and what resolution to adjust and whether it’s compatible with the device you’ reusing and that’ show you can successfully improve video quality. Sometimes, when you’ re watching videos on the internet, the quality of video depreciates and one cause of that is the speed of the internet you are using. That is why there are options of resolutions where you can choose to and of course the higher the resolution that you set, the more internet speed you will need.

There are some instances that don’t require video editor applications because you can actually set it directly to the resolution you prefer. Such as, while watching videos on and you want to improve the screen resolution, you can find suggestions on its settings. However, it’s only applicable to YouTube videos.
Apparently, there are numerous ways on how to fix or improve low-quality videos. You can find various video editor applications on the internet. Some may have their free-trial session. In which, you can test the effectivity of its features and how such an application can benefit you. However, there is an expiration of the free-trial registration. So, in order to indulge yourself with its usage, you must sign up and register any of your payment methods. And by that, you can have the licensed version of the application you have been longing to resolve issues that were beyond in your capabilities as a human. Nevertheless, there are still video applications that are being used for free by the many.
Part 2. How To Solve Issues Regarding Poor Video Quality
#1: When You Are The One to Record The Video You Must Follow These Steps:
- Be ready before hitting the record button. Be familiar with what resolution you are recording with. High definition and production dimensions are 1080p (1920 x 1080 pixels) and 720p (1280 x 720 pixels). Nevertheless, whatever screen resolution available as long as you record in the highest resolution possible then the flexibility of video editing is possible both in zooming and scaling footage.
- Choose vector art when video recording. There are differences between vector art and raster art. Raster art is made up of a certain number of pixels while vector art is based on mathematical calculations, curves, and paths. In short, raster art tends to lose its quality when being enlarged. Whereas, vector art is not using pixels thus it is resolution-independent. Examples of applications that use vector art are Photoshop, Illustrator or After Effects in which most of the editing techniques are base on vector art. Also, Camtasia and Snagit are samples of software programs that are used as a screen recorder and video editor. These applications will produce high-quality videos.
- Be aware of video formats. For best results, always use the.MP4 (or H.264) file format to ensure high-quality video with low file size. In addition, this file format is the universal format in which all web and software applications accept and it also plays on almost type of device. You can also check this link to know which video format is the lightest for your comparison.
#2: When The Video File Was Already Recorded You Must Follow These Steps:
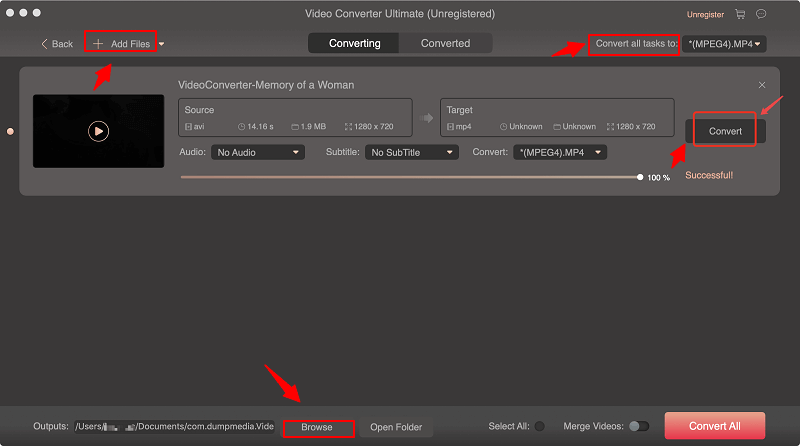
1: Install a video editor (like DumpMedia Video Converter). Download the application (base on the operating system applicable either Windows or Mac) and run the executable file (.exe file format). Follow the instructions embedded with the downloaded file to complete the setup process.
DumpMedia is a multifunctional video editor/converter application that enables you to edit, convert and play various videos. It has a lot of embedded features that allow you to explore in video editing. It can handle basic video editing as well as apply advanced features such as keyframe, transitions, effects, animation, filters, etc. In which, even beginners can be able to do video edits using this user-friendly application.
2: Start a Video Project. After running the DumpMedia Video Converter, click New Project in the project window to start. Once a dialog box prompts, you can now add videos, audio files, and images to edit and create a video project.
3: Import Videos. Once a project has been created, the main window can be seen already. Then, double click the media library to view and select videos, music, images needed and import it to the project.
4: Edit Videos. After importing videos, you can now start your video editing and you will notice that there are numerous editing tools for you to use. Just explore the whole panel.
Here are some of the basic video editing steps :
#1: Delete : Pick the extra part of the video then, click the Delete icon to eliminate the portion from the video.
#2: Copy and paste : Choose a video/audio clip or a photo and right-click Copy to get a copy of it. Then, right-click again and choose Paste to paste the selected clip or photo onto the desired position or portion of the video.
#3: Edit : Click the Edit icon to open the Properties panel of a video and there you can change the video speed or mute it.
#4: Resize and reposition : You can resize a video with a position, scale, rotate tools that appear on the window panel. You can also minimize a video to make a picture-in-picture effect.
#5: Rotate : Rotate a video or picture in any degree either in clockwise or in a counterclockwise direction depending on your preference.
5: Add Effects. In the DumpMedia Video Editor, there exist the effects library that contains any variations of effects that are applicable both to the video clip and audio clip. You can blur a video, reverse the video play, stabilize the quivering video, and add audio filters such as robot/alien voices.
6: Add Transitions. Transitions enable the switching of video clips easily without leaving a gap. There are actually 22 built-in transition animations present in DumpMedia Video Editor. And you can customize your own transition of photos if you want.
7: Color Filters. Applying color filters has become easy. You can apply basic color corrections like adjusting contrast, brightness, a saturation of a video, as well as filters from Sepia tone, Retro to 3D LUT and many more. There is also the Chroma Key effect to change the color and background.
8: Add Text. This is adding a caption to your video/image. It has different font styles, font sizes, font colors. You may position the text in any portion of your video/image.
Part 3. In Conclusion
Good quality videos are pleasing to watch especially if you are watching your favorite video clips like movies, games, music videos, documentary, etc. Watching videos with good quality satisfies us. It helps us to stay calm and enjoy entertainment hassle-free. Not only for entertainment but having good quality videos is an asset when used in business advertisements. It captures the attention of prospective customers. And it’s also an effective way of business strategy especially now that most people tend to focus on the advantages of products when being portrayed through a video.
The aforementioned guidelines are the basics when capturing or editing videos. There are still lots of effective ways to improve the quality of a video and it depends on you because you just have to explore more of the features present in a certain video editor application.

30% Off >>>