


How to Upload An MKV Video File to YouTube in 2026
Mkv files are high-quality videos compressed in Matroska container format, which are usually encountered in BluRay rip and videos exported from HD streams. Have you ever tried uploading MKV videos to YouTube to share with friends and colleagues? Did you receive an error message during upload stating that the file format is invalid?
You have encountered this error because YouTube does not have native support for the MKV format. Therefore, in this article, we will show you how to upload an MKV video file to YouTube. For this, you would need a reliable video converter software, DumpMedia Video Converter, to convert your MKV files. For instance, you can convert your MKV files to PS3. But before we go to these, let us first discuss what MKV files are in the next section to help you better understand these video formats.

Contents Guide Part 1. What Is MKV And Supported YouTube Video File FormatsPart 2. How to Convert Your MKV Files to YouTube-Compatible FormatsPart 3. How to Upload An MKV Video File to YouTubePart 4. In Conclusion
Part 1. What Is MKV And Supported YouTube Video File Formats
#1: What Is MKV?
Firstly, we want to make it clear that MKV is not a format for compressing videos. They are containers for data especially for:
- Subtitle tracks,
- Still images,
- Audio codec, and
- Video codec.

A container helps make things convenient and makes transfer and playback simpler by having all the mentioned video components above inside one file. This means that you do not need to deal with these different video components separately as containers allow users to deal with a single file only.
MKV, which is a short-term for Matroska video, is a standard container for videos for Matroska Multimedia. It is popularly used for HD videos and is a flexible and free file format capable of storing a limitless number of video components in one file. MKV was meant to be a universal format for videos for storing common media content like TV movies and TV shows. Speaking of here, you may be interested in the differences between MKV files and MP4 files. Click the link and you will get a detailed guide!
#2: Does YouTube Support MKV?
YouTube actually accepts MKV files as video sources but the platform has also some preferences such as progressive/MPEG-4/H.264 scanning video. Moreover, because of MKV’s large file size and sometimes because of your internet’s speed, it makes it hard for users to load a whole MKV movie into YouTube.
#3: Supported YouTube Video File Formats
You should note that audio files such as PCM, WAV, and MP3 files cannot be uploaded to the YouTube platform. Users can use tools for video editing to convert their audio files into videos.
If you are not sure what video format you should be saving your videos for uploading to YouTube and are receiving an error notifying you an invalid file format when you are uploading, double-check that you are using either one of the video formats below:
- AVI,
- 3GPP,
- MOV,
- MP4,
- MPG or MPEG,
- FLV,
- M4V,
- WMV,
- WEBM
Part 2. How to Convert Your MKV Files to YouTube-Compatible Formats
DumpMedia Video Converter is a powerful and high-speed all-in-one audio and video converter, downloader, editor, and player. Enjoy the convenience of a friendly interface equipped with a lot of features to meet all of your video needs. The software supports many formats including MPEG, 3GP, FLV, MKV, AVI, WMV, MOV and MP4 along with other regular video formats.
So, whether the music from Apple Music or Amazon Music downloads is allowed to be edited on this Converter. To convert your MKV files to a YouTube-supported format, download the software first and follow the steps below.
Step 1. Launch the DumpMedia Video Converter.
For Windows users :
Step 1a. Go to the Search icon (magnifying glass) beside the Windows icon in your computer’s Task Bar.
Step 1b. Type DumpMedia on the text field.
Step 1c. Click on the DumpMedia Video Converter on the search results.
For MacOS users :
Step 1a. Click on the Launchpad icon in your computer’s Dock. The launchpad icon is a gray circle with a darker gray rocket at the center.
Step 1b. Type DumpMedia on the Search bar at the topmost part
Step 1c. Hit the Return button on your keyboard to launch the Video Converter.
Step 2. Click the Add Files button located at the top-left section of the interface to import your files or you can drag-and-drop them directly into the main interface.
Step 3. Look for the Convert all tasks to text at the top right corner of the interface. Select your desired output format.
Step 4. At the bottom of the interface, click on the Browse button and browse your computer to the desired destination folder of the converted files.
Step 5. Click the Convert button to start the conversion of your audio file.
Step 6. Wait for the conversion to complete.

Part 3. How to Upload An MKV Video File to YouTube
Are you planning on sharing your videos with your family, friends, or other YouTube viewers? Uploading a video to YouTube can be done easily and quickly whether on your mobile phones or computers. So this section discusses a step-by-step guide on how to upload an MKV video file to YouTube.
Step 1. Log in to your YouTube account. Note that each account you have on YouTube has a channel to which it is attached. So sign in using the account linked to the channel wherein you want your video to be uploaded.
Step 2. Click on the Upload button located at the top part of the YouTube homepage. You can find it beside YouTube’s Search bar. It looks like a grey video camera icon with a white plus sign inside.

Step 3. Click on the Upload Video option from the choices.
Step 4. Select the video file you want to upload by clicking on the Select files to upload button. This opens the file browser.
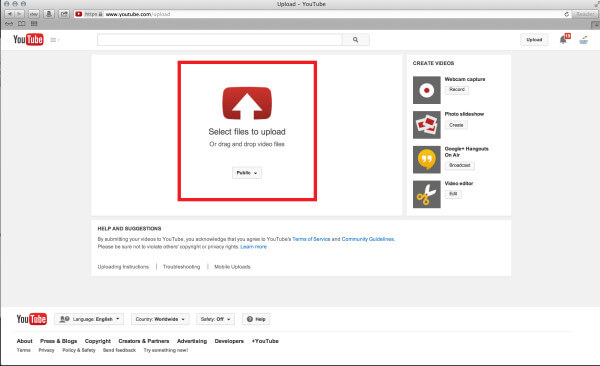
Step 5. Look for the file/s that you’d want to upload from your computer. Another option is by dragging and dropping your video files to the square presented to you in the YouTube window.
Step 6. Click on the Open button.
Step 7. Once you have added your file, it will be automatically uploaded and you’ll be directed to a new page wherein you can set the information about the video.
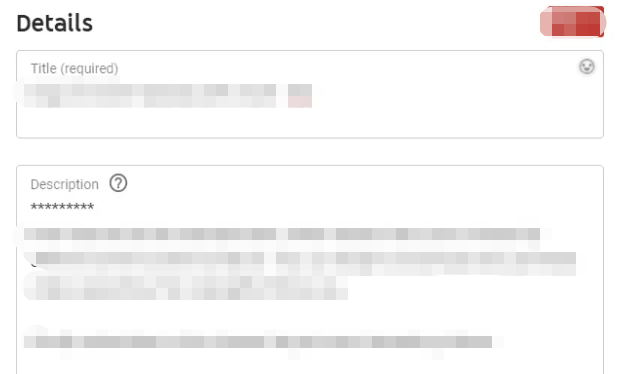
Step 8. Enter the video details. Below is the required information about the video:
- The video title,
- Video description, and
- Any tags you want to include in your video.
Adding descriptions to your uploaded video allows viewers to learn more about your video. This will be displayed at your video’s bottom section. If you want your video to stand out, you should add include a distinct description. Don’t just put your video’s title on the description box.
Tags allow your viewers to find our video if you link common words related to your video. While annotations let you add pauses or notes to your video where you might have missed to put into.
Step 9. Select the settings for your video’s Privacy.
If you want your video to be searched and viewed by everyone, set it to Public. Videos that are unlisted can only be accessed by people who have the link to the video. Videos that you set as Private are unlisted, which means that only the designated viewers can view your video. However, they would need an account in Google before they can access your video.
Step 10. If you’d like to, you can also share your video on Twitter, Facebook or Google+. You can also send your video’s link to your friends. Tick the box beside each service which you’d like to share your video in.
Step 11. Feel free to monetize a video by clicking on the Monetization tab. You can add advertisements to your uploaded video/s.
Step 12. Adjust other advanced settings for your video by clicking on the Advanced settings tab and check out your options. If you want to, you can choose to do a lot of things including the following:
- Disable responses to the video,
- Disable comments to the video,
- Change the rights for the ownership, and
- Notify your viewers.
Step 13. Set a photo thumbnail for your video so that other users of YouTube can quickly see an overview of what should be expected in your video. The platform can find locations on your video where the film has stopped for a few seconds then it takes a snapshot. YouTube allows its users to use the clipped images on their videos. Take note that this is required. YouTube assists you by selecting clips near the start of your video. If you want to change the thumbnail, just click on a new image clip.
Step 14. Click on the Save button. YouTube will save your settings once your video is done uploading. When you see the bar completely filled, it means that you upload an MKV video file to YouTube successfully.
Part 4. In Conclusion
In this article, you have learned that YouTube does not accept MKV files for uploading on the platform. We gave you the video formats that YouTube supports along with a converter software that you can use to convert your MKV files to a YouTube-supported format - DumpMedia Video Converter. Lastly, we gave you a step-by-step guide on how to upload an MKV video file to YouTube on your computer. Hopefully, we were able to give what you are looking for in this article.

30% Off >>>