


How to Experience Spotify High-Quality Streaming in 2025
Audiophiles pay good money for Spotify. Why shouldn’t they? They can experience Spotify high quality streaming if they pay the monthly fee. Yes, they can listen to their music at 320kbps in the Ogg Vorbis file format.
Aside from that, they also get access to the millions of songs Spotify has to offer and well-curated playlists. With Spotify’s algorithm, their music preferences are given priority as well. It just makes so much sense to upgrade a Spotify account.
The thing is, there might be some paid subscribers out there who aren’t experiencing Spotify high quality streaming. They might be settling for the default setting on Spotify. If you’re one of these paid subscribers, then read on to learn how you can experience high quality streaming from Spotify.
Contents Guide Part 1. The One Requirement for High Quality Streaming from SpotifyPart 2. How to Get Spotify High Quality Streaming on Your Computer Part 3. How to Get Spotify High Quality Streaming on your Mobile Part 4. Download High Quality Music from Spotify Part 5. Conclusion
Part 1. The One Requirement for High Quality Streaming from Spotify
Sure, you can experience Spotify high quality streaming on both your computer and mobile phone. It’s just a matter of adjusting a couple of settings within the app.
However, you will not have access to these settings if you are not a premium Spotify user. Hence, the one requirement for you to experience high quality streaming from Spotify is to be on a paid account.
Part 2. How to Get Spotify High Quality Streaming on Your Computer
Premium Spotify users don’t have to settle for the default settings of Spotify. They can tweak the settings to level up their listening experience with Spotify. The default setting for Spotify’s music quality on a computer is set to Automatic.
While there is nothing wrong with that, the Automatic setting is pretty limited. It has lower bit rates and bandwidth. Make the most out of your paid subscription by adjusting it. The steps below will show you how.
Step 1. Launch the Spotify App on your Computer
Explore the settings of Spotify by launching it on your desktop. As a paid subscriber, you should explore the settings. That way, you can make the most of your monthly fee.
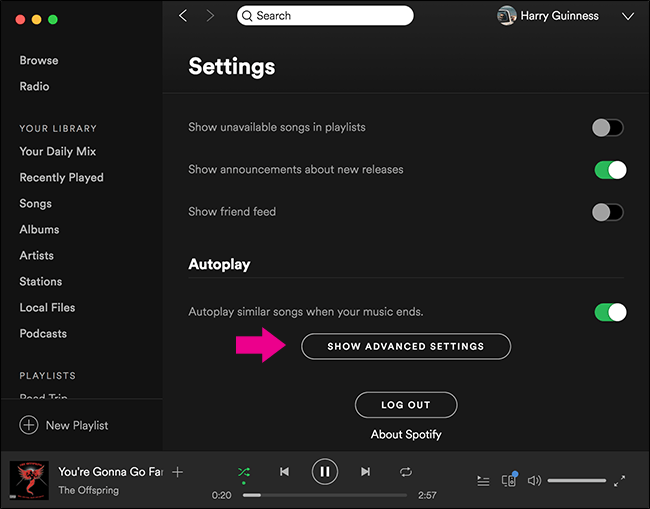
Step 2. Go to your Profile
Now, go to your Profile. If you notice, there is an arrow-down beside your profile. Click on it to open a drop-down list.
Step 3. Go to Settings
One of the options you will see on the drop-down list is Settings. Click on it to launch it.
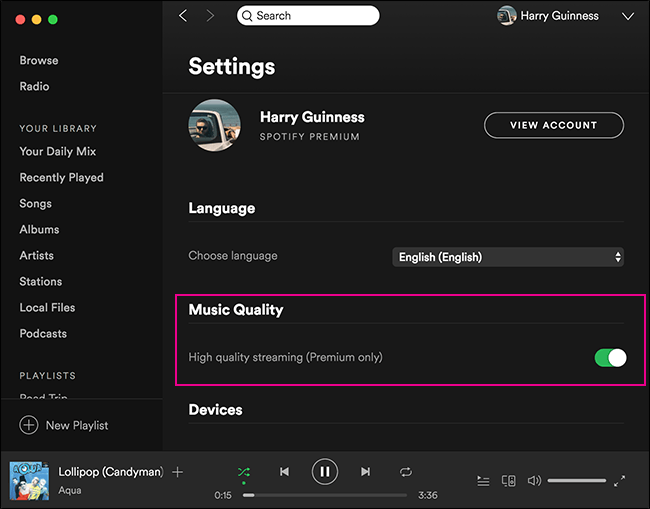
Step 4. Adjust Music Quality
Once you launch the Settings, scroll down the page and stop when you see Music Quality. Underneath Music Quality, you will High quality streaming (Premium only). Opposite that, you will see a button that you can enable. Slide the button to enable it. When you see it turn green, Music Quality is enabled.
Part 3. How to Get Spotify High Quality Streaming on your Mobile
You can also enjoy Spotify high quality streaming on your Mobile. You can choose to listen to your music on a Normal mode (96kbps), High mode (160kbps), or an Extreme mode (320kbps). The steps below will show you how.
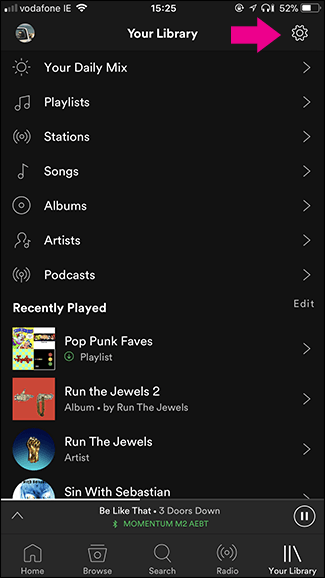
Step 1. Click on Settings
Open your Spotify app on your mobile. Then click on Settings. You will see this at the bottom part of your screen.
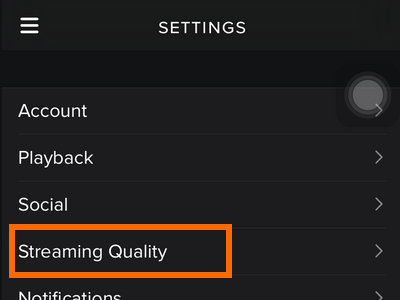
Step 2. Click on Streaming Quality
Once you click on Settings, you will be brought to another page. Look for Streaming Quality on the Settings page and click on it, and you can enjoy Spotify high quality streaming.
Step 3. Adjust Streaming Quality
You will now be on a new page where you can adjust the streaming quality. If your stream quality is on automatic, then it’s time to change it to High.

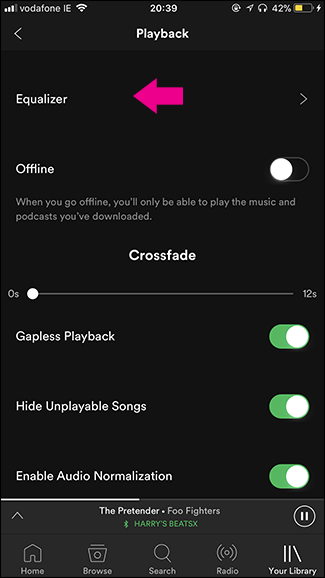
Step 4. Adjust Equalizer
You can raise and lower the volume of certain frequencies on the equalizer on your Spotify. To get to the equalizer area, click on Settings and then tap on Playback. At the top of the screen, you will see Equalizer. Click on it to adjust certain frequencies. That will definitely level up your listening experience with Spotify.
Part 4. Download High Quality Music from Spotify
Since you have already adjusted the settings to get Spotify high quality streaming, why not download your favorite songs now? The best way to download them is with the use of the DumpMedia Spotify Music Converter.
Sure, you can download songs from Spotify since you’re a paid subscriber. However, you might want to keep your songs in their high-quality format for a longer time. You see, once you stop paying for your Spotify account, your high- quality songs will disappear as well. A better way to download and keep your high-quality songs is with the use of the DumpMedia Spotify Music Converter.
Think about it. With the DumpMedia Spotify Music Converter, you are not just streaming music but downloading it. Hence, you get to keep the downloaded music even after you have given up your paid Spotify account.
The reason why the DumpMedia Spotify Music Converter allows you to download and keep songs is that it removes the DRM from the songs. There is no doubt that you can maximize your paid subscription by downloading songs with the DumpMedia Spotify Music Converter. The steps below will show you how to do it.
- Go to the DumpMedia Website
- Select and Import Songs from Spotify
- Choose a File Format and Convert Spotify Songs
- Download High Quality Spotify Songs
The detailed steps below will show you how to navigate the DumpMedia Spotify Music Converter.
Step 1. Go to the DumpMedia Website
Go to the DumpMedia website by clicking on this link. The link will automatically give you access to the DumpMedia Spotify Music Converter. Click on it to start the download.
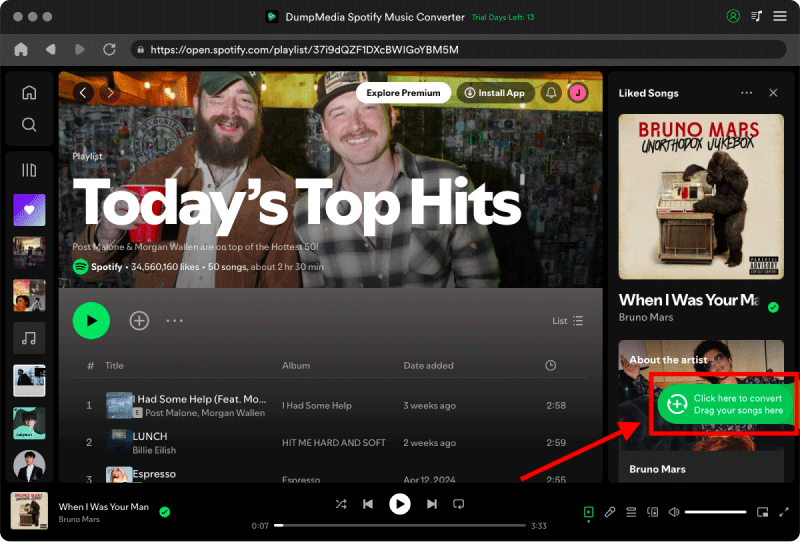
Step 2. Select and Import Songs from Spotify
After you have downloaded, installed, and launched the DumpMedia Spotify Music Converter; open your Spotify app. Then select the songs that you want to download and convert. You can do that by clicking on each song and copying its link. Once you have copied the link, paste it on the DumpMedia Spotify Music Converter.
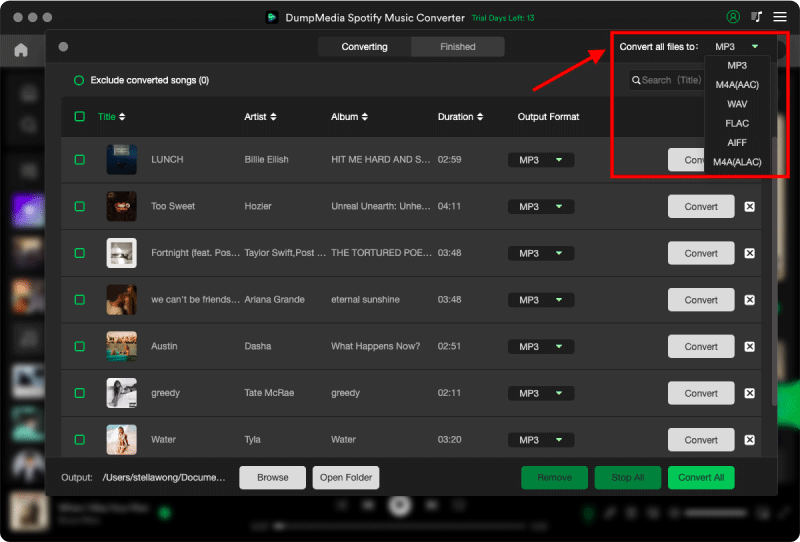
Step 3. Choose a File Format and Convert Spotify Songs
Once all the songs have been added to the DumpMedia Spotify Music Converter, you can go to the top, right-hand side of the screen to choose a file format for your output. Then click on the Browser button on the bottom part of the screen to choose a location on your computer to save the output.
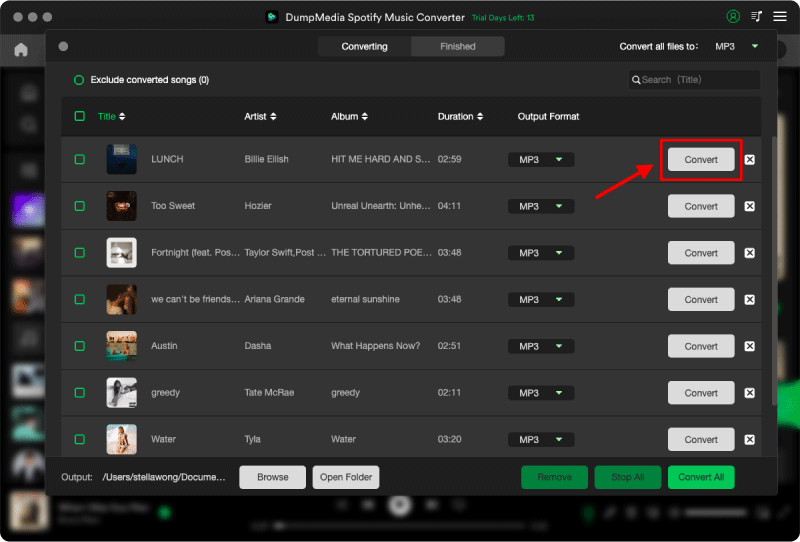
Step 4. Download High Quality Spotify Songs
Click on the Convert button to download high quality Spotify songs. As the songs are downloading, the DRM is removed. Once all the songs have been downloaded, you can always listen to them in their maximum audio quality. Since the DRM is removed, you can even transfer them to any mobile device that you own.
Part 5. Conclusion
There you have it. You’re not only able to level up Spotify high quality streaming but you’re also able to download music at their maximum audio quality with the use of the DumpMedia Spotify Music Converter.
Are you making the most of your Spotify account? Feel free to share your thoughts.

30% Off >>>