


How To Add A Member To Apple Music (2025 Tips)
Apple Music is an online streaming platform providing listeners the ability to stream tracks without the need to download them or save them on any device in use. There are millions of song collections and playlists that any music enthusiast would surely be happy about.
The good thing about Apple Music is that it offers several different subscription plans wherein listeners can choose from. It also has a free trial period of 3 months for every new user who would want to check out what the app has before subscribing to a plan.
Apart from the free trial period, with Apple Music, you must know that just by using a single account, you can log in to up to 6 devices! So, if you got any other devices apart from your mobile device or tablet, you could simply log in to your Apple Music account and use the same subscription! No need to pay an extra fee!
Also, you can share the subscription with your family members as long as they have gadgets compatible with Apple Music. That’s actually the main topic in this post - how to add a member to Apple Music! If you have been wondering about the procedure, we’ll discuss everything you need to know as you jump to the first part!
Contents Guide Part 1. How to Add a Member to Apple Music?Part 2. Bonus: How to Share Apple Music without Limitation?Part 3. Summary
Part 1. How to Add a Member to Apple Music?
As mentioned, Apple Music has been offering several subscription plans wherein every user can choose from. They actually have three – the student plan, the individual plan, and the family plan. If you have been looking for the details of how to add a member to Apple Music, we assume you have registered under Apple Music’s Family Plan.
Based on the terms and conditions of this plan, you are allowed to add or invite up to 6 family members. Before we go to the procedure of how to add a member to Apple Music, you need to be aware of these requirements:
- You must have an Apple ID that is signed into iCloud on an iOS device or an iTunes app on your Mac PC.
- Of course, your active Apple Music Family Plan account
- An iOS or Android device that supports Apple Music
Now, here are the steps relating to the “how to add a member to Apple Music” topic.
Step #1. Start A Family Group
The first thing that must be accomplished is the creation of a Family Group. After having this created, if you are a prime Apple Music subscriber, you just have to invite your family members to join. Here are the steps you need to do in case you are using an iOS device or a Mac PC.
Using Your iOS Device
- Head to the “Settings” icon then “Your_Name”. If you are using an iOS device with a 10.2 version or earlier, head to “Settings” and then “iCloud”.
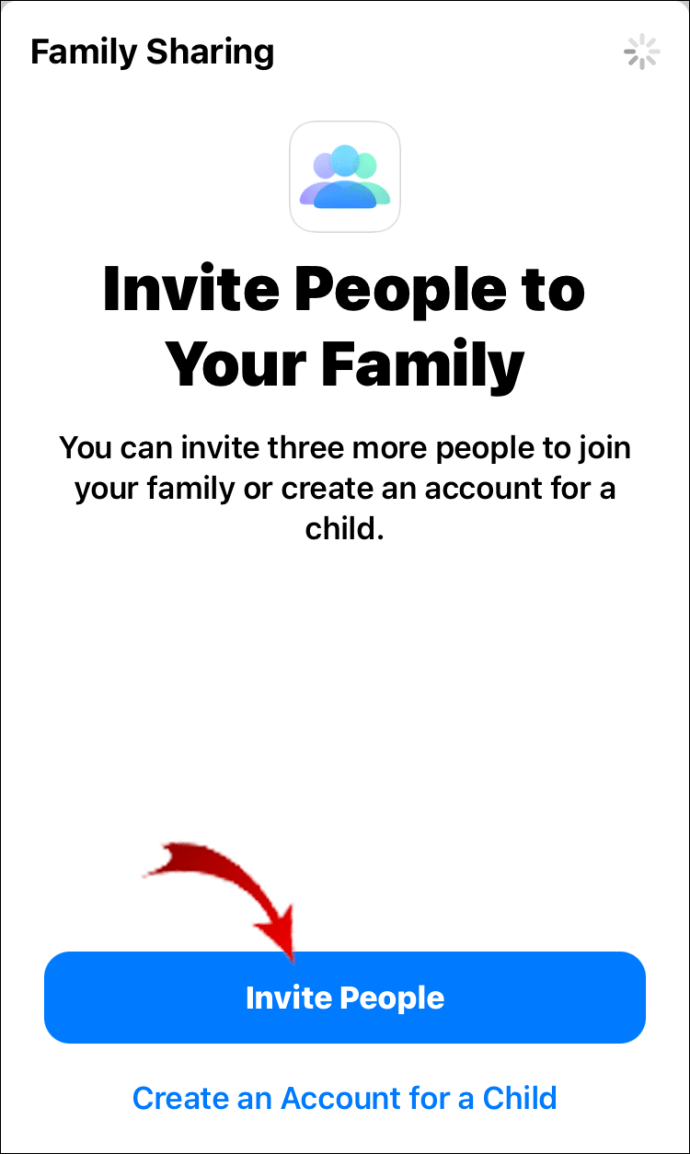
- Tap the “Get Started” button in order to set up the “Family Sharing”. You shall see some instructions on your screen regarding the setup and the invitation process. Just follow those.
- If you are using a device under iOS 11 or later, there is a need to select the first feature that you wish to share with your family members.

Using Your Mac iOS
It’s much easier if you are using a Mac PC.
- Select the “Apple” menu then choose “System Preferences”, then click “iCloud”. Tap the “Set Up Family” button.
- Just follow the instruction on the screen to accomplish the setup process.
Step #2. Sending Invitations To Your Family Members
Now, here’s the main step of how to add a member to Apple Music – sending out invitations to your family members. Just take note that under Apple Music’s Family Plan, only 6 members can be invited including yourself.
Using Your iOS
- On your handy iOS device, head to “Settings” then “Your_Name” and choose “Family Sharing”. For those who are using devices in iOS 10.2 version or earlier, just tap “Settings” then “iCloud”, and finally, “Family”.
- Tap the “Add Family Member” button. You would be asked to enter the name of the member you wish to invite or his / her e-mail address. Afterward, just follow the instructions that you’ll read on your screen.
- For those with iOS 11 devices, there are other options available to invite your family members. You can either send an invitation via Messages or just invite them in person. The same with the second step, just follow the onscreen instructions displayed.
Using Your Mac iOS
- Tick the “Apple” menu, select “Preferences”, then click the “iCloud” button.
- Tick the “Manage Family” option.
- Afterward, click the “+” icon and then make sure you follow the instructions on your screen.
Using Your Android Device
Here’s the procedure of how to add a member to Apple Music in case you are using an Android device. Take note that Apple Music is supported on Android devices so there is absolutely nothing to worry about in case you do not have an Apple device.
- On your Android device, launch the Apple Music app and tick the “menu” icon.
- You shall see your name or photo at the top area of the screen. Tap on it.
- Click the “Manage Membership” button. Your iCloud password might be asked. Have it entered?
- Tick either “Family” or “Family Setup”.
- The difference between ticking the “Family” button and the “Family Setup” button is that the earlier will allow you to add family members whereas the latter will let you create a Family Group.
Since a Family Group has been created already and invitations were sent out, the invited members only need to accept the invitation using the same Apple ID. After doing so, every family member can now enjoy streaming their favorite Apple Music songs.
See? It’s just so easy to learn the whole procedure of how to add a member to Apple Music!
Part 2. Bonus: How to Share Apple Music without Limitation?
Apart from the procedure of how to add a member to Apple Music that we just highlighted in the first part of this article, there is still another way of enjoying any Apple Music songs that you love. In this case, there is no need to pay any monthly fee! You just have to download those Apple Music songs you want to save and stream them anytime! But how can that be done?
But you must know first that Apple Music tracks are encrypted with Apple’s FairPlay protection. With this, the removal must be done first in order to save them on any device and share the tracks with your family members. There is a need for a trusted app here!
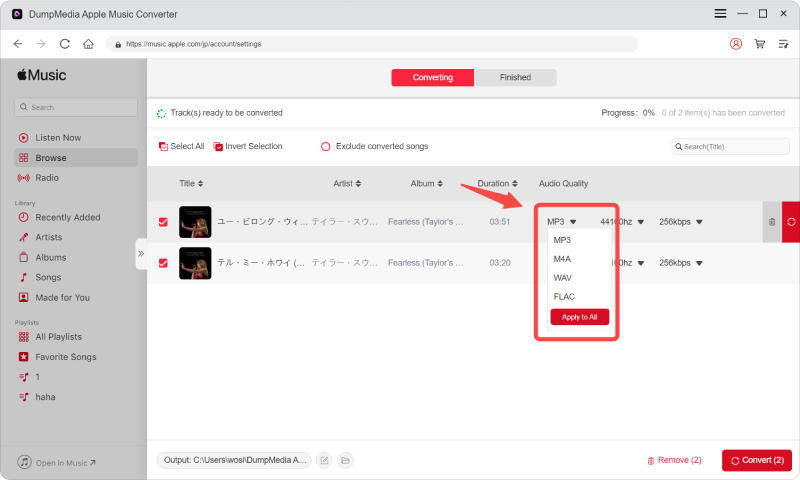
It is recommended to use DumpMedia Apple Music Converter! With its fast processing speed, conversion feature, and DRM removal perk, you can easily have any Apple Music songs saved on your PC! So basically, there is no need to learn how to add a member to Apple Music because you can just download the Apple Music songs, save them, and share them with your loved ones!
Here’s how easily you can use the DumpMedia Apple Music Converter during the conversion and downloading process.
Step #1. Install the DumpMedia Apple Music Converter on your PC and launch it after the successful installation. If you are worried about the installation needs and process, just visit DumpMedia’s official website and you’ll see the complete list. Start previewing the Apple Music songs to convert.
Step #2. Set up an output format you like and the output path. You can also customize some settings.
Step #3. Tap the “Convert” button to start the conversion process. The app will also remove the DRM protection of the chosen tracks.

After a while, you must expect the converted files to be readily available on the output path you defined before!
Part 3. Summary
We do hope that you already learned how to add a member to Apple Music upon reading this post. We are also glad to introduce an app like the DumpMedia Apple Music Converter that can help you with Apple Music songs’ conversion and downloading. If in case you have other questions relating to this “how to add a member to Apple Music” topic, just leave them in the comment section below!

30% Off >>>