


How to Record YouTube Live Streaming Video
YouTube has been considered as one of the most popular social media viewing platforms. There are a lot of people who are fond of watching videos on YouTube. Recently, live streaming has been trending. There are lots of YouTubers who are also performing live streaming to showcase what is happening in their daily lives in real-time. If you are one of the live streaming fans, you possibly got irritated before when you experienced skipped moments due to some instances. Well in this article, we are to share with you the ways to record YouTube Live Streams !

To ensure that you get a full live stream video to playback, screen recording would be the answer to your problems. If you got to have a recorded copy, you can go back to it as many times as you want even if you do not have the internet connection to do so. Amazing isn’t it? Wanted to know these awesome ways? Let us dig into those by staying on this page!
Contents GuideThree Best Ways to Record YouTube Live Streaming VideoBonus Tip: Converting Your Recorded Videos To Other File FormatsIn Conclusion
Three Best Ways to Record YouTube Live Streaming Video
#1: VideoSolo Screen Recorder
One powerful tool for recording Youtube Live Stream is this VideoSolo Screen Recorder. The scenes of This record seen in YouTube live stream videos, any music, and even other videos on both Mac or Windows computer. While using this program, you can also be assured that the quality of the output is a great as the original.
The following shows the easy step by step guide to using this VideoSolo Screen Recorder.
Step 1: You need to ensure that you have this VideoSolo Screen Recorder downloaded and installed on your personal computer.
Step 2: To begin using, make sure to launch and open the program.
Step 3: Once you arrived at the main interface, you would need to click the “Video Recorder ” option to capture the screen and the audio of the video. You got the option to record only the audio by ticking the “Audio Recorder ” button.
Step 4: Once you have clicked the “Video Recorder” button, you will see a lot more options on the screen for adjusting the recording area. You must use the “Custom ” button to hover over the YouTube live stream region you want to record. You should also remember that the "System Sound " button should be switched on. You must set proper system volume as well.
Step 5: Next would be clicking the “More settings ” button. This is where you can adjust the settings based on your preference. You have the option to record a YouTube live stream without losing the original quality and maintaining a 60 fps frame rate. VideoSolo Screen Recorder also allows high-definition videos to be recorded at a fast rate while achieving high compression.
Step 6: The last step would be ticking the “REC ” button to begin the recording process.
With these easy steps presented, you can have your recorder YouTube live stream!
#2: Screen Grabber Pro
Another tool that you can utilize for recording YouTube Live Streaming videos is this Screen Grabber Pro. Aside from this recording function, the user also gets to experience its editing function wherein one can even reduce the video size. Trimming can also be performed if one wanted to alter and remove scenes that are not actually needed or wanted to delete.
Below steps would help you to make use of this application software.
Step 1: Download and install this Screen Grabber Pro.
Step 2: Once installed, launch and open the program on your personal computer.
Step 3: The first thing that must be done is to go to the “Audio input ” tab which can be found on the top left the corner of the interface. From the drop-down list, select what type of audio you want to be included in your video. If you preferred recording YouTube video with sound, you can just tick the “System sound ” option and if you are going to include audio input from your microphone, you can tick the “System sound and microphone” button which you will easily see in the screen.
Step 4: You can move to the “Settings ” tab and choose “Options ” from the list that would be shown. You can click the “Recording ” tab and personalize the settings related to video format, mouse, and even the information that you are seeing on the screen. Once you are done with the changes wanted, make sure to hit the “OK ” button to save the settings.
Step 5: Head to YouTube’s website and look for the live stream video you wanted to record. Click the “Record ” option which you can see in the top left corner of the screen. From the drop-down list that you will see, select one of the five recording options. If you wanted to record live stream videos from YouTube, the most preferred way is “Region ”. You would need to drag the mouse cursor to be able to create a rectangle covering the area of the video you desire to capture. The region highlighted will only be the area that will be recorded. Make sure to hit “OK” once you are done. After some seconds, the recording process will immediately start.
Once the live stream and the recording process ended, you can easily check your recorded video in Screen Grabbers Pro’s media.
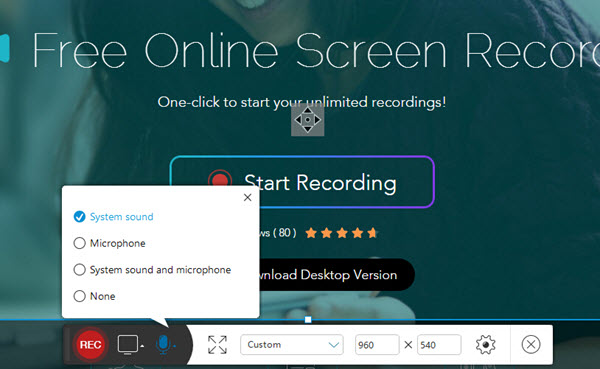
#3: Free Screen Recorder Online
If you are a person who finds downloading and installation of application software as a hassle, you can somehow resort to this web-based screen recorder. This one is a free online screen recorder that can also perform the task of screen recording. To be able to use this one, you just need to have a secure internet connection to continue with the process. It also has multiple functions that you can also make use of.
Below are the methods to be followed.
Step 1: To be able to use the tool, you must click the “Start ” button which can be seen on the main interface once you visited the site.
Step 2: Once ticked, go ahead to the YouTube site and look for the live stream video intended to be recorded. You as well have the chance to adjust the recording area depending on the size of your media player or your preference by just dragging the corners of the highlighted area using your mouse. If you prefer to record the video in full screen, you should press the “Full Screen ” icon on the bottom menu to continue.
Step 3: When you are satisfied with everything, you can now hit the “REC” button and after just some seconds, the whole recording process will begin.
Once the video ended, you can click the “Stop ” button to finish your recording. You can view your recorded video in Free Screen Recorder’s media player.
Bonus Tip: Converting Your Recorded Videos To Other File Formats
Now that you have finished the record YouTube live streaming video process, you can convert it to your desired format by using this DumpMedia Video Converter which has been used and trusted by a lot of users nowadays.
The main feature of this tool is video conversion to different desired formats without quality loss. This supports numerous formats such as MP4, AVI, FLV, AAC, AC3, WMA, WAV, FLAC, and a lot more! In addition, you can easily convert DVD and videos to GIF/ video/ audio. This as well as editing and enhancing functions such as adjusting of brightness, contrast, saturation hue, and volume control which you can use. Even adding subtitles is possible! Aside from its main function, this one is software with a user-friendly interface and offers easy steps to perform the desired processes. We are definitely recommending this converter for users like you.
Downloading and even the installation of this program could be done in just a few minutes and would require only a few clicks. You got to have your converted video by just following a few and simple steps. Are you now delighted, thrilled, and excited to use this one?
To proceed with video conversion, you must do this simple step by step guide.
Step 1: Of course, you are required to ensure that this DumpMedia Video Converter would be downloaded and installed on your Windows of Mac computers.
Step 2: Launch the program and click the “Add files ” button to select the desired media file to convert. You can as well drag and drop the files directly from the location to the main interface of the application.
Step 3: Select the desired output format by ticking the “Convert All Tasks to: ”. You got a lot of options you can choose from such as MP4, MOV, WMV, AVI and many more.
Step 4: Once done, choose the destination folder wherein the output or converted file would be saved by clicking the “Browse ” button.
Step 5: Click the “Convert ” button to begin with the conversion process.
Once you are done with these steps, you can preview the video and check the converted file by tapping the “Open Folder”. By performing just these five simple steps, you go to have your converted video in just a few minutes.

In Conclusion
There is a lot of application software which offers the function of recording YouTube live streaming videos. The above are just a few. If you do not want to perform downloading and installation, you can also make use of free online screen recorders. Did you find this article beneficial? Let us know your feedback by leaving your comments below!

30% Off >>>