


Guide on Playing DVD on iPad [2026 Guide]
Just like streaming a DVD on your TV via Chromecast which you cannot directly do without copying the DVD to your computer first through ripping, and then converting the ripped DVD to a Chromecast-compatible format, playing DVD on iPad requires the same process. Except that you need to convert the ripped DVD into an iPad-compatible format.
In this article, we will be giving you a step-by-step guide on the whole process of playing a DVD on your iPad to help you enjoy watching your favorite DVDs not just on a DVD player but also on your portable devices such as iPad. But before this, you should know the risk of ripping a DVD, especially the copy-protected ones, before you start copying a DVD to your iPad. So in the next section, we will discuss the legality of ripping a DVD for playback on your iPad.
Contents GuidePart 1. Is It Legal to Rip DVD for Playback on Your iPad?Part 2. How to Convert DVD to An iPad-Compatible Format?Part 3. How to Watch Your DVD on Your iPad?Part 4. In Conclusion
Part 1. Is It Legal to Rip DVD for Playback on Your iPad?
The real question is, when is ripping a DVD considered legal? When you create your personal copies of DVDs that are not from copyrighted works, ripping is considered completely legal. The reserved rights for each DVD are usually listed depending on the type of the copyright. But oftentimes, you need to cite the creator of the DVD. And before you can sell these copies, make sure that you have the appropriate business licenses
In the US, ripping copy-protected DVDs is still illegal. But many organizations are continuing to work to make the process legal for buyers of copyrighted DVDs as long as they rip them for personal purposes only such as for playback on devices like your iPad. Although some countries had already made this legal. The UK would be a good example. So here will provide you a guide on how to decrypt your DVD and rip the copyrighted DVDs.
Part 2. How to Convert DVD to An iPad-Compatible Format?
Converting your DVD to an iPad-compatible format is the first thing you need to do before you can watch your DVD on your iPad. This may be harder than you think it is because most DVDs are copy-protected. Converting your DVD to a format supported by iPad basically comprises of two steps:
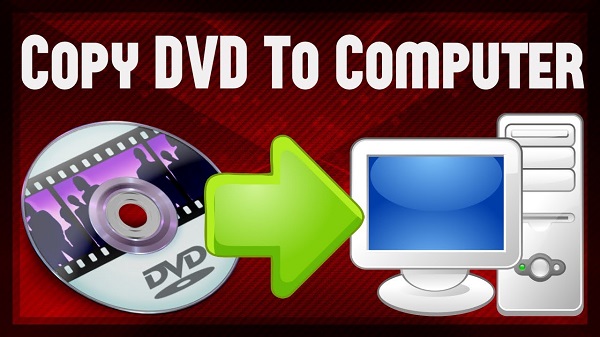
Step 1. Copying your DVD to your computer by using a DVD ripper.
Step 2. Converting your ripped DVD into an iPad-compatible format by using a video converter software.
Copying Your DVD to Your Computer by Using A DVD Ripper
The tools you will be used to copy a DVD to your computer are called DVD rippers. There are a lot of options you will find when you search online but some of the best ones are actually free such as Handbrake.
In this section, we are going to show a step-by-step guide on how to use a free DVD ripper, HandBrake, to rip your DVDs before converting it to an iPad-compatible video format. Aside from being free, it is very easy to use and is ideal for beginners. To rip your DVD, just follow the steps below.
Step 1. Download and install Handbrake on your computer.
Step 2. Open the CD tray of your computer and insert your DVD.
Step 3. Launch the application.
Step 4. Once the software has loaded, a Source Selection window will appear on your screen’s left side. Ignore the File and Folder options and click on the DVD option. Wait for a few seconds while Handbrake scans you DVD’s contents.
Step 5. To avoid a large ripped output file, just select the video components that you need under the Source section.
Step 6. Go to the Destination section and click on the Browse button.
Step 7. Select your destination drive’s location. For the output location, it is recommended to use an external drive, or in the cloud.
Step 8. On your screen’s right portion, choose your ripped DVD’s output quality under the Presets section.
Step 9. Select your Subtitles and Audio at the bottom of the HandBrake interface.
Step 10. Once you are done configuring your settings, look for the Start Encode icon on the app interface’s top section and click on it to start the ripping process.
The process may take some time depending on your DVD video’s length and the settings you have selected. If you want to check the process’ progress, just click on the Activity Log.
Using DumpMedia Video Converter to Convert DVD to iPad Directly
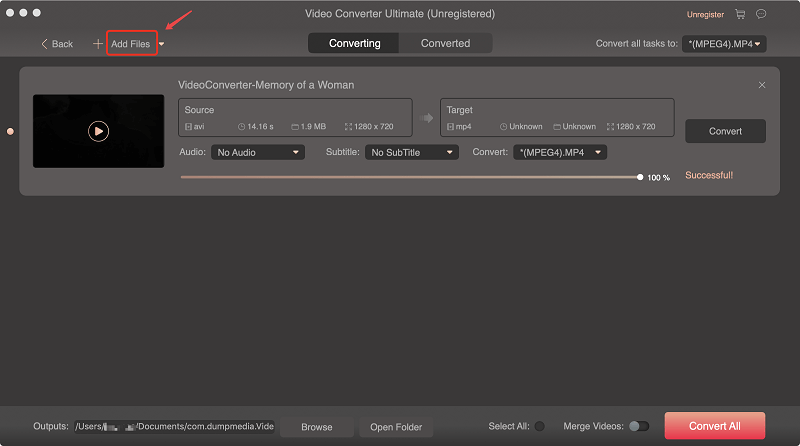
DumpMedia Video Converter is a powerful and high-speed all-in-one audio and video converter, downloader, editor, and player. Enjoy the convenience of a friendly interface equipped with a lot of features to meet all of your video needs. The software supports many formats including MPEG, 3GP, FLV, MKV, AVI, WMV, MOV, MP4 along other regular video formats.
DumpMedia also allows you to improve your video’s quality by upscaling its resolution by converting it from SD to HD resolution and vice versa. To convert your ripped DVD videos to an iPad-compatible format, download the software first and follow the steps below:
Step 1: Launch the DumpMedia Video Converter.
Step 2: Add your DVD video to the DumpMedia.
Step 3: Choose an iPad-compatible output format and destination folder.
Step 4: Start the conversion process.
Launch the DumpMedia Video Converter
After downloading the DumpMedia installer, launch the application by following the steps below for Windows and MacOS operating systems.
For Windows users:
- Go to the Search icon (magnifying glass) beside the Windows icon in your computer’s Task Bar.
- Type DumpMedia on the text field.
- Click on the DumpMedia application on the search results.
For MacOS users:
- Click on the Launchpad icon in your computer’s Dock. The launchpad icon is a gray circle with a darker gray rocket at the center.
- Type DumpMedia on the Search bar at the topmost part
- Hit the Return button on your keyboard to launch the application.
Add Your DVD Video to The DumpMedia
Click the Add Files button located at the top-left section of the interface to import your files or you can drag-and-drop them directly into the main interface.
Choose An iPad-compatible Output Format and Destination Folder
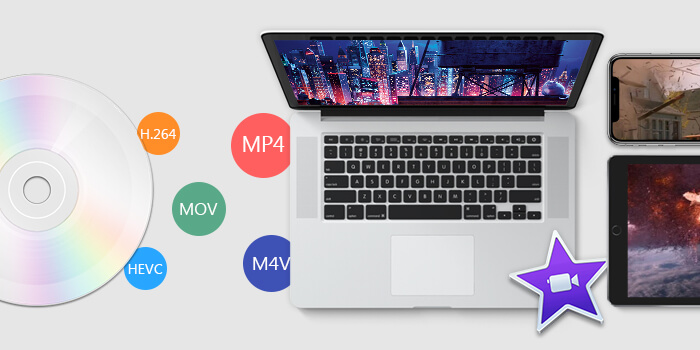
To help you choose an iPad-compatible format, below is a list of the video formats that iPad supports and the ones that it does not.
Supported iPad video formats: H.264, M4V, MP4, MOV, M-JPEG, and MPEG-4
Unsupported video formats: Windows (WMV), Flash (FLV), and AVI video formats
For the steps, look for the Convert all tasks to text at the top right corner of the interface. Select your desired iPad-compatible output format. At the bottom of the interface, click on the Browse button and browse your computer to the desired destination folder of the converted files.

Start the Conversion Process
Click the Convert button to start the conversion of your ripped DVD file. Wait for the conversion to complete.
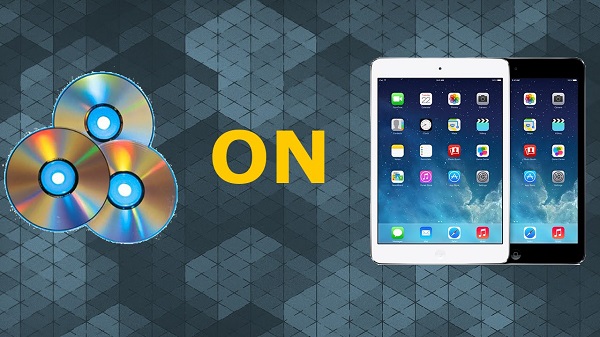
Part 3. How to Watch Your DVD on Your iPad?
After converting your ripped DVD to an iPad-compatible format, the next step before you can watch your DVD on your iPad are:
Step 1. Importing the converted DVD into iTunes
Step 2. Syncing iTunes with your iPad
iTunes is Apple’s default app for media management that allows you to sync all media types including music and videos to an iPad device or any other iOS device.
Importing the Converted DVD Into iTunes
To import your converted DVD into iTunes, just follow the steps below:
- Launch the iTunes app on your computer.
- Click on the File tab and select Add File to Library from the choices.
- Browse the location of your converted DVD file then adds it to iTunes.
Once your video has been added, it will appear on iTunes’ Movies section. You can find the Movies section at the right panel of the app interface.
Syncing iTunes With Your iPad
This process is very straightforward. However, since the files have large sizes, the sync may take a while. So do not sync your whole movie collection simultaneously. To sync iTunes with your iPad, follow the step below.
- Connect your iPad to your computer.
- In iTunes, click on the iPad icon.
- Click on the Movies section at the right panel of iTunes.
- Tick the Sync Movies checkbox located at the top portion.
- Uncheck the Automatically include
- Select the DVD movie that you want to watch on your iPad from the list that will appear. Each movie you select will display the length and file size of the movie.
- After making a selection, click on the Apply
Now, you can view your DVD using iTunes on your iPad devices.
Part 4. In Conclusion
In this article, we discussed the steps on how you can watch DVD on your iPad. To end our discussion, below is the summarized steps for the whole process discussed in this guide:
- Rip your DVD to your computer using Handbrake.
- Convert the ripped DVD into an iPad-compatible format using DumpMedia Video Converter.
- Import your converter DVD into iTunes.
- Connect your iPad to your computer and then sync iTunes with your iPad.
- Enjoy watching your DVD video on your iPad.
So that’s it! Hopefully, this guide was able to give you what you were searching for. Happy viewing!

30% Off >>>