


How to Stream DVD to Your TV via Chromecast Losslessly
You might be wondering if there is a way that you can directly stream a DVD to TV via Chromecast. However, you cannot do this because Chromecast can only support Google Cast media formats. So there is no chance for you to experience this the easy way. Are you disappointed? No worries as there is actually a way that you can still enjoy streaming high-quality DVD videos on your TV via Chromecast.
Although Google Chrome does not support the direct casting of DVDs through the Chromecast extension, you can still stream your favorite DVDs on your TV by copying your DVD to your computer and converting it to a Chromecast-compatible format before casting it to your TV. In this article, we will guide you on how you can do this so if you want to know more, just keep on reading! But first, let us get you familiar with what exactly is Chromecast in the next section.
Contents GuidePart 1. What Is Chromecast?Part 2. How to Stream DVD to TV via ChromecastPart 3. In Conclusion
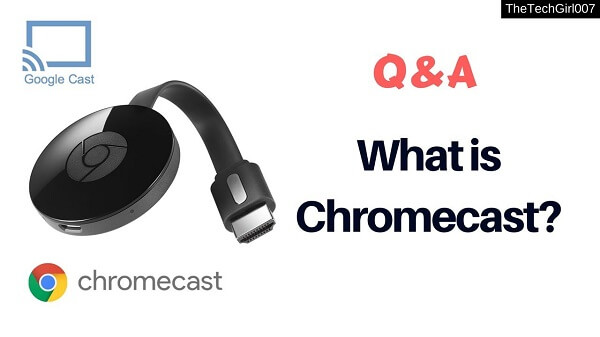
Part 1. What Is Chromecast?
Chromecast was developed by Google and serves as a player for digital media. All you have to do is plug your Chromecast into the HDMI port of your TV and then you can either use your smartphone of the computer to control the streaming of local videos remotely. Using Chromecast is very convenient but there are also limitations that you have to deal with such as the number of supported formats written in the table below.
|
Supported Formats |
Unsupported Formats |
|
WebM and MP4 encoded using the following video codecs and audio codecs: Video Codecs ● H.264 High Profile Levels 4.1, 4.2, and 5.2 ● VP8 Audio Codecs ● LC-AAC ● HE-AAC ● CELT/Opus ● Vorbis ● MP3 ● WAV ● FLAC |
● 3GP ● M2TS ● TS ● DIVX ● ASF ● RM ● RMVB ● DV ● F4V ● TOD ● OGV |
For more information about supported media for Google Cast, you can check out this link.
Typically, Chromecast takes advantage of a WiFi network to display various stuff on your TV screen. But Chromecast’s Guest Mode authorizes other people to directly cast contents to your TV.
Things You Would Need Before You Can Stream A DVD to Your TV via Chromecast
Before you can start playing a DVD from your computer to your TV via Chromecast, make sure that you have the following first to prevent any hassles:
- A Chromecast device
- A DVD that you would like to cast
- A TV where the DVD will be cast
- A computer
- A DVD Ripper for copying your DVD to your computer
- A Video Converter software that you’ll use to convert your DVD to a Chromecast-compatible format.
Bonus Tips : How to stream media videos from VLC using chromecast.
Part 2. How to Stream DVD to TV via Chromecast
1. Copying Your DVD to Your Computer
This is the first step that you need to do before you can play your DVD on your TV via Chromecast. For this step, you would need a DVD ripper. If you don’t have one, we recommend using Handbrake as it is a free and easy-to-use tool and it is preferred by most users.
To copy your DVD to your computer using Handbrake DVD ripper, follow the steps below:
Step 1. Scan the DVD.
Step 2. Select Your Content.
Step 3. Choose the Destination Folder.
Step 4. Choose Output Quality.
Step 5. Select Your Subtitles and Audio.
Step 6. Start the Ripping Process.
Scan the DVD
- Before launching Handbrake, open the CD tray of your computer and insert the DVD.
- Close the CD tray and launch Handbrake.
- Once the software has loaded, a Source Selection window will appear on your screen’s left side. You can’t proceed further until you’ve selected a source.
- Ignore the File and Folder options and click on the DVD option (the last option on the list). Wait for a few seconds while Handbrake scans your DVD’s contents. If you haven’t installed dll properly, you will receive an error pop up message. Else, you will be directed to Handbrake’s Settings.
Select Your Content
The Handbrake app allows you to select what kind of content you’d like to rip off your DVD. Make all of these adjustments under the Source section. A lot of DVDs include other contents besides the TV show or movie itself. They might have special features, interviews, deleted scenes, director’s cuts, and others.
- You can choose the part of the DVD content that you want to rip in the Title dropdown menu. The longest one is probably the movie. But if you are ripping TV shows, you would need to rip the episodes one by one.
- Adjust the Angles and Chapters that you’d like to retain from the corresponding drop-down buttons. DVDs are divided into chapters and angles for easier navigation. Angles are simply used for providing various versions of a single scene.
- Change the Chapters to Seconds or Frames if you prefer using a different basis to cut your content.
Choose the Destination Folder
The next thing to do is to decide the output location of your ripped videos. To save your ripped DVD to your hard drive, follow the sub-steps below.
- Go to the Destination section and click on the Browse button.
- Select your hard drive’s location.
- Enter a name for your ripped video.
Choose An Output Quality
On your screen’s right portion, you will notice the various Presets you can choose from. These correspond to your rip’s quality. Handbrake not only offers various general presets, but it also has presets that are device-specific. Browse through the available preset on the list and select one. Remember that if you choose higher quality, the resulting file will also have a larger size and the ripping process will take longer.
Select Your Subtitles and Audio
At the bottom part of Handbrake’s interface, there are six tabs: Chapters, Subtitles, Audio, Video, Filters, and Picture. Video, Filters, and Picture will be automatically determined by your selected preset but you can still customize these settings further according to your preference.
However, it is worth more of your time to spend on the Subtitles and Audio tabs. Why? Because these tabs are where you can decide which subtitles and dubs you would want to include in your ripped video. Fewer subtitles/dubs selected will make your resulting file size smaller.
The Audio tab will list the available dubs in your DVD, just add the audio version that you really need. On the Subtitles tab, you can select which subtitle file or files you want to copy whether for incorporating them on the ripped video itself or save them as standalone subtitle files.
Start the Ripping Process
Once you are satisfied with your settings, look for the Start Encode icon on your screen’s top section and click on it to start ripping your DVD. The process can take some time depending on your DVD video’s length and the settings you have selected. If you want to check the process’s progress, just click on the Activity Log.
2. Converting Your Ripped DVD to A Chromecast-Compatible Format
For this step, we recommend using DumpMedia Video Converter. DumpMedia is a powerful and high-speed all-in-one audio and video converter, downloader, editor, and player. Enjoy the convenience of a friendly interface equipped with a lot of features to meet all of your video needs. The software supports many formats including MPEG, 3GP, FLV, MKV, AVI, WMV, MOV, MP4 along other regular video formats.
DumpMedia also allows you to improve your video’s quality by upscaling its resolution by converting it from SD to HD resolution and vice versa.
To convert your ripped DVD videos to a Chromecast-compatible format, download the software first and follow the steps below:
Step 1: Launch the DumpMedia Video Converter.
Step 2: Add your Ripped DVD video to the application.
Step 3: Choose a Chromecast-compatible format along with the destination folder.
Step 4: Start the conversion process.
Launch the DumpMedia Video Converter
After downloading the DumpMedia installer, launch the application by following the steps below for Windows and MacOS operating systems.
For Windows users:
- Go to the Search icon (magnifying glass) beside the Windows icon in your computer’s Task Bar.
- Type DumpMedia on the text field.
- Click on the DumpMedia Video Converter on the search results.
For MacOS users:
- Click on the Launchpad icon in your computer’s Dock. The launchpad icon is a gray circle with a darker gray rocket at the center.
- Type DumpMediaon the Search bar at the topmost part
- Hit the Return button on your keyboard to launch the application.
Add Your Ripped DVD Video to the Application
Click the Add Files button located at the top-left section of the interface to import your files or you can drag-and-drop them directly into the main interface.
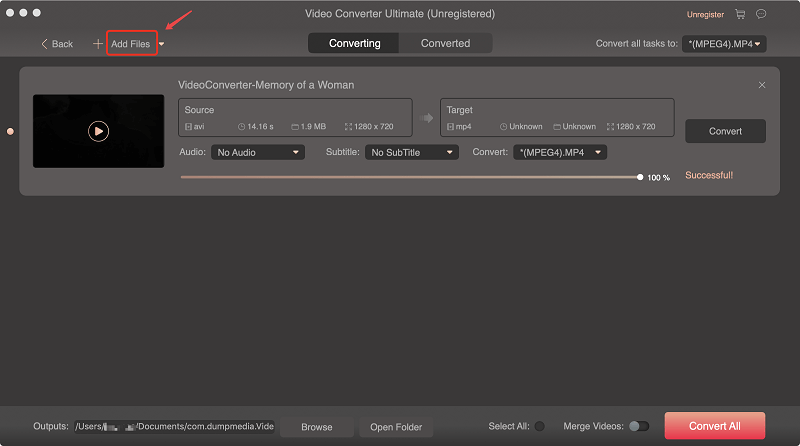
Choose a Chromecast-compatible Format
Look for the Convert all tasks to text at the top right corner of the interface. Select a Chromecast-compatible format for the output. At the bottom of the interface, click on the Browse button and browse your computer to the desired destination folder of the converted files.
Start the Conversion Process
Click the Convert button to start the conversion of your ripped DVD file. Wait for the conversion to complete.

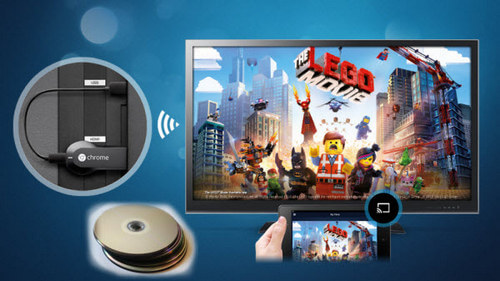
3. Casting Your Converted DVDs to Your TV via Chromecast
The final step is to cast your converted DVDs to Your TV from your computer screen. Just follow the steps below.
- Play your converted DVD on your computer.
- Launch Google Chrome.
- Click on the three dots located at Chrome’s top right corner.
- From the dropdown options, click on Cast.
- Click on the Cast todown arrow.
- Choose Cast desktop.
Now, enjoy watching your DVD on your TV!
Part 3. In Conclusion
In this article, we gave you a step-by-step guide on how you can enjoy watching your favorite DVDs on your TV via Chromecast, Though the process may not be as straightforward as you thought it will be, we hope that this guide was able to make the process easy for you. So what are you waiting for? Get your DVDs now and follow these easy steps to start enjoying your favorite DVDs on your personal home theaters!

30% Off >>>