


How to Convert WAV to MP3 on Mac: 5 Easiest Ways
To convert a WAV file to MP3, Mac users typically have various ways on how they can do this such as using iTunes, online audio converters, and third-party WAV to MP3 converters for Mac. But Mac users should expect quality loss from the conversion process of WAV to MP3 as WAV is basically lossless. However, this sometimes depends on the tool you’re using because some tools can convert audio with a minimum quality loss.
In this article, we are going to give you some methods to convert WAV to MP3 on Mac. And First, we will give you our most recommended audio converter software, DumpMedia Video Converter, in the following section.
Contents GuidePart 1. The Best Audio Converter To Convert WAV to MP3 on MacPart 2. Other Four Tools To Convert WAV to MP3 on MacPart 3. In Conclusion
Part 1. The Best Audio Converter To Convert WAV to MP3 on Mac
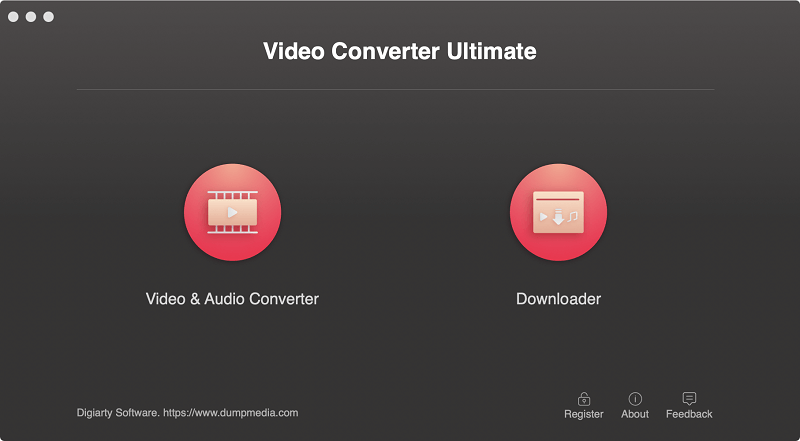
DumpMedia Video Converter is a powerful and high-speed all-in-one audio and video converter, downloader, editor, and player. Enjoy the convenience of a friendly interface equipped with a lot of features to meet all of your video needs. It supports the following audio formats:
AAC, AC3, AIFF, AMR, AU, FLAC, M4A, MKA, MP2, MP3, OGG, WAV, WMA
The software also supports many video formats including MPEG, 3GP, FLV, MKV, AVI, WMV, MOV, MP4 along with other regular video formats. To convert your WAV files to MP3, download the software first and follow the steps below.
Step 1. Launch the DumpMedia Video Converter.
For Windows users:
Step 1a. Go to the Search icon (magnifying glass) beside the Windows icon in your computer’s Task Bar.
Step 1b. Type DumpMedia on the text field.
Step 1c. Click on the DumpMedia Video Converter on the search results.
For macOS users:
Step 1a. Click on the Launchpad icon in your computer’s Dock. The launchpad icon is a gray circle with a darker gray rocket at the center.
Step 1b. Type DumpMedia on the Search bar at the topmost part
Step 1c. Hit the Return button on your keyboard to launch the application.
Step 2. Click the Add Files button located at the top-left section of the interface to import your WAV files or you can drag-and-drop them directly into the main interface.
Step 3. Look for the Convert all tasks to text at the top right corner of the interface. Select the MP3 format.
Step 4. At the bottom of the interface, click on the Browse button and browse your computer to the desired destination folder of the converted files.
Step 5. Click the Convert button to start the conversion of your audio file.
Step 6. Wait for the conversion to complete.
Part 2. Other Four Tools To Convert WAV to MP3 on Mac
#1 iTunes

Using iTunes is the most simple and direct way to convert a WAV file to MP3. As you may already know, iTunes is an audio player but it can also be used as a converter for audio files. Luckily, the tool supports both MP3 and WAV files. iTunes can be considered as the most favorable converter of WAV files to MP3 as it is free and is already pre-installed in the macOS. You can probably save more energy and time by opting for iTunes in converting your WAV files to MP3 on Mac.
For some reason, iTunes’ encoder settings are hidden by Apple in a considerably deep layer inside iTunes making it not easy to find. But once you find it, the conversion process for WAV to MP3 is easily done. Follow the guide below on how you can convert WAV files to MP3 in Mac using iTunes.
Step 1. Launch iTunes. Every Mac is pre-installed with this program. But if you accidentally deleted it, Apple allows you to download it for free from their website.
Step 2. Change the settings for iTunes encoding by using the following steps:
Step 2a. Click on iTunes then hover on Preferences from the drop-down list.
Step 2b. Select Import Settings.
Step 2c. Click on Mp3 Encoder.
Step 2d. Click on the OK button.
Step 3. Import the file/files you’d like to convert by dragging it/them to the iTunes interface.
Step 4. Select the file/files that you want to convert by clicking on it/them. You can also press and hold the Shift keyboard button while you select the files.
Step 5. Click on the Advanced option.
Step 6. Choose Create Mp3 version.
Step 7. Wait for the conversion to finish.
#2 All2Mp3 Software
All2Mp3 is among the great conversion utilities for various reasons:
- It is free,
- It allows you to adjust you output audio’s bitrate quality through a slider (the default value is 320kbps), and
- It is very fast and very easy to use.
So without any further ado, below are the steps on how you can convert a WAV file to MP3 using All2Mp3.
Step 1. Download All2Mp3.
Step 2. Launch the program.
Step 3. Drag your WAV file/s that you’d like to convert into the app interface. The software can handle more than 1 file at a time so you can import files as many as you want.
Step 4. Set the quality of the audio output to your liking by using the slider.
Step 5. Click on the Convert button.
Step 6. Wait for the conversion to finish.
Alm2Mp3 works very fast and it will save the output MP3 file in your input WAV file’s location by default so you should look for your converted file in that folder unless you have specified the output path before the conversion. Moreover, All2Mp3 only works for Mac computers.
#3 MediaHuman Audio Converter
This is a free software for Windows and macOS. It helps you convert your audio files for free to AIFF, OGG, FLAC, AAC, WAV, MP3, WMA, and others. MediaHuman Audio Converter has a simple interface and has the following features:
- Conversion between all major audio formats,
- Track splitting using CUE sheet,
- Exports outputs to iTunes,
- Simultaneous conversion of multiple files,
- Keeps folder structures,
- Extraction of video audio tracks, and
- It is absolutely free!
To convert WAV files to MP3, follow the steps below.
Step 1. Add your WAV files to the application.
Step 1a. Launch MediaHuman Audio Converter.
Step 1b. Click on the Add button at the top-left corner of the interface.
Step 1c. Browse your WAV file/s and select it/them.
Step 2. Select the MP3 format.
Step 2a. Click on the fourth dropdown button.
Step 2b. Select MP3.
Step 3. Choose the settings for your output MP3. From here, you can specify the codec settings such as sample rate, bitrate, and channels. You can either create your own settings or choose from the predefined ones. To create your own settings, follow the steps below.
Step 3a. Click on the other dropdown button beside the MP3 dropdown below the main menu bar.
Step 3b. Click on Custom.
Step 3c. Specify your desired settings individually.
Step 4. Start the conversion process by clicking on the rightmost button on the iTunes’ toolbar. The conversion will use all of your processor’s power which you can limit from the application’s Preferences.
Step 5. Wait for the conversion to complete.
Step 6. After all of the conversion is done, you can locate your converted file/s by clicking on the Locate icon at the right part of your converted file from the iTunes list. This will open the file location of your MP3 file/s. The Locate icon looks like a magnifying glass.
#4 Online-Audio-Converter.com
Online-Audio-Converter.com is an online audio converter that you can use to convert your files for free. It supports all audio formats and processes file conversion quickly. Furthermore, you won’t need to do any installation procedures. This tool works with more than 300 audio and video file formats such as M4R (for iPhone ringtones), MP2, AME, OGG, FLAC, MA, WAV, and MP3. To convert your WAV files to MP3 using Online-Audio-Converter.com, follow the steps below.
Step 1. Navigate to Online-Audio-Converter.com’s website.
Step 2. Click on the Open files button and add your WAV file/s from your computer. You can also import your file/s from Google Drive, Dropbox, or through a URL.
Step 3. Wait for the tool to finish uploading your file/s.
Step 4. Choose mp3.
Step 5. Adjust the output MP3’s quality from the Quality slider.
Step 6. Click on the Advanced Settings button to adjust the Bitrate, Samplerate, Channels, and add audio effects.
Step 7. Click on the Edit track info button if you want to set the Title, Artist, Album, Year, and Genre details of the output MP3 file.
Step 8. Click on the Convert button.
Step 9. Wait for the conversion to finish.
Step 10. After the conversion is completed, click on the Download link. You can also save the output MP3 to your Google Drive or Dropbox.
Step 11. Wait for the download to finish.

Part 3. In Conclusion
In this article, we gave you our most recommended video converter software you can use to convert WAV to MP3 - DumpMedia Video Converter. Then we have listed other four tools on how you can do this along with a step-by-step guide on how you can convert WAV to MP3 using each tool:
- iTunes,
- All2Mp3 Software,
- MediaHuman Audio Converter, and
- Online-Audio-Converter.com.
Choose the tool that suits yours needs to begin enjoying listening to music on your devices.

30% Off >>>