


Detailed: How to Add Music from YouTube to CapCut
Adding appropriate music to your video may create a compelling impression. Whether you're creating a Vlog, a TikTok clip, or a tutorial video, adding the right soundtrack may elevate your video to the next level. This might explain why people want to import their favorite YouTube Music songs into CapCut.
In addition, YouTube has a large music collection, and CapCut offers a suite of editing tools that allow producers to modify their films and add individual soundtracks. However, CapCut does not presently enable directly importing tracks from YouTube Music, and it appears to be difficult to smoothly integrate YouTube music into your CapCut production. In this article, we will share with you how to add music from YouTube to CapCut.
![]()
Contents Guide Part 1. How to Download Music from YouTube for CapCutPart 2. How to Add Music from YouTube for CapCutPart 3. FAQs about Adding Music from YouTube to CapCutPart 4. Summary
Part 1. How to Download Music from YouTube for CapCut
If you're a YouTube Premium subscriber, you might assume that downloading music is a breeze. While premium subscriptions offer a range of benefits, they do not grant you unrestricted access to YouTube music for use in unauthorized apps like CapCut.
As a YouTube Premium user, you would think downloading music and utilizing it in CapCut is simple. While Premium allows you to download songs, many YouTube tunes remain locked by Digital Rights Management (DRM). This DRM restricts the direct usage of music, making it difficult to incorporate YouTube tracks to CapCut projects.
The issue is exacerbated by CapCut's limits. CapCut, like many video editing applications, has issues with encrypted audio and video data and requires certain format specifications. As a result, you must not only remove DRM from your YouTube music, but also convert the songs to CapCut-compatible formats.
To remove DRM protection from YouTube Music songs and convert the songs to CapCut supported formats, you need a professional YouTube Music Converter, that is DumpMedia YouTube Music Converter, which can convert YouTube music tracks to widely used audio formats such as MP3, WAV, AAC and FLAC.
One of DumpMedia YouTube Music Converter's most notable qualities is its ease of use, making it excellent for folks who are not tech knowledgeable. The program features an easy-to-use UI with step-by-step instructions, making it ideal for novices. Furthermore, if you find any problems, the DumpMedia support team is there to help you swiftly and effectively.
Follow these simple steps to convert music from YouTube:
Step 1: Download and Install
First, download and install DumpMedia YouTube Music Converter on your computer. After installation, launch the software and log in to your YouTube Music account.
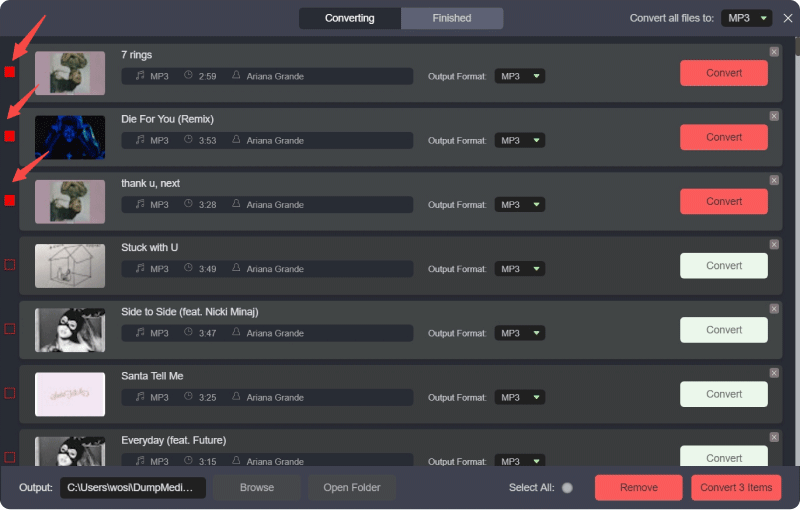
Step 2: Choose Your Songs
Browse through your YouTube Music library to find the songs or playlists you want to convert. Use the search feature to find specific tracks or explore your playlists and albums. Add your selected songs to the conversion queue.
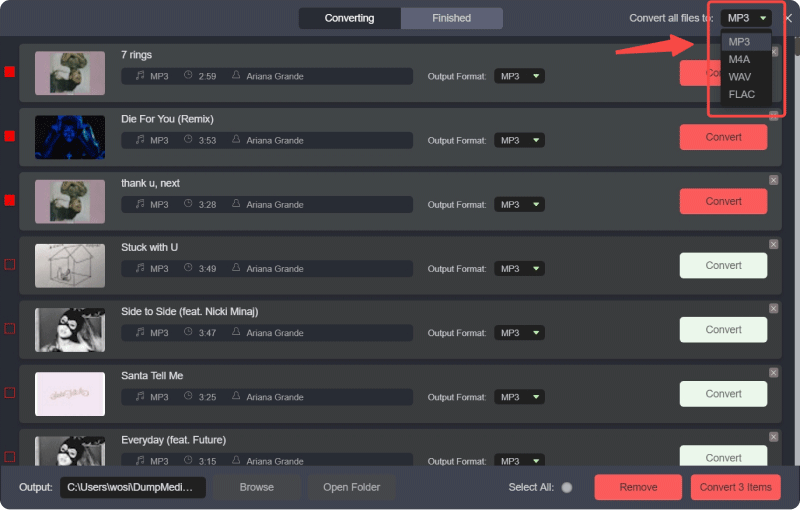
Step 3: Set Output Preferences
Select your desired output format, such as MP3 or AAC. Customize settings like bitrate and sample rate to adjust the quality and size of the files, ensuring they’re compatible with your iPod.
Step 4: Pick Output Location
Choose a folder on your computer where you want the converted files to be saved.
Step 5: Start Conversion
Click the "Convert" button to start the process. The software will quickly convert your chosen YouTube Music tracks into high-quality files. Once done, you’ll find the files in your designated output folder.

Part 2. How to Add Music from YouTube for CapCut
Make sure your music is on the device you plan to use to edit the CapCut project before you start adding music. This is how you do it:
Transferring YouTube Music to Your Devices
- Ensure that your device—be it a smartphone, computer, or tablet—is properly connected and ready for file transfers.
- Locate the YouTube Music files you downloaded on your computer.
- For smartphones or tablets, use a USB cable to transfer music. Connect your device to your computer, then drag and drop the music files into the appropriate music folder on your device.
Adding Downloaded YouTube Music to Your CapCut Project
The specific operation methods are different depending on the device you use. The following are the specific operation steps on computers and smartphones.
On Computer:
Step 1. Launch CapCut, then load a project or create a new one.
Step 2. Click the "Import " to load an existing project. Click the "Menu" --"File "--"New project " to create a new project.
Step 3. Tap "Open " to add the song you downloaded on computer to the project's library.
Step 4. Click "Add to track " or drag and drop the song into the project's timeline.
On Smartphone
Step 1. Open the CapCut app on your smartphone.
Step 2. Tab "New Project " to choose the video you want to edit and add music from YouTube Music. Or you can open an existing project.
Step 3. Tab "Add audio ", then choose "Sounds " from the menu.
Step 4. Tab on the file icon and select "From device".
Step 5. Locate the downloaded YouTube Music file, then tap the "+ "icon to add it to your project.
Step 6. You can begin to edit the added track to fit your project.
Part 3. FAQs about Adding Music from YouTube to CapCut
Q1. Can I add multiple audio tracks from YouTube in CapCut?
Yes, you can add and layer multiple audio tracks in your CapCut project. Simply repeat the import process for each audio file you want to use.
Q2. How can I extract audio from a video?
Choose "Audio", then click "Extracted". Select the video from which you wish to extract the audio, then click "Import sound only ".
Q3. Can I use YouTube music in CapCut for commercial projects?
Using copyrighted music from YouTube for commercial purposes without proper licensing can lead to legal issues. Always check the licensing and obtain necessary permissions.
Q4. What should I do if I receive a copyright claim on my CapCut video with YouTube music?
If you receive a copyright claim, you may need to remove or replace the music. You can also dispute the claim if you believe it is incorrect and you have proper usage rights.
Part 4. Summary
CapCut can enhance videos by importing music from YouTube, but DRM restrictions prevent direct imports. DumpMedia YouTube Music Converter can remove DRM and convert music to a CapCut-compatible format. This process involves downloading, converting, and transferring music files from YouTube to your device. Importing and editing the music within CapCut is easy. Understanding the process and legal considerations can help successfully integrate YouTube music into CapCut videos, creating compelling content.

30% Off >>>