


How to Fix VLC No Sound Issue 2026
VLC is a very popular media playback tools used to launch audio and video files. It has a variety of features and many people find it to have a very robust platform. However, this doesn’t mean one won’t find issues with the most-loved software.
One common problem users find with the tool is the issue of “VLC No Sound.” The video can be played properly; however, one cannot hear the sound coming off from it. There are many reasons for this type of problem.
In this article, we’ll help you fix the issue of VLC No Sound. Thus, after you have gone through the entire article, you will now be able to play audio and video files on VLC Media Player while listening to its corresponding audio. Let’s get started.
Contents GuidePart 1: Top Solutions To Fix VLC No SoundPart 2: To Wrap It All Up
Part 1: Top Solutions To Fix VLC No Sound
In this section, we will give you the solutions on how to fix the problem we’re currently facing. We’ll start with the easiest solutions first and progress to more technical solutions we can implement to repair the issue of “VLC No Sound.”

#1: Unmute VLC Media Player Audio
There might actually be a configuration error in VLC Media Player. These types of errors are very simple to spot and can happen instantly. You may just have muted the VLC player by mistake. You should ensure that you have not muted the sound in VLC by checking out the section “Audio-Mute.”
#2: Updating The Software To Its Latest Version
You might have a VLC Media Player that is outdated. You can simply fix this by downloading the latest version of the software on their official site. After this, simply install the downloaded installer on your computer.
There might be a bit of enhancement to the latest version which is not included in the version currently installed on your Mac or Windows PC. An open-source software, VLC Media Player might be able to repair bugs and add brand new audio codecs for it to work properly. That’s why you need to make sure you have the latest version of the tool.
#3: Reset The Audio Preferences Of VLC Media Player
Have you already tinkered with the audio settings of the VLC media player? Maybe, you’re scared to change the settings again as you can make things worse. However, you can actually reset the audio preferences in order to fix the problem of “VLC No Sound.” Here’s how to do it step by step:
Step 01: Launch VLC Media Player.
Step 02: Press Tools-Preferences.
Step 03: Go to the Audio section or tab.
Step 04: Located at the bottom section, press “Reset Preferences.”
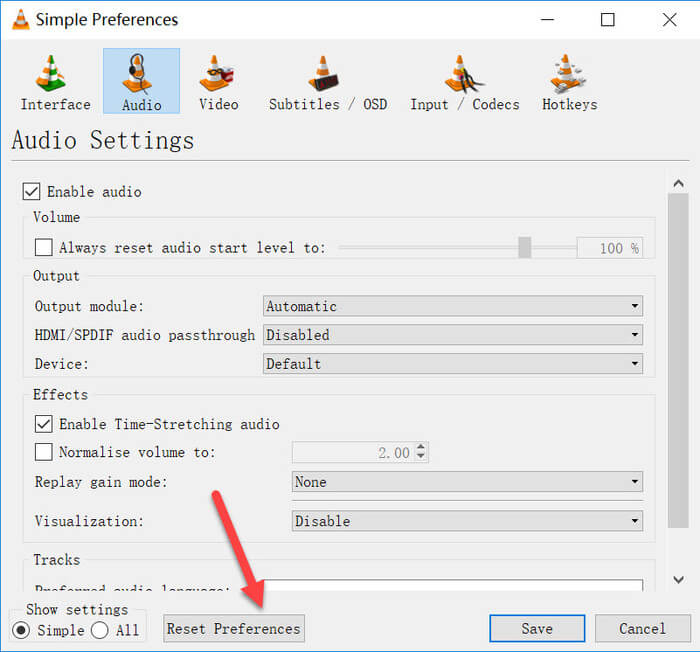
Step 05: Then, press Save.
#4: Adjust Audio Settings Within The Preferences Window
If the solutions above did not work, you can try to adjust the audio settings of the VLC Media Player within the Tools-Preferences window. To do this, you simply have to follow the steps below:
Step 01: Launch VLC and press Tools-Preferences.
Step 02: Within the interface for “Simple Preferences,” visit “Audio Settings.”
Step 03: Ensure that the box labeled “Enable Audio ” is really checked. After this, select “DirectX Audio Output ” located in the dropdown list for “Output.”
Step 04: If any of these settings didn’t work, you can select each option within the drop-down lists for Device and Output Module.
#5: Activate “Disable All Enhancements” Option
Visit your Windows computer’s Control Panel window. Press the option for Sound. After this, check the box that says “Disable All Enhancements.” Now, make sure that the problem “VLC No Sound” has been fixed. If it isn’t, then go to the solution below.
#6: Convert Your Video To Another File Format
The final solution involves converting the video to another file format. In this way, the problem might be fixed. For this, you have to utilize DumpMedia Video Converter, a robust platform that allows you to convert both audio and video files into another file format. This can be done on both Windows and Mac operating systems.
Here are the steps to use it:
Step 01: Download and install DumpMedia Video Converter on your Mac computer or Windows PC.
Step 02: Launch the application on your computer.
Step 03: Within the main interface, select Audio and Video Convert.
Step 04: Choose the video file where the problem for “VLC No Sound” persists.
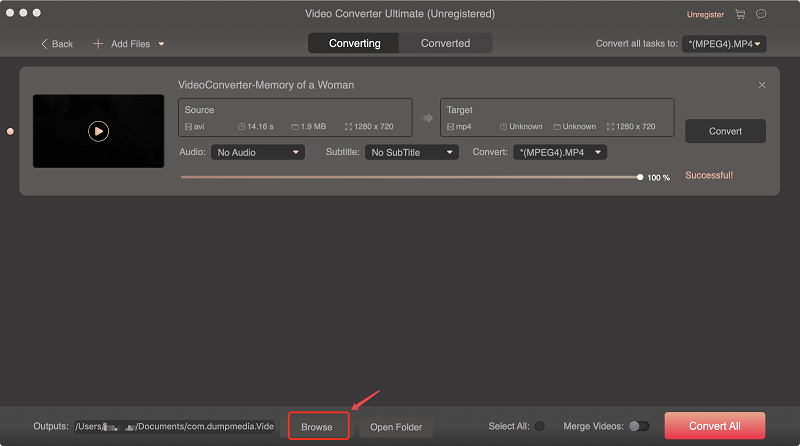
Step 05: Select the settings you wish. Make sure you convert it into another file format that is different from its current file type.
Step 06: Follow the prompts on the screen until you start the conversion process.
Step 07: Wait until the conversion process is complete. After this, you will now have the video in another format and you can watch while being able to hear sounds coming off of it.
DumpMedia Video Converter can also be used to download audio and video files from the Internet if you wish. For instance, you simply copy the link of a YouTube video and it will download the files easily. The program has a lot of capabilities and can help you with a lot of media problems you encounter. Plus, it can be used to enhance the quality of videos you convert if you want to.
Overall, DumpMedia Video Converter is a great tool for media enthusiasts. It can be used to solve the problem of “VLC No Sound” by converting the video from one format to another. In this way, you simply work around the issue and find a fix that is easy to do.
Part 2: To Wrap It All Up
VLC is a very popular media playback platform that is used all around the world. However, sometimes, users will find technical problems with the software. One problem we have tackled in this article is the issue of “VLC No Sound.”
In this article, we have delved into six different solutions when you can’t hear audio coming off of VLC Media Player. You can start from the simplest solution (the first one) and work your way up. In this way, you’ll find the root cause of the problem and fix it.
Have you encountered the problem of VLC not emitting sounds before? How did you fix this problem? If you want to help others, you can share it in the comments below.

30% Off >>>