


How to Use DumpMedia Playlist Transfer
Transfer playlists between Spotify, Apple Music, YouTube Music, Amazon Music, Deezer, Pandora, and more, all in one place. Follow the simple steps below to get started!
Contents Guide Part 1. Install and Register DumpMedia Any Music ConverterPart 2. How to Transfer Your Playlists and FavoritesFAQs (Frequently Asked Questions)
Part 1. Install and Register DumpMedia Any Music Converter
Step 1. Download and Install DumpMedia Any Music Converter
DumpMedia Any Music Converter is supported on Mac and Windows devices currently. You can download the installation package from its product page or simply by clicking the download button provided here.
Step 2. Launch DumpMedia Any Music Converter
After installation, open DumpMedia Any Music Converter on your computer. You will see a clean and intuitive interface designed to make conversion simple, even for first-time users.
Tip: Make sure you’re connected to the internet for the best experience.
Step 3. Register and Activate Any Music Converter
Launch DumpMedia Any Music Converter. Click the "login in" button or profile icon in the bottom left corner. Enter the email address and license key you used during your purchase. Click "Sign in" to complete the registration. After activation, you can download songs without any quantity limitations.
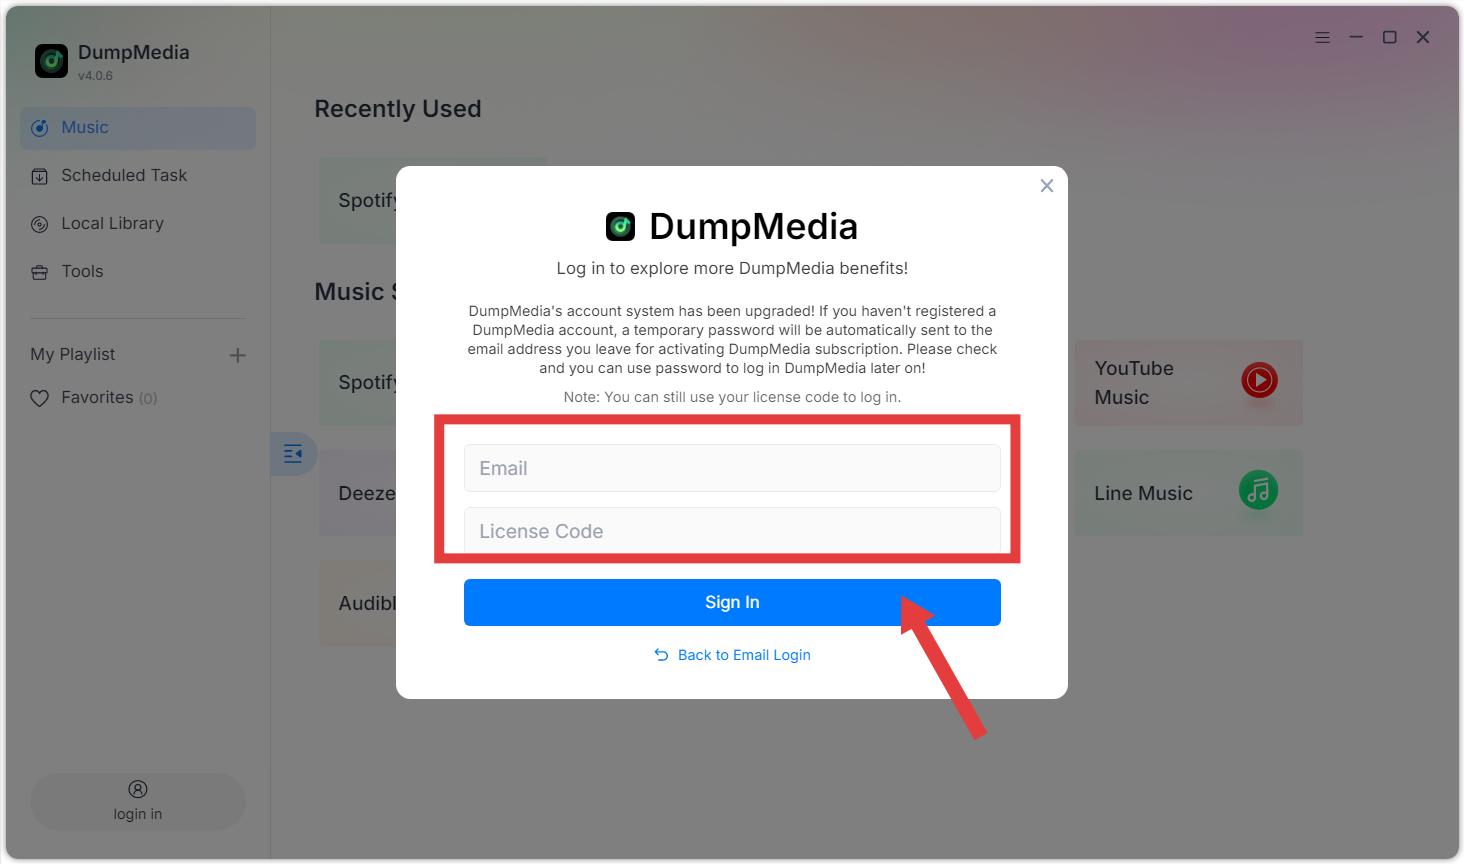
Tip: To buy the registration code, you can navigate to the DumpMedia Online Store. DumpMedia offers different subscription plans for you. You can also contact our customer service team for discounts.
Part 2. How to Transfer Your Playlists and Favorites
Step 1. Launch Any Music Converter and Choose Playlist Transfer
Open Any Music Converter. Choose Tools > Playlist Transfer.
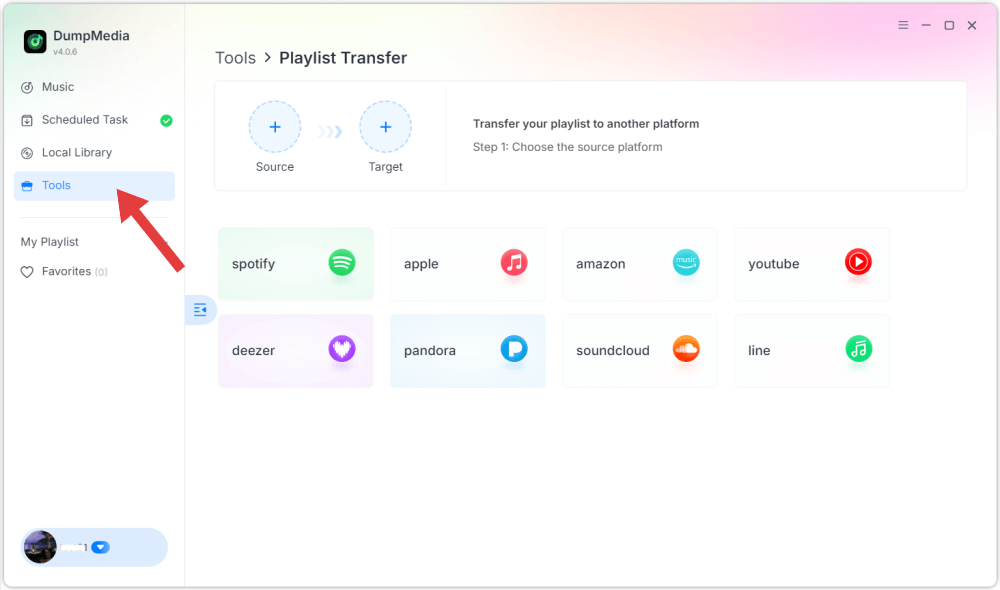
Step 2. Select the Source Music Service
Choose a music platform as a source.
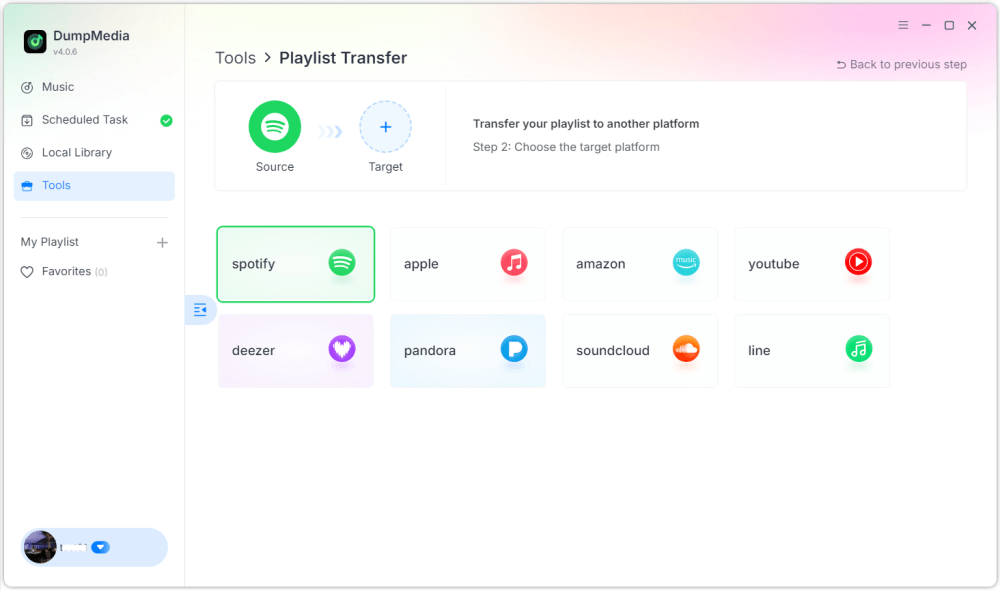
Step 3. Select A Destination
Select a music service as a platform where you want to move your playlist.
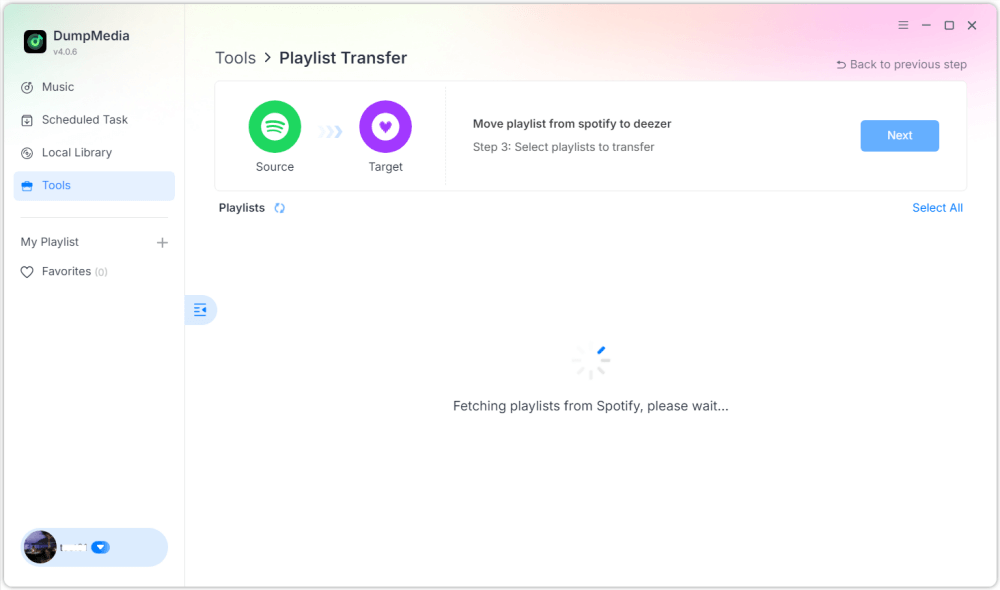
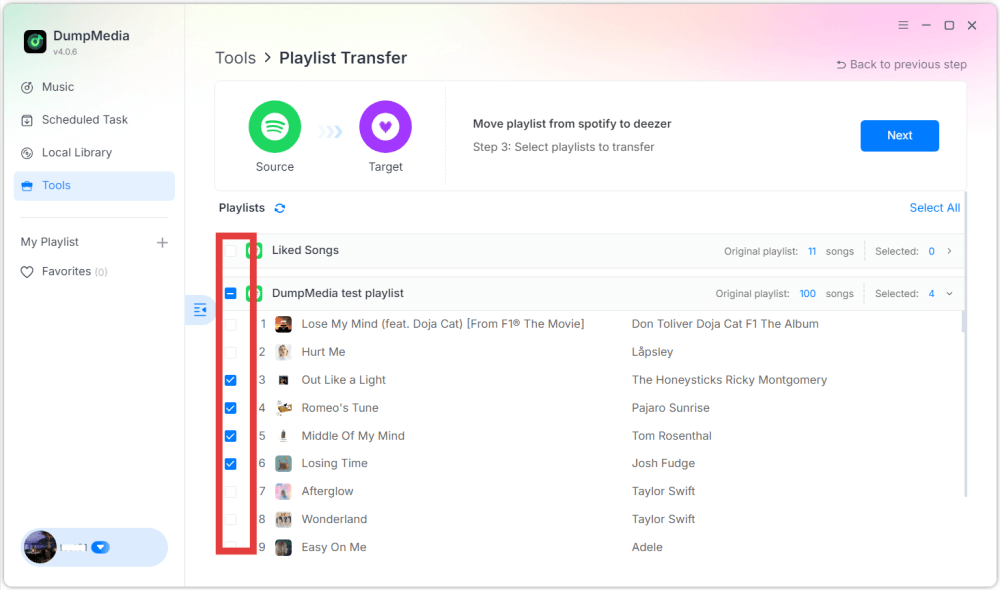
Step 4. Select Playlists for a Transfer
Find the playlists you want to transfer from A service to B and select all the playlists you want to move.
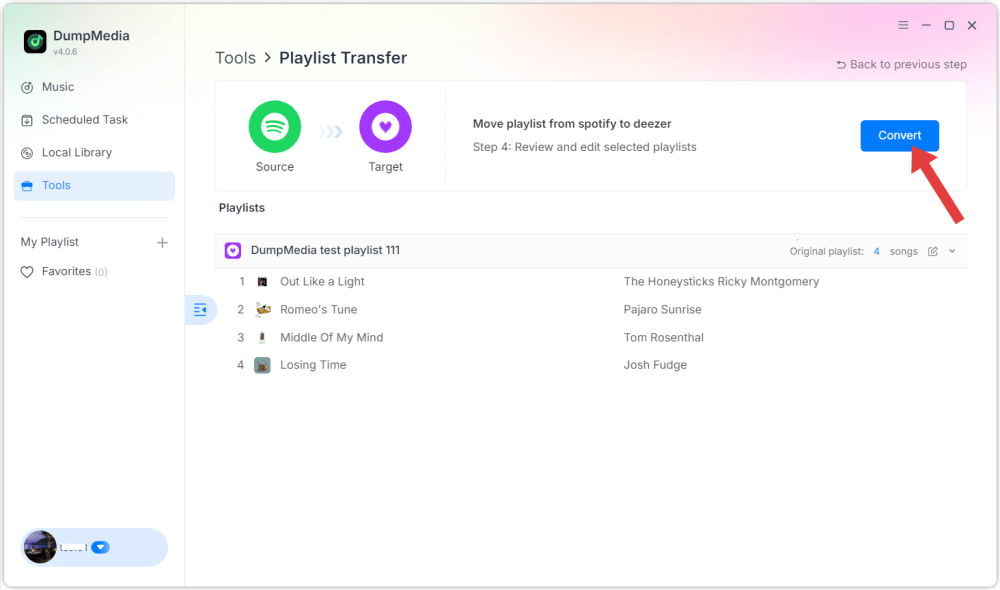
Step 5. Confirm Your Action
Click Convert to start the transfer.
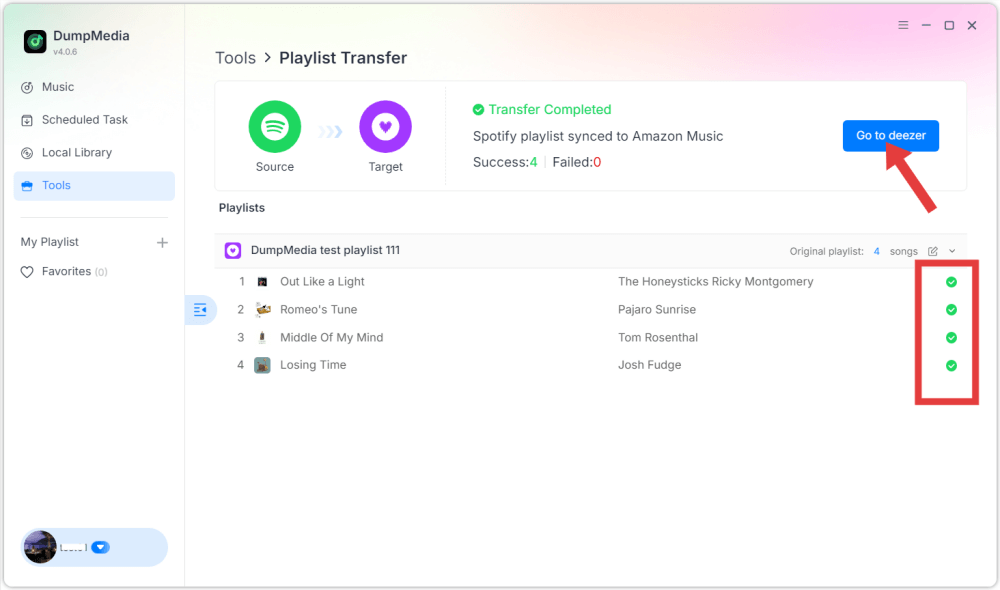
Step 6. Finished!
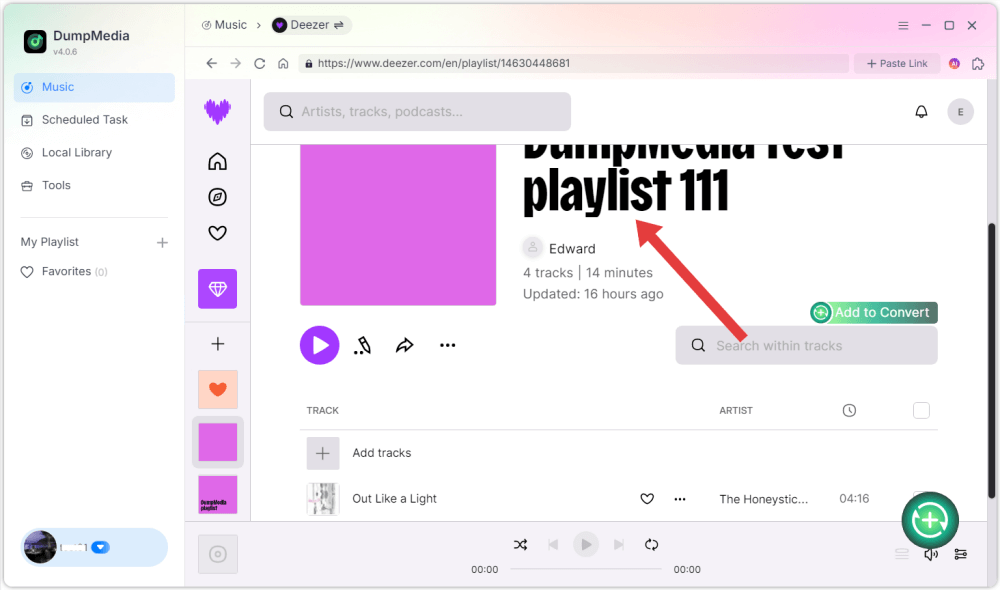
The transfer is finished. Click "Go to [Music Service]". Your playlists have been moved to a new service, and you can start enjoying your new music streaming service.
FAQs (Frequently Asked Questions)
1. Can I use DumpMedia Playlist Transfer for free?
Yes. If you’ve already subscribed to DumpMedia Any Music Converter, which is still active, you can use this feature for free with no limits. If you don’t have a subscription, you can still try it for free, but some features will be limited.
2. What's the limitation of the free trial version?
With the trial of this playlist converter, you can transfer only once, with a limit of 100 songs per playlist. To remove these limits, you can either purchase DumpMedia Any Music Converter.
3. How to activate DumpMedia Playlist Transfer?
Launch the software and log in to the account center with your license code and email address. After successfully logging in, select "Tool > Playlist Transfer" in the account center.
4. What platforms does DumpMedia support?
DumpMedia supports all major streaming services, including Spotify, Apple Music, YouTube Music, Amazon Music, Deezer, Line Music, SoundCloud, and Pandora.
5. Will all playlists transfer over perfectly?
Most of the time, yes. DumpMedia uses a smart matching system to find the same or similar songs across platforms. While rare, some tracks may be unavailable on your new service and won’t transfer.
6. How long does a playlist transfer take?
It depends on the size of your playlists and the speed of your internet connection, but most playlist transfers take just a few minutes.
7. Is DumpMedia Playlist Transfer safe?
DumpMedia adheres to the highest data protection standards while transferring your music library. We use industry-standard OAuth login, so your credentials are never stored or shared. Your data privacy is always our top priority.
8. Does DumpMedia remove my playlists and favorites from the source platform?
No! We are just copying your music to the new platform. We do not change or delete anything on the source platform.

30% Off >>>