


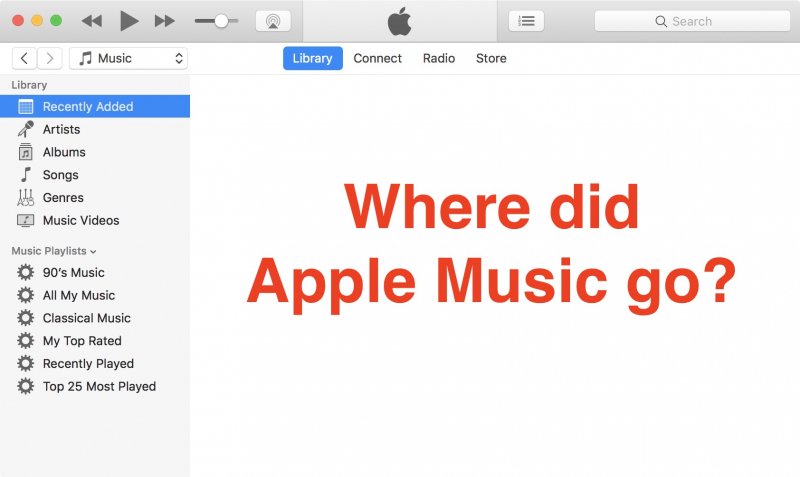
How to Fix Apple Music Not Showing Up in iTunes
Users who have signed up for Apple Music using their iPad or iPhone will sometimes encounter Apple Music not showing up in iTunes when they try to use their Mac to listen to their music.
If you are one of these users, then you’ll surely want to know how you can fix this. No worries because your problem may only be due to some bug or a box you left unchecked which can be easily fixed.
To make it easier for you, we will be showing you step-by-step solutions on how you can solve your problem so that you can keep enjoying listening to your favorite Apple Music songs.
But before that, let us have a quick discussion about the “Apple Music not showing up in iTunes” issue in the next section.
Contents Guide Part 1. A Quick Overview of Apple Music Not Showing Up in iTunes IssuePart 2. How to Fix Apple Music Not Showing Up in iTunes on Your MacPart 3. Fixing Apple Music Not Showing Up Problem Using an Apple Music ConverterPart 4. Wrapping It Up
Part 1. A Quick Overview of Apple Music Not Showing Up in iTunes Issue
As mentioned earlier, the issue of Apple Music not showing up in iTunes is typically experienced by users who have signed up for Apple Music using their iPad or iPhone.
In many cases, this problem is caused by specific boxes that you have not ticked in the Preferences menu of iTunes on your Mac.
Or, it may also be because of software glitches either on your Mac or in iTunes itself which prevents Apple Music from showing up in your iTunes.
Whichever the case may be, you can easily fix the problem by checking the necessary options in the Preferences menu of iTunes and logging in using the right Apple ID.
So, without any more delays, let us proceed to the solutions on how you can do this in the following section.
Part 2. How to Fix Apple Music Not Showing Up in iTunes on Your Mac
Solution 1. Make Sure You Are Logged into iTunes Using the Correct Apple ID
Below are the steps on how you can check if you are using the right Apple ID in iTunes.
- Launch iTunes on your Mac or Windows computer.
- On the Menu tab of iTunes, look for Account and then click on it.
- Check what Apple ID is signed in and make sure that it is the same as the one you used in Apple Music.
- If the signed in Apple ID in iTunes is different, log out from iTunes and then sign in again using the right Apple ID. Otherwise, if the Apple ID is the same, try logging out and then logging in back again. This method sometimes does the trick as some bugs can be fixed during the process.
- Check again if your missing Apple Music songs are now displayed in iTunes. If not, proceed to the next solution.

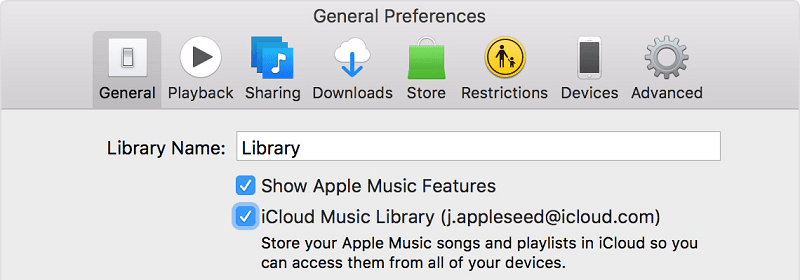
Solution 2. Make Sure That The iCloud Music Library Checkbox is Ticked
Follow the steps below to check if iCloud Music Library is ticked in iTunes Preferences Menu.
- Open the iTunes app.
- Click iTunes from the Menu tab and choose Preferences.
- Once on the Preferences window, click on the General
- Under the Library Name textbox, there is a checkbox for the iCloud Music Library. Make sure that this checkbox is ticked. Otherwise, all of your Apple Music songs will not appear on iTunes. But, if it is already ticked, untick it and click OK to save your changes.
- After that, click the iTunes tab again, navigate to Preferences, and then recheck the iCloud Music Library checkbox.
Solution 3. Make Sure that Show Apple Music Features is Checked
Follow the steps below to fix Apple Music not showing up in iTunes by ticking Show Apple Music Features.
- Launch the iTunes app through your Dock in your Mac.
- Click iTunes from the app’s Menu Bar.
- Choose Preferences from the drop-down list.
- Once you are in the Preferences window, navigate to the General tab if you are not directed there automatically.
- Under the Library Name text box, you will find a Show Apple Music Features If this option is not checked, tick it. Otherwise, if it is already ticked, untick it and click on the OK button to save your changes.
- Click the iTunes tab again, navigate to Preferences, and then recheck the Show Apple Music Features checkbox.
The process of unchecking and checking the iCloud Music Library and Show Apple Music Features checkboxes helps in solving software glitches that are preventing Apple Music from appearing in iTunes.
Part 3. Fixing Apple Music Not Showing Up Problem Using an Apple Music Converter
If you are tired of dealing with several complications in iTunes, there is a better alternative for you to keep enjoying your favorite Apple Music songs without the need to sync your data on different devices. This is by using an Apple Music Converter so you can listen to your songs offline on various devices without any hassle instead.
We recommend using DumpMedia Apple Music Converter for downloading and converting any Apple M4P songs, albums, and playlists to MP3, AC3, M4A, M4R, FLAC, MKA, AU, AC3 and more for enhancing your listening experience.
Since you can’t listen to Apple music on your other devices because they are protected by DRM, this tool helps in removing the DRM protection of various Apple songs such as the following so that you can play your favorite songs anywhere:
- Apple Music tracks
- Purchased M4P songs in iTunes
- iTunes M4B audiobooks
- Audible AA/AAX audiobooks
Moreover, DumpMedia Apple Music Converter is a powerful Apple Music Converter with up to 16x conversion speed and retains the original quality of your songs, 100%.
Features of DumpMedia Apple Music Converter
- Conversion of thousands of audiobooks and songs from the iTunes music library.
- It allows you to listen to Apple Music tracks on various devices offline.
- It helps you keep all of your Apple Music songs playable even after canceling your subscription.
- Retains ID tags of the original songs.
- Supports customization of the output song.
Now, onto the step-by-step guide on how to use DumpMedia Apple Music Converter.
- Download, install then register the app.
- Open the software.
- Select the files you want to convert.
- Choose your desired output format & destination folder.
- Start the conversion process.
Below are the detailed steps of the process.
Step 1. Download, Install then Register the App
Of course, you need to download the app first before you can use it. Whether you want to try the software first or purchase it, you can find the links here. Then install the app and proceed to the registration page to activate it. You should have received an Activation Code which you need to type in the registration window.
Step 2. Open the Software
Once activated, launch the software. After this, all of your downloaded iTunes music, Apple music, podcast files, and videos will be automatically uploaded to the Converter. Thus, you have to ensure that you have already downloaded your desired songs to your computer. If you want to check your upload files, you can find it in the app’s Playlists section.
Step 3. Select the Files You Want to Convert
You will find the video or audio types of your uploaded files on the app interface’s left portion. If you want, you can select one category first. This allows you to see your desired files on the app’s right column. Choose your files by checking the box in front.
Or, you can also search your desired songs directly on the app’s search box found on the upper portion before ticking them.

Step 4. Choose Your Desired Output Format & Destination Folder
Next, proceed to the app’s Output Settings then select your desired output format on the drop-down list. The default parameters are already set for you but you can also customize them yourself including the output file’s Channels, Sample Rate, Bit Rate, and Codec.
Tip:
If you are converting audiobooks, you will be provided the following formats: AIFF, M4R, MKA, AU, AC3, FLAC, M4A, MP3.
After you are satisfied with your settings, select a destination folder for your converted files.
Step 5. Start the Conversion Process
Click the Convert button to start the conversion process. Wait for the conversion to finish. The length of the conversion will depend on the number of songs you converted.

Part 4. Wrapping It Up
Just like any other apps, problems in the iTunes app cannot be avoided which can influence your Apple Music listening experience. Luckily, there are simple solutions you can use to fix these issues including the Apple Music not showing up in iTunes problem. Hopefully, the solutions we have listed in this blog were able to help you fix your problem.
Also, we recommend using DumpMedia Apple Music Converter for converting your favorite Apple Music songs and playlists so that you can listen to them offline instead of dealing with annoying Apple Music issues. This is an excellent music converter for DRM-protected Apple songs. Feel free to try this software anytime.

30% Off >>>