


Comment créer une playlist collaborative sur Spotify en 2026.
Do you want to share your selection of Spotify songs to your friends and collaborate together to create an ultimate Spotify playlist that you will be using for an occasion or event? No worries as in this modern era, you can now easily create and share a collaborative playlist on Spotify. Once you share this playlist with other people, you can start to manage it together with them.
But how do you create a collaborative Spotify playlist? This article discusses how you can do this whether on your computer, iOS, or Android devices. So keep on reading to know more! But first, let us discuss what a Spotify collaborative playlist is, the things you can do with it, and what you should be aware of in the next section.
Guide des matièresPart 1. What Is A Spotify Collaborative Playlist?Part 2. How to Create A Collaborative Playlist on SpotifyPart 3. How to Share Your Spotify Songs Without Spotify Application Partie 4. En conclusion
Part 1. What Is A Spotify Collaborative Playlist?
Spotify’s feature for playlist collaboration provides multiple users the ability to add tracks of their own choices to a single Spotify playlist. These collaborative playlist on Spotify in 2008 which instantly became popular with users. Recently, the collaboration feature even improved wherein users can view who added what song and when.
A collaborative playlist is similar to Wikipedia wherein anyone can virtually edit the contents in the encyclopedia. All you need to do is share the link of your collaborative playlist with your friends and depend on their wisdom to make sure that the decent quality of your playlist is maintained and is on topic.
Collaborative playlists also make it fun and easier to share and coordinate with your circle of friends regarding the best tracks that each of you thinks would be worth listening to.
Below are the things you are allowed and not allowed to do with your collaborative playlist.
- You, along with your collaborators, can delete or add tracks any time to the playlist by dragging tracks into it or by hitting Supprimer to erase a track. All of the changes will be visible on every collaborator’s copy of your playlist.
- You have the capability of turning the collaboration off if you are the owner of the collaborative Spotify playlist in case things get out of your hands.
- When a collaborator adds a track that is off from the theme of the playlist, the collaborator will be accountable since his/her username will be displayed on the playlist.
- At the current moment, you are not given the chance to restrict who can access your collaborative playlist. However, Spotify has created a means to prevent random strangers from accessing your playlist - Spotify does not allow you to publish a collaborative playlist on your profile.
- You will have control over who can access the web address of your playlist so you should be the one responsible to determine if you can trust your friends to keep your playlist’s address within your circle and not post it on public sites.
NOTE:
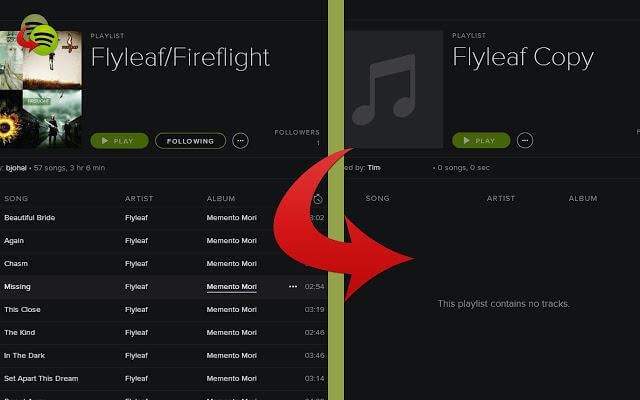
If in case your playlist’s web address gets out to the public, anyone with the link can edit your playlist. Someone can even delete all of your tracks saved on it. So the safest solution is to back up the content of your collaborative Spotify playlist. Just make a private copy of your playlist and then you are safe.
Tips : Maybe you want to share your Spotify playlist with your friends. But, the question is, how to add friends on Spotify? Read the post to get a detailed guide.
Part 2. How to Create A Collaborative Playlist on Spotify
Creating a Spotify collaborative playlist is an easy and straightforward task. The whole process only takes approximately 10 seconds, regardless if you are using a desktop computer or a mobile device.
But do note that the steps for each device slightly differ because, in computers, there are fewer clicks needed compared to mobile devices.
Also, for computers, users can use either a Spotify Gratuit ou Spotify Premium account. But for mobile devices, you would need a abonnement premium. So below are the steps you need to do when creating and sharing a collaborative playlist on your computer, iOS, and Android devices.
#1: Creating A Collaborative Playlist on Computer
To create a collaborative playlist on your Windows or Mac computer, follow the steps below.
Step 1. Choose An Existing Spotify Liste de lecture
Choose an existing Spotify playlist that you would like to share or create a new one on your computer.
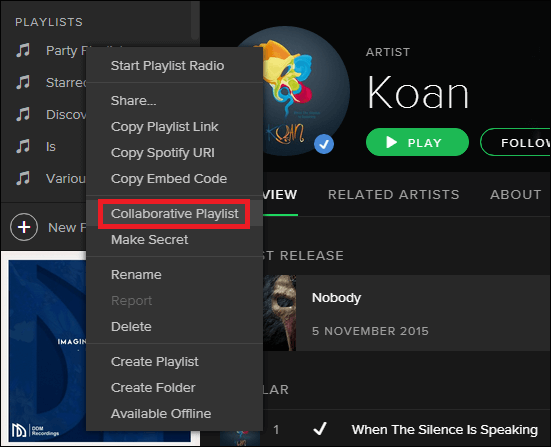
Step 2. Click on Collaborative Playlist
Right-click on your chosen playlist and click on the Collaborative Playlist when a pop-up menu appears. An icon will be added to your playlist.
Step 3. Right Click on Your Chosen Playlist to Share
Right-click on your chosen playlist again (the one you turned into a collaborative playlist in the previous step) and choose Share. Spotify gives you the option of whether you want to share it on Skype, Twitter, Facebook, and others.
Note that anyone who you gave your collaborative playlist’s link can edit, delete, or rearrange the tracks in the playlist.
#2: Creating A Collaborative Playlist on iOS Devices
Étape 1 : Lancez l' Spotify application on your device.
Étape 2 : Log in using your account for Spotify Premium
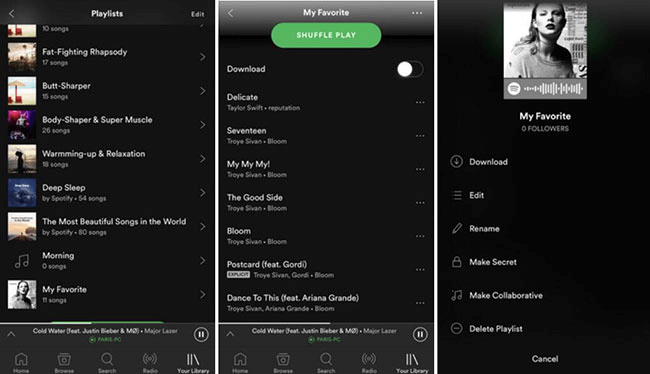
Étape 3 : Cliquez à nouveau Votre bibliothèque and choose a playlist you would want to share with your friends.
Étape 4 : Tap on the horizontal dots located at the application interface’s top-right corner.
Étape 5 : Choisir Make Collaborative.
Étape 6 : To share your a collaborative playlist, tap on the horizontal dots again then choose Share.
#3: Creating A Collaborative Playlist on Android Devices
For Android users, the same steps are used above. The main difference is how the application looks like on the device. So no need to illustrate the steps again. Explore the app yourself if you are still confused about the steps and for sure you will be able to solve it on your own.
Part 3. How to Share Your Spotify Songs Without Spotify Application
Nous vous recommandons d'utiliser DumpMedia Spotify Music Converter pour télécharger et convertir tout Spotify de la musique, des listes de lecture ou des albums à MP3, M4A, WAV et FLAC.
Cet outil peut conserver la qualité d'origine de votre Spotify des dossiers. C'est un puissant et rapide Spotify convertisseur qui vous permet de profiter de votre Spotify musique sans abonnement premium. Ainsi, vous donner gratuite Spotify pour une écoute hors ligne!
Caractéristiques DumpMedia Spotify Music Converter
- Facile Enlèvement de Spotify DRM
- Téléchargement rapide et conversion de Spotify Chansons
- Prise en charge de la lecture hors ligne gratuite de Spotify Musique sur divers appareils
- Préservation des métadonnées Indo et ID3 Tags
- Disponible en trois langues et comptage.
- Permet la personnalisation de la qualité du fichier audio de sortie selon vos besoins.
Maintenant, pour convertir vos fichiers multimédia aux formats souhaités, suivez les étapes ci-dessous:
Etape 1: Téléchargez le DumpMedia .
Étape 2: Lancez le DumpMedia .
Étape 3 : Ajoutez votre Spotify chanson à l'application.
Étape 4: Choisissez le format de sortie et le dossier de destination souhaités.
Étape 5: démarrez le processus de conversion.
Vous trouverez ci-dessous les étapes plus détaillées pour convertir vos fichiers vidéo au format souhaité en utilisant DumpMedia.
Téléchargement gratuit Téléchargement gratuit
Téléchargez le DumpMedia Demande de leasing
Avant de pouvoir commencer à utiliser l'application, vous devez bien sûr d'abord télécharger le logiciel. La bonne nouvelle est, DumpMedia possède de version Mac gratuite pour que vous essayiez le logiciel avant de décider s'il s'agit du bon outil pour vous ou non, mais nous vous assurons que vous ne serez pas déçu de ses fonctionnalités.
Lancez l' DumpMedia Demande de leasing
Après avoir téléchargé le DumpMedia installateur, lancez l'application en suivant les étapes ci-dessous pour WinSystèmes d'exploitation Dows et MacOS.
Pour WinUtilisateurs de Dows :
Rendez-vous dans la section Rechercher icône (loupe) à côté du Winicône dows dans la barre des tâches de votre ordinateur. Tapez DumpMedia sur le champ de texte. Clique sur le DumpMedia application sur les résultats de la recherche.
Pour les utilisateurs de MacOS:
Cliquez sur le Launchpad icône dans votre ordinateur Dock. L'icône du tableau de bord est un cercle gris avec une fusée gris foncé au centre. Type DumpMedia sur le Rechercher barre au sommet Frappez le Retour sur votre clavier pour lancer l'application.
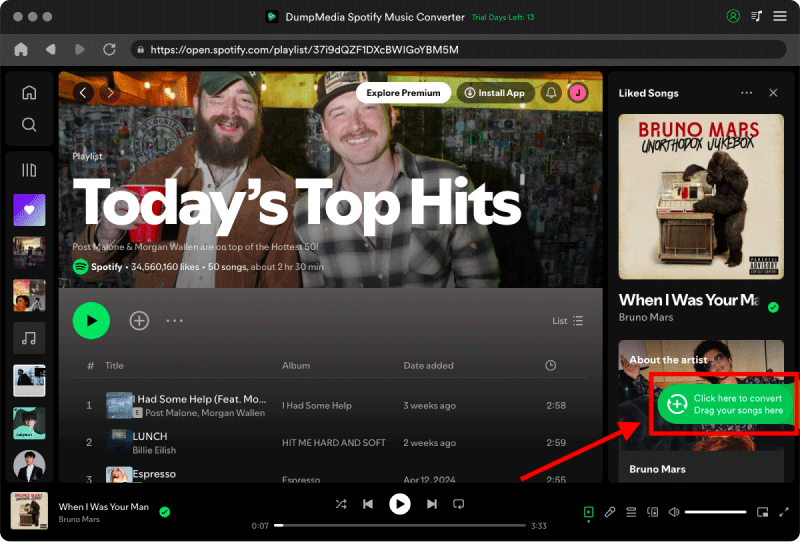
Ajoutez votre Spotify Chanson à l'application
Ajoutez l'URI de votre Spotify chanson/playlist/album sur la barre de recherche ou vous pouvez faire glisser et déposer vos fichiers dans l'application.
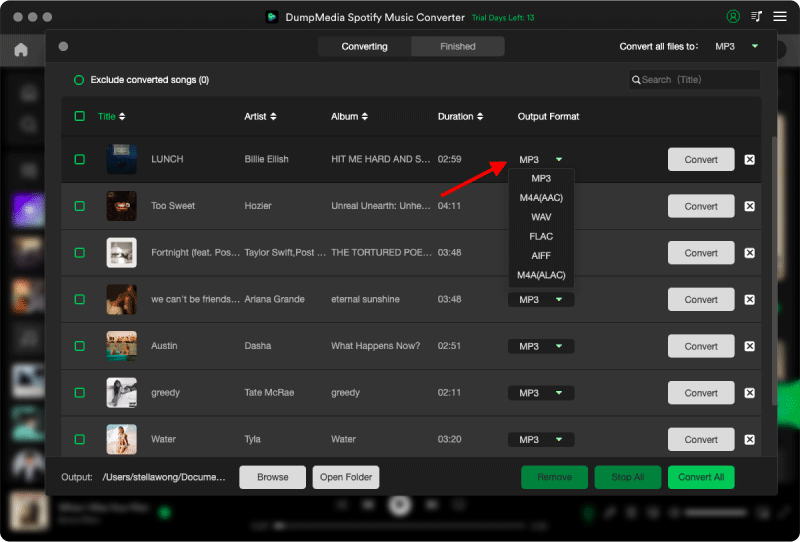
Choisissez le format de sortie souhaité et le dossier de destination
Recherchez le Convertir toutes les tâches en texte dans le coin supérieur droit de l’interface. Sélectionnez le format de sortie souhaité (FLAC, WAV, M4A ou MP3). Au bas de l'interface, cliquez sur le Explorer et parcourez votre ordinateur jusqu'au dossier de destination souhaité des fichiers convertis.
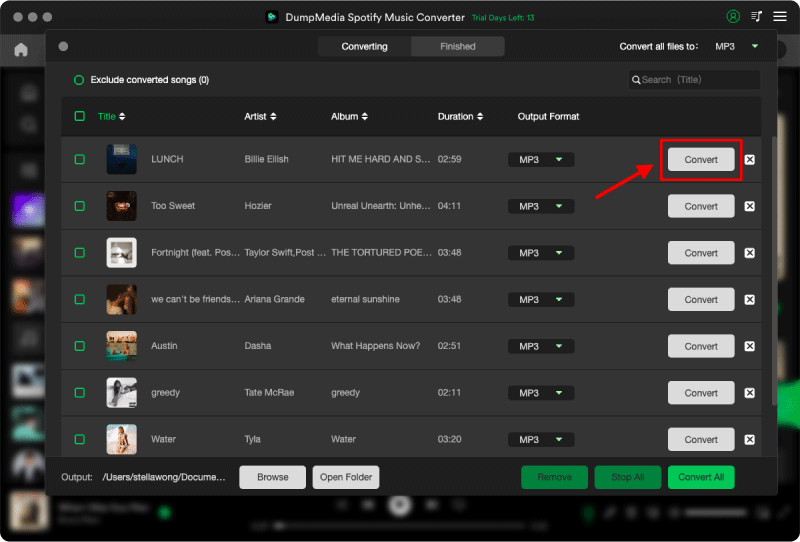
Démarrer le processus de conversion
Cliquez sur Convertir pour démarrer la conversion de votre fichier vidéo. Attendez la fin de la conversion.
Partie 4. En conclusion
To wrap up our discussion, below are the key topics we tackled in this article:
- Definition of collaborative playlist on Spotify.
- The things you can do and you should be aware of when managing a Spotify collaborative playlist.
- How to create and share a collaborative Spotify playlist on your computer, iOS, and Android devices.
- How you can share your Spotify tracks to other users for creating an offline collaborative playlist without a Spotify app.
Hopefully, you were able to find what you were looking for in this article.

30% de réduction >>>